Flows Editor
Build and manage chatbot flows
Overview
The Flows Editor is where you build and manage your chatbot flows. From this screen, you can also:
- Test and publish your chatbots
- Revert to previous flow versions
- Import and export flow configurations
- Monitor usage statistics and performance for your flows
- View flow logs
Getting There
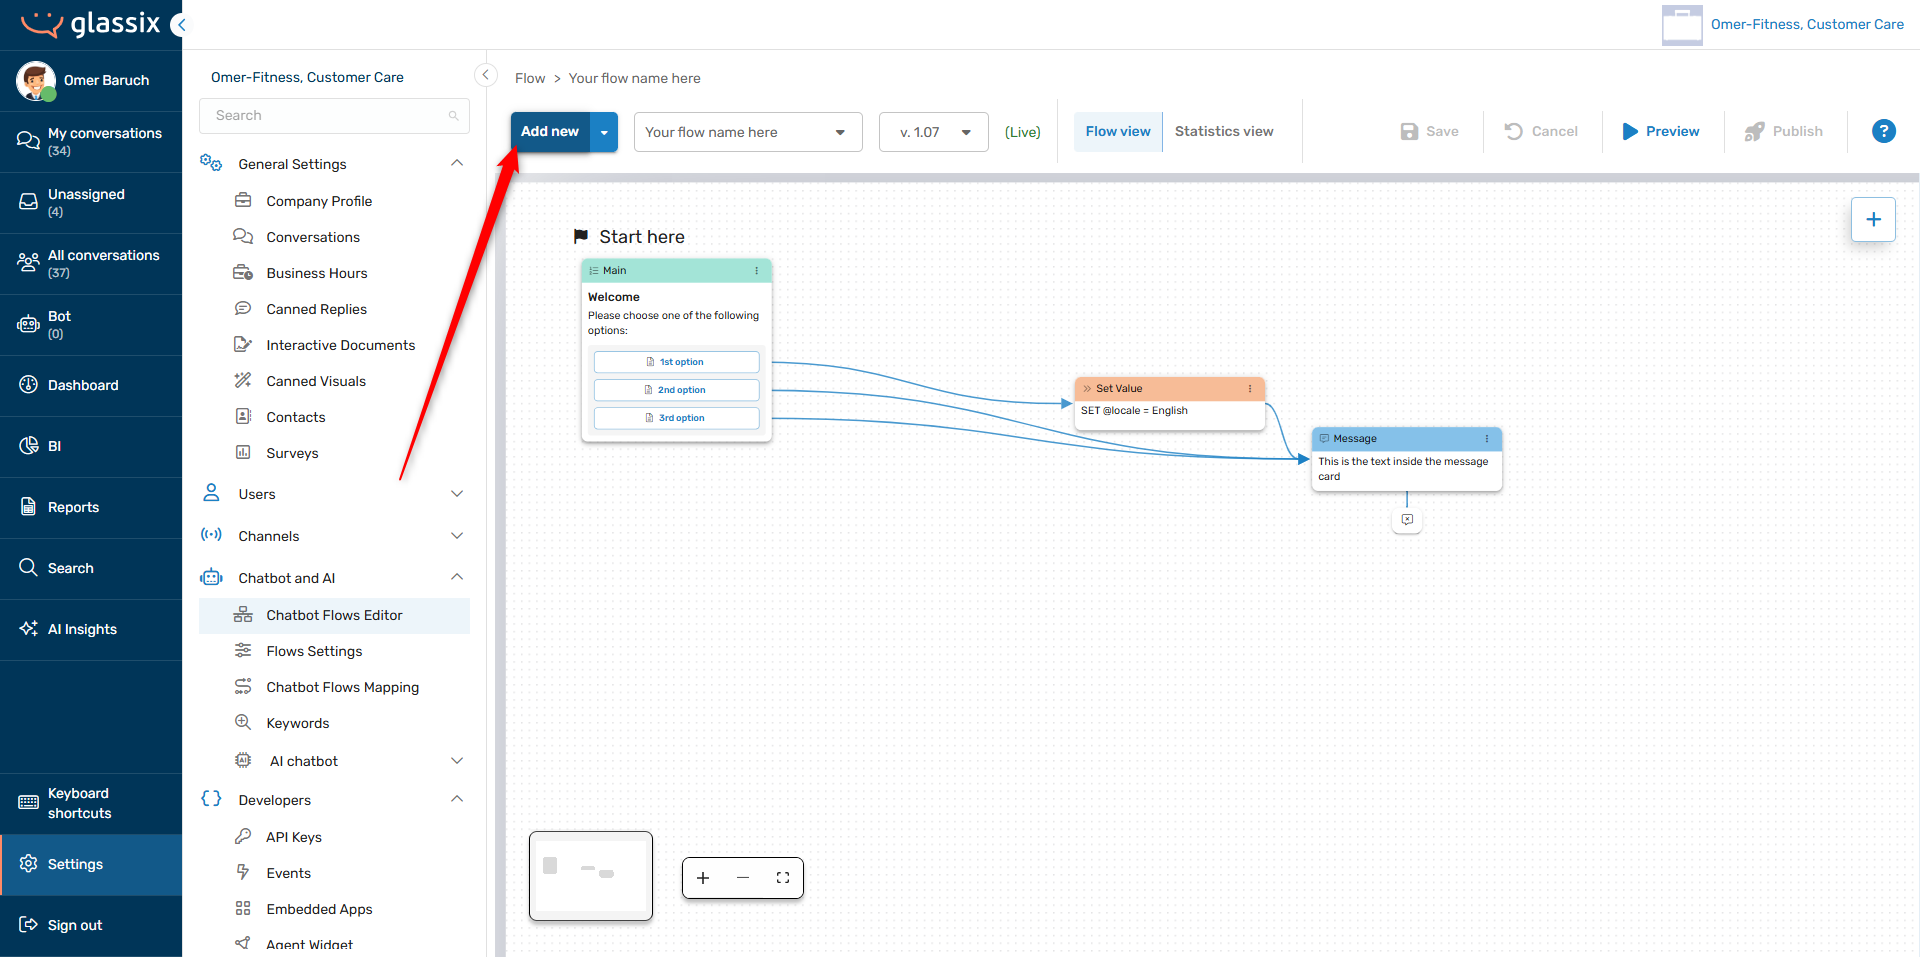
To access your Flows Editor, click here or:
- Go to Settings.
Click on the symbol in the agent dashboard.
- Click Chatbot and AI → Chatbot Flows Editor
Create a New Flow
The process for creating a flow is different depending on whether this is the first flow you've ever created.
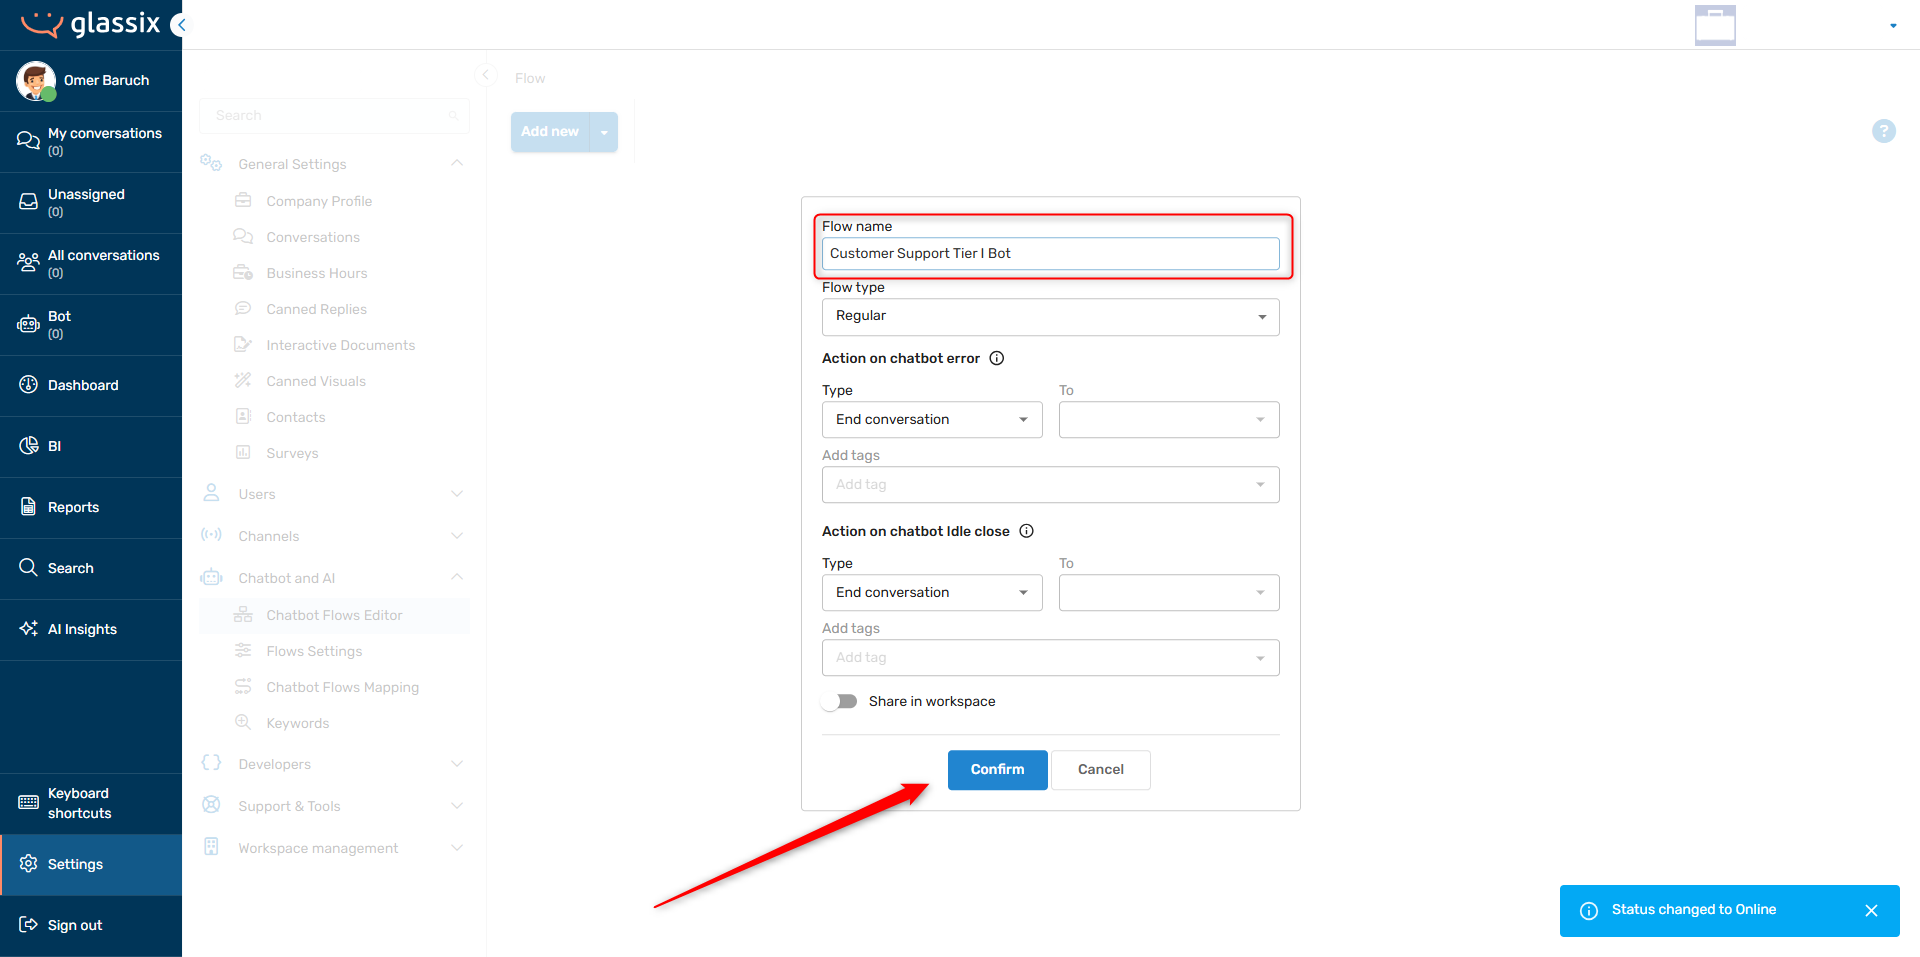
If this is your first flow, the New Flow dialogue will come up automatically when you navigate to the Flows Editor. Simply give your flow a name in the Flow name text box (this is the only required field) and choose Confirm to save your first flow:
If you already have at least one flow created, click on the Add flow button to create another one. As before, you only have to give your flow a name in the Flow name text box in order to save your new flow:
Flow Properties
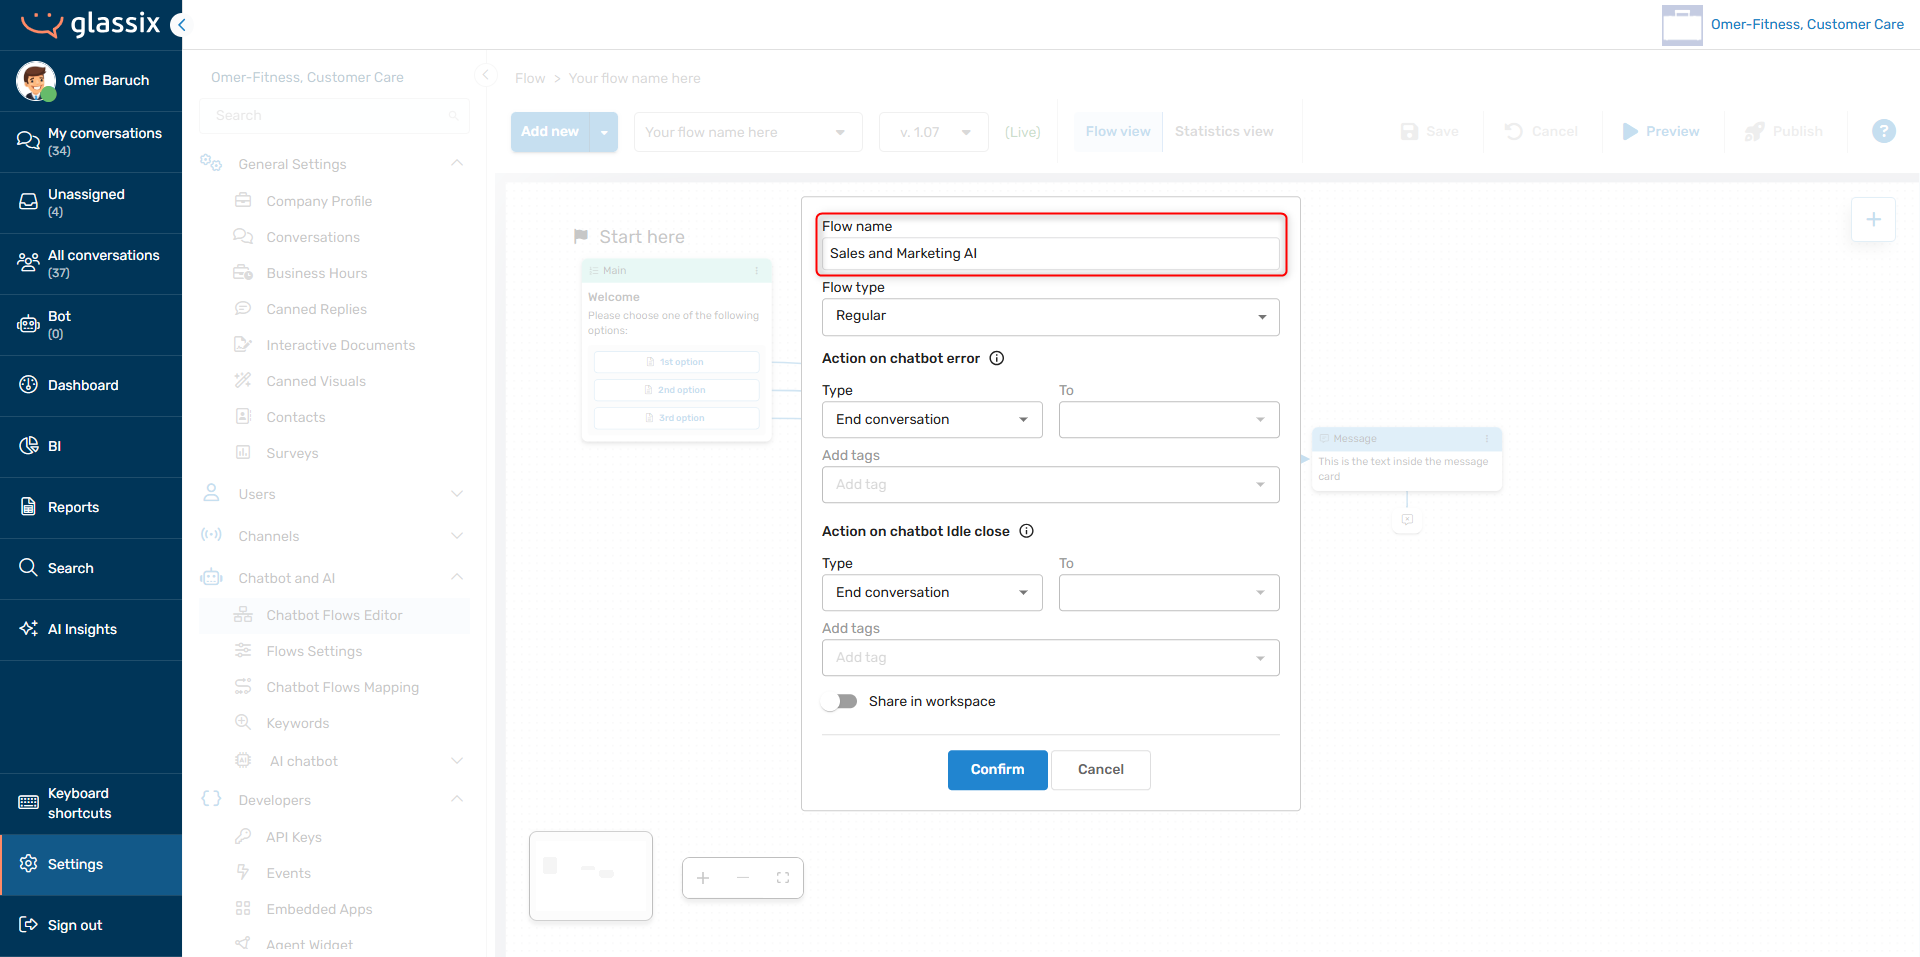
When you create a new flow, you'll see a number of configuration options in addition to the Flow name field:
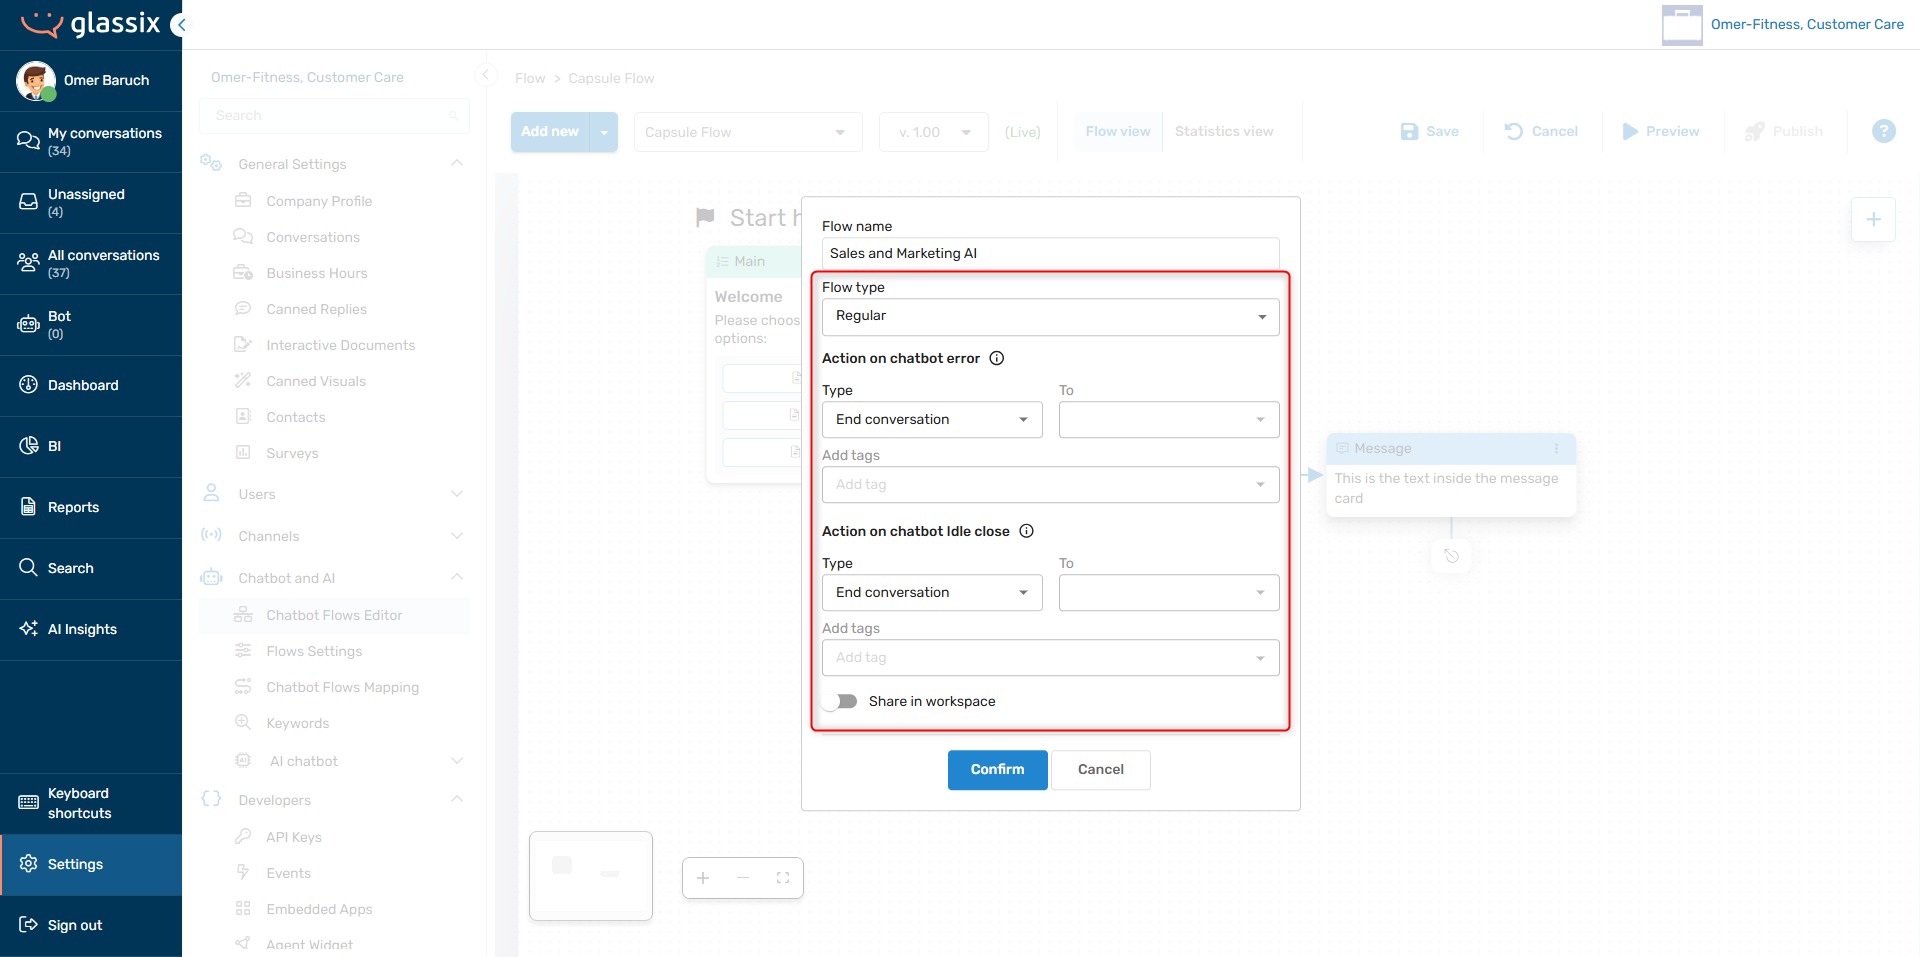
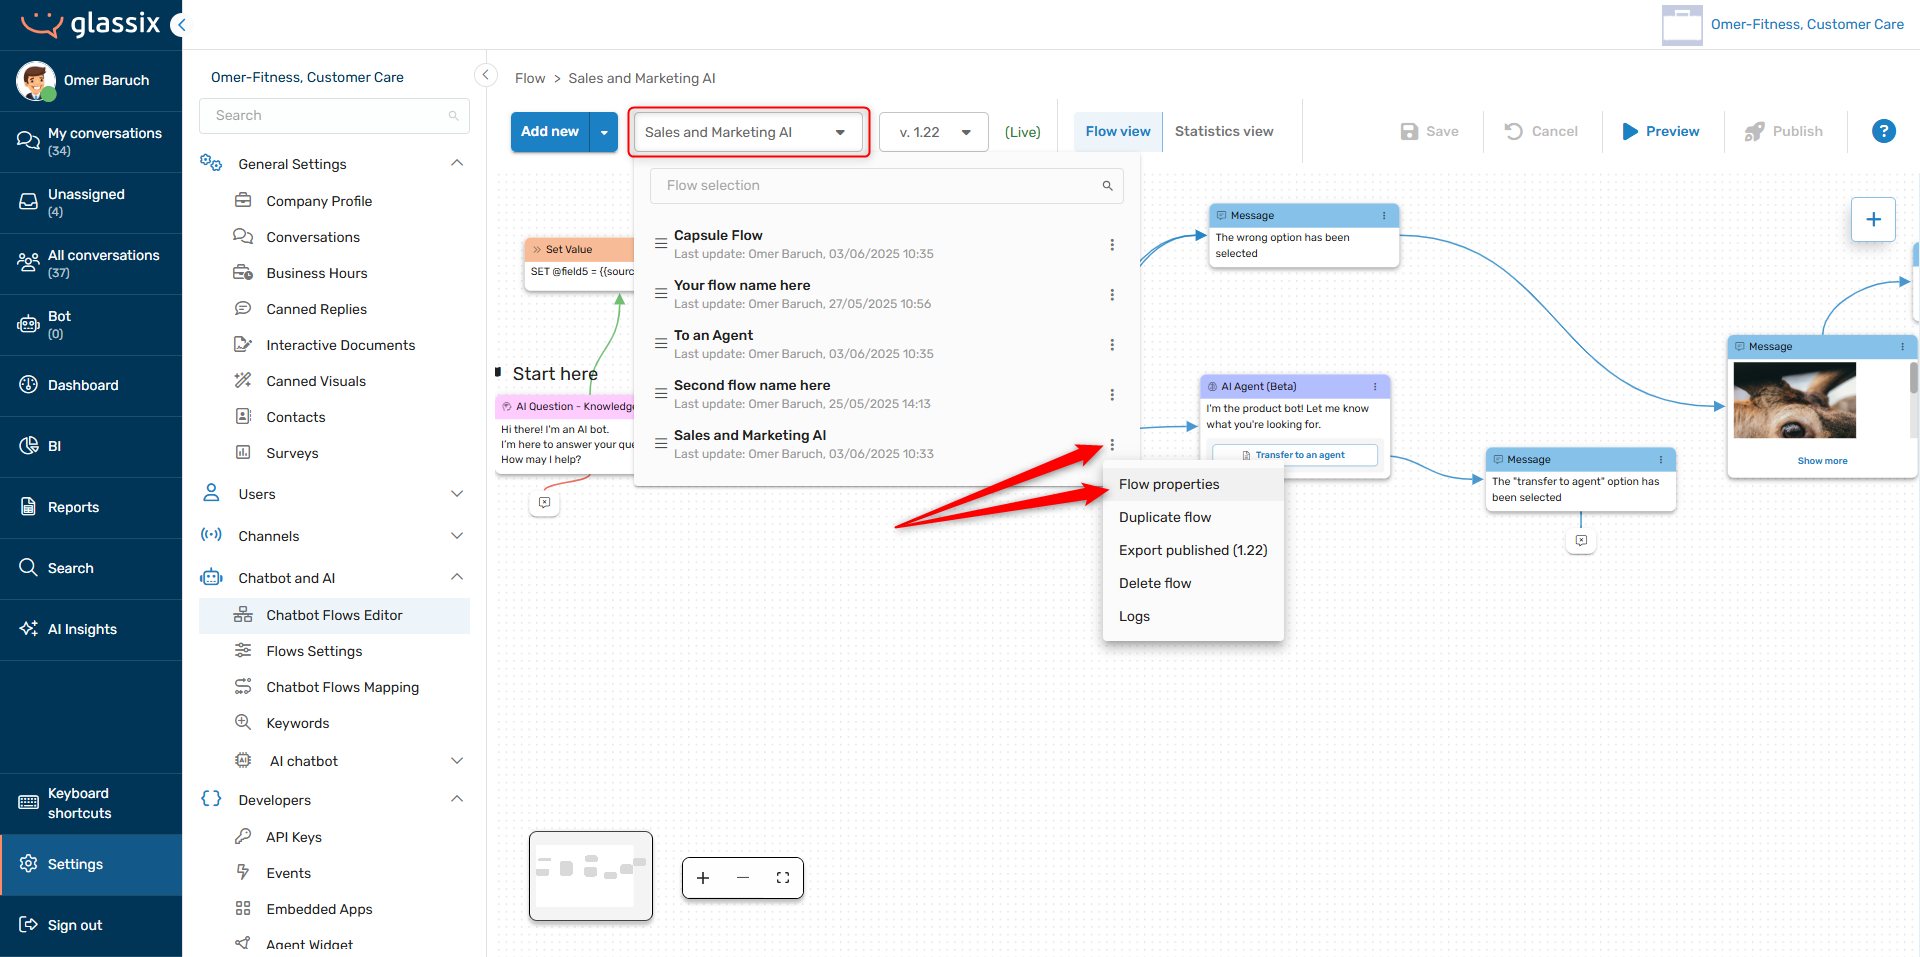
These options can also be accessed for existing flows by clicking on the flow selection dropdown → the three-dot menu → Flow properties:
NoteMost options are not available for capsule flows.
Flow Type
The flow type determines a flow's overall behavior and available actions. There are two flow types available:
- Regular - this is a normal chatbot flow. It can be mapped to your channels and made available to your agents as an in-conversation assistant.
- Capsule - this type of flow must be started from a regular flow, and may be configured to redirect back to the flow it was started from. A single capsule flow can be used across multiple regular flows.
TipCapsule flows are useful when you have one flow which you want to run in multiple chatbots, but don't want to build again each time.
For example, you might have different chatbots to handle support, customer success and sales, but you always want to collect Know Your Customer (KYC) data. You can create a single capsule flow for collecting KYC and run it in each of your three chatbots just after the intro message.
Action on Chatbot Error
This allows you to decide what happens if the chatbot runs into an error while this flow is running. This overrides the global setting but works the same way, see the article for the global setting for more information.
Action on Chatbot Idle Close
This allows you to decide what happens if a customer stops responding while this flow is running. This overrides the global setting but works the same way, see the article for the global setting for more information.
Share in Workspace
Info:This option is currently only functional for capsule flows.
If you have multiple departments in your workspace, the Share in workspace switch allows you to make this flow available for use to all other departments in your workspace.
This option allows anyone with access to the Flows Editor in any of your departments to redirect to this flow.
Note:If you want a flow in another department, but not in all departments, consider exporting and importing the flow instead.
Duplicate a Flow
In addition to creating a new flow from scratch, you may also duplicate one of your existing flows. This allows you to create a new flow with the same steps and settings as an existing flow.
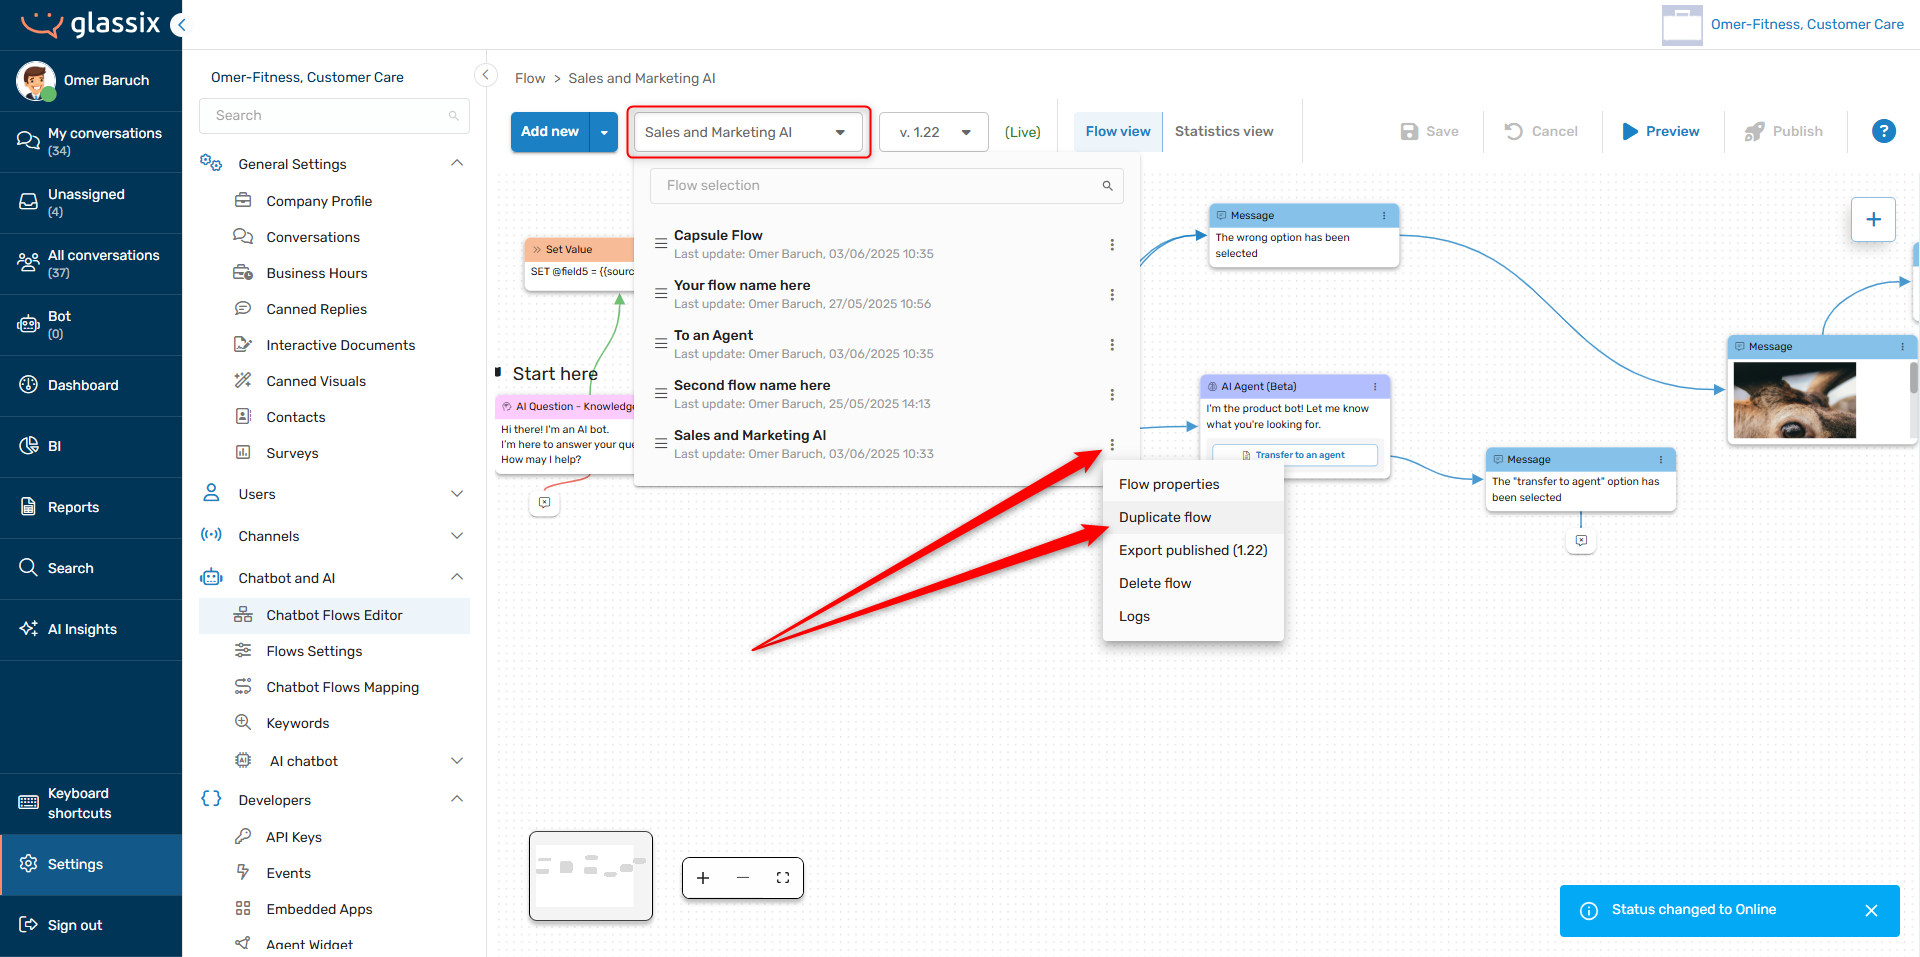
To duplicate a flow, click on the flow selection dropdown → the three-dot menu → Duplicate flow:
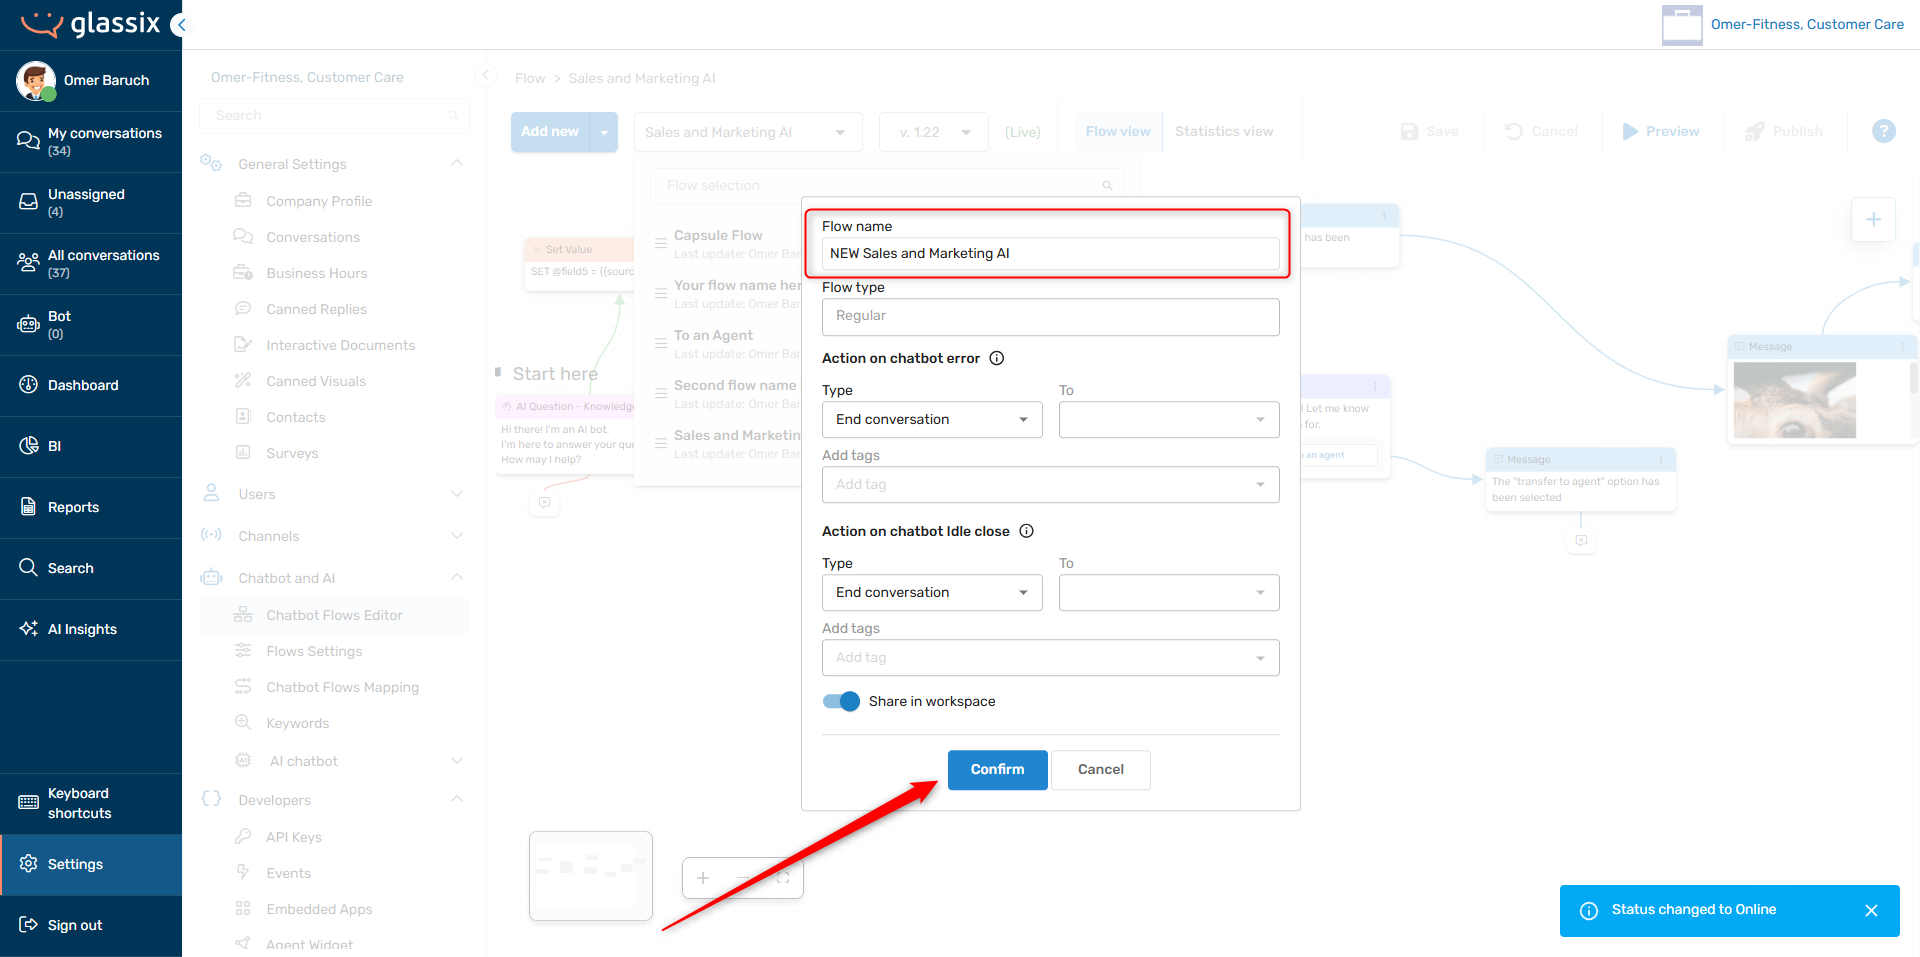
Choose a new flow name for your duplicate and then click Confirm to save your flow:
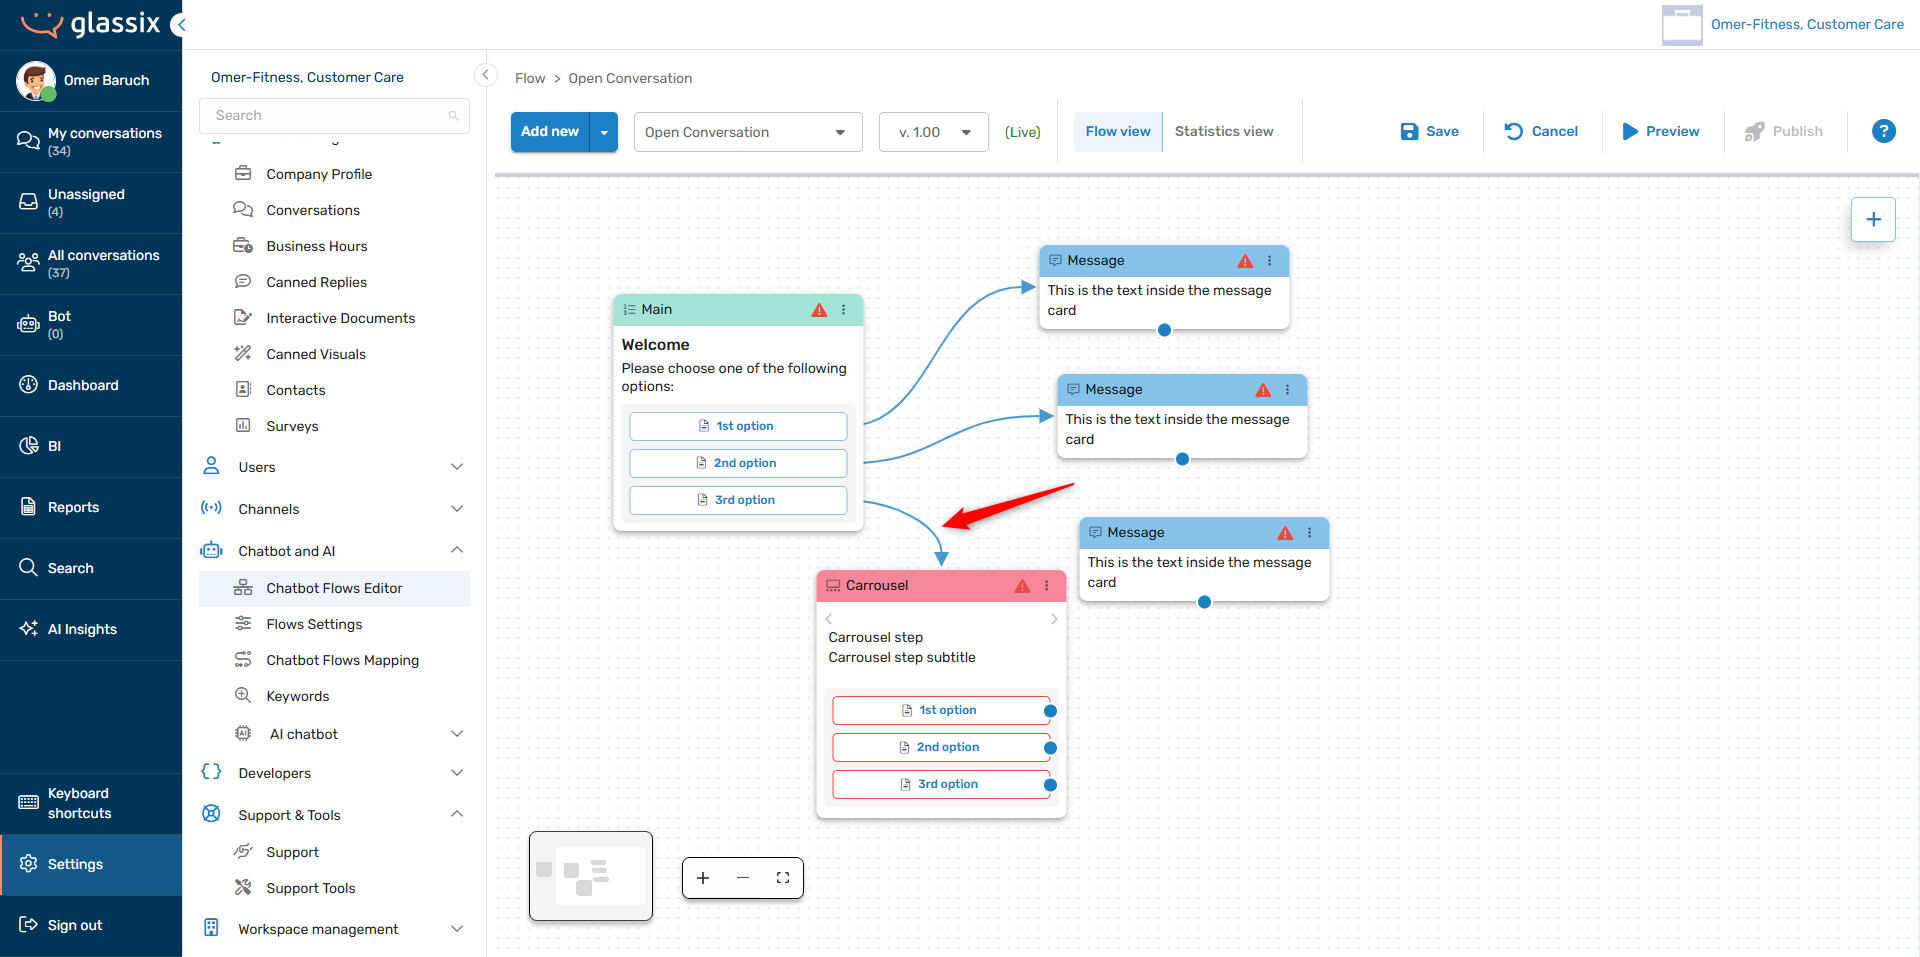
Build or Edit a Flow
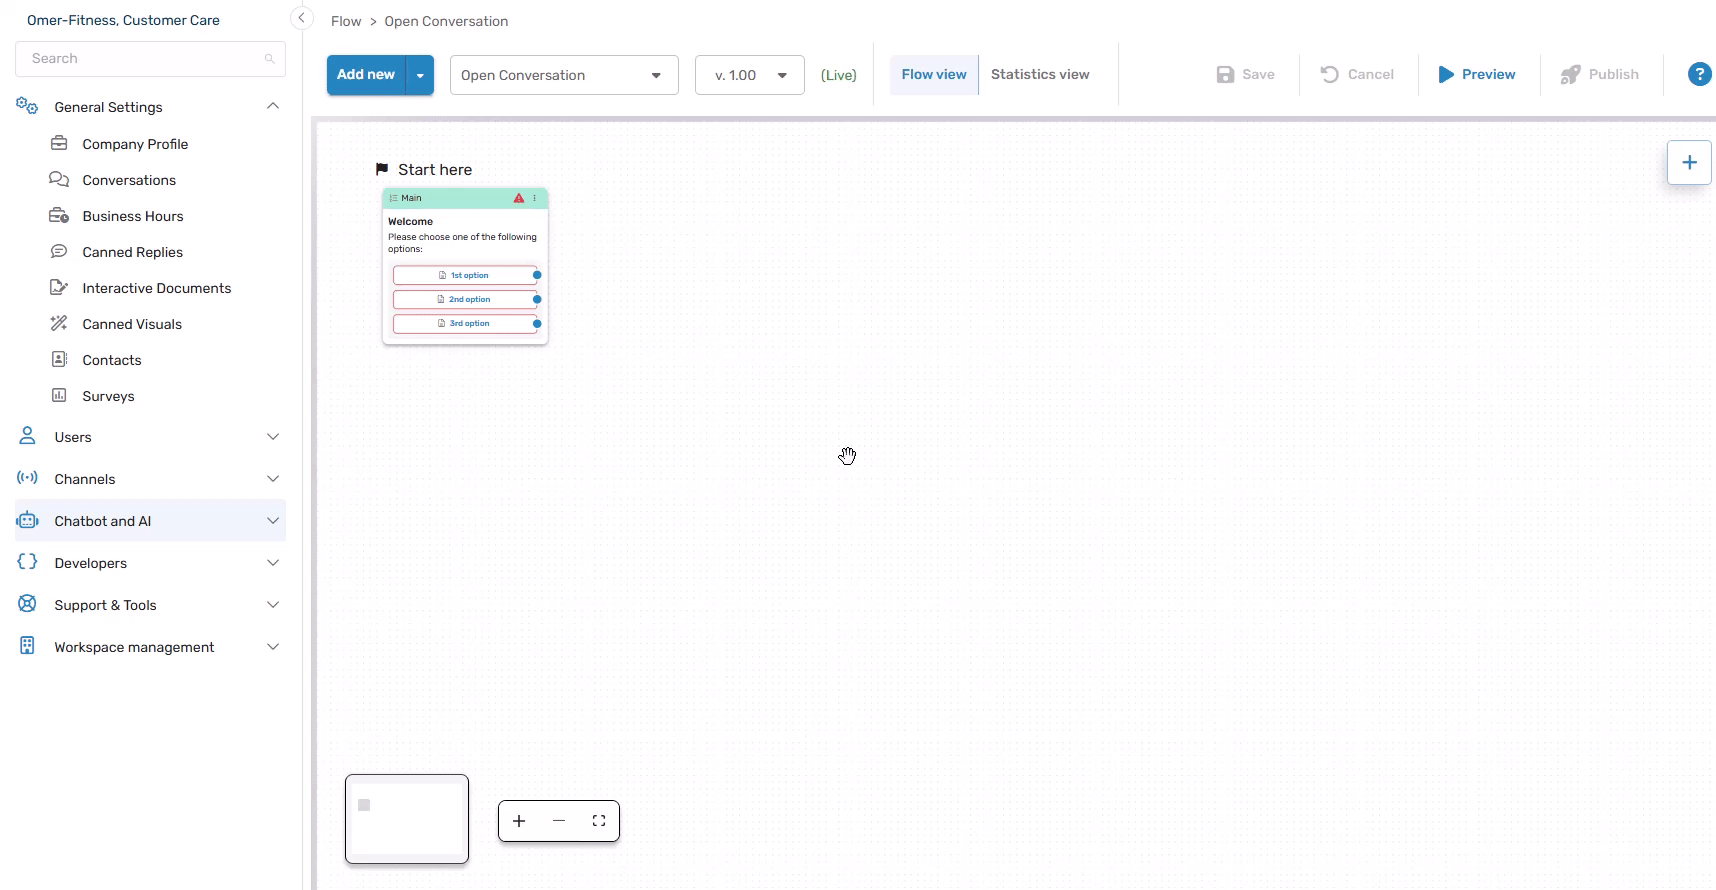
Once you have your new flow created, you can start building it out to do what you want. The basic idea behind any flow is to add steps to perform specific tasks, linking these steps together in a chain to make a smooth and seamless experience for your customers.
There are 20 different step types to choose from, and each one has a number of possible configurations. See the various "Add ___ Step" articles in this section for more in-depth explanations of each of the step types.
If you run into anything which the built-in step types can't do for you, you can also build your own custom steps with function steps.
Add a New Step
There are a number of ways to add steps to your flow - they all do mostly the same thing, so you can pick the one that's the most comfortable for you.
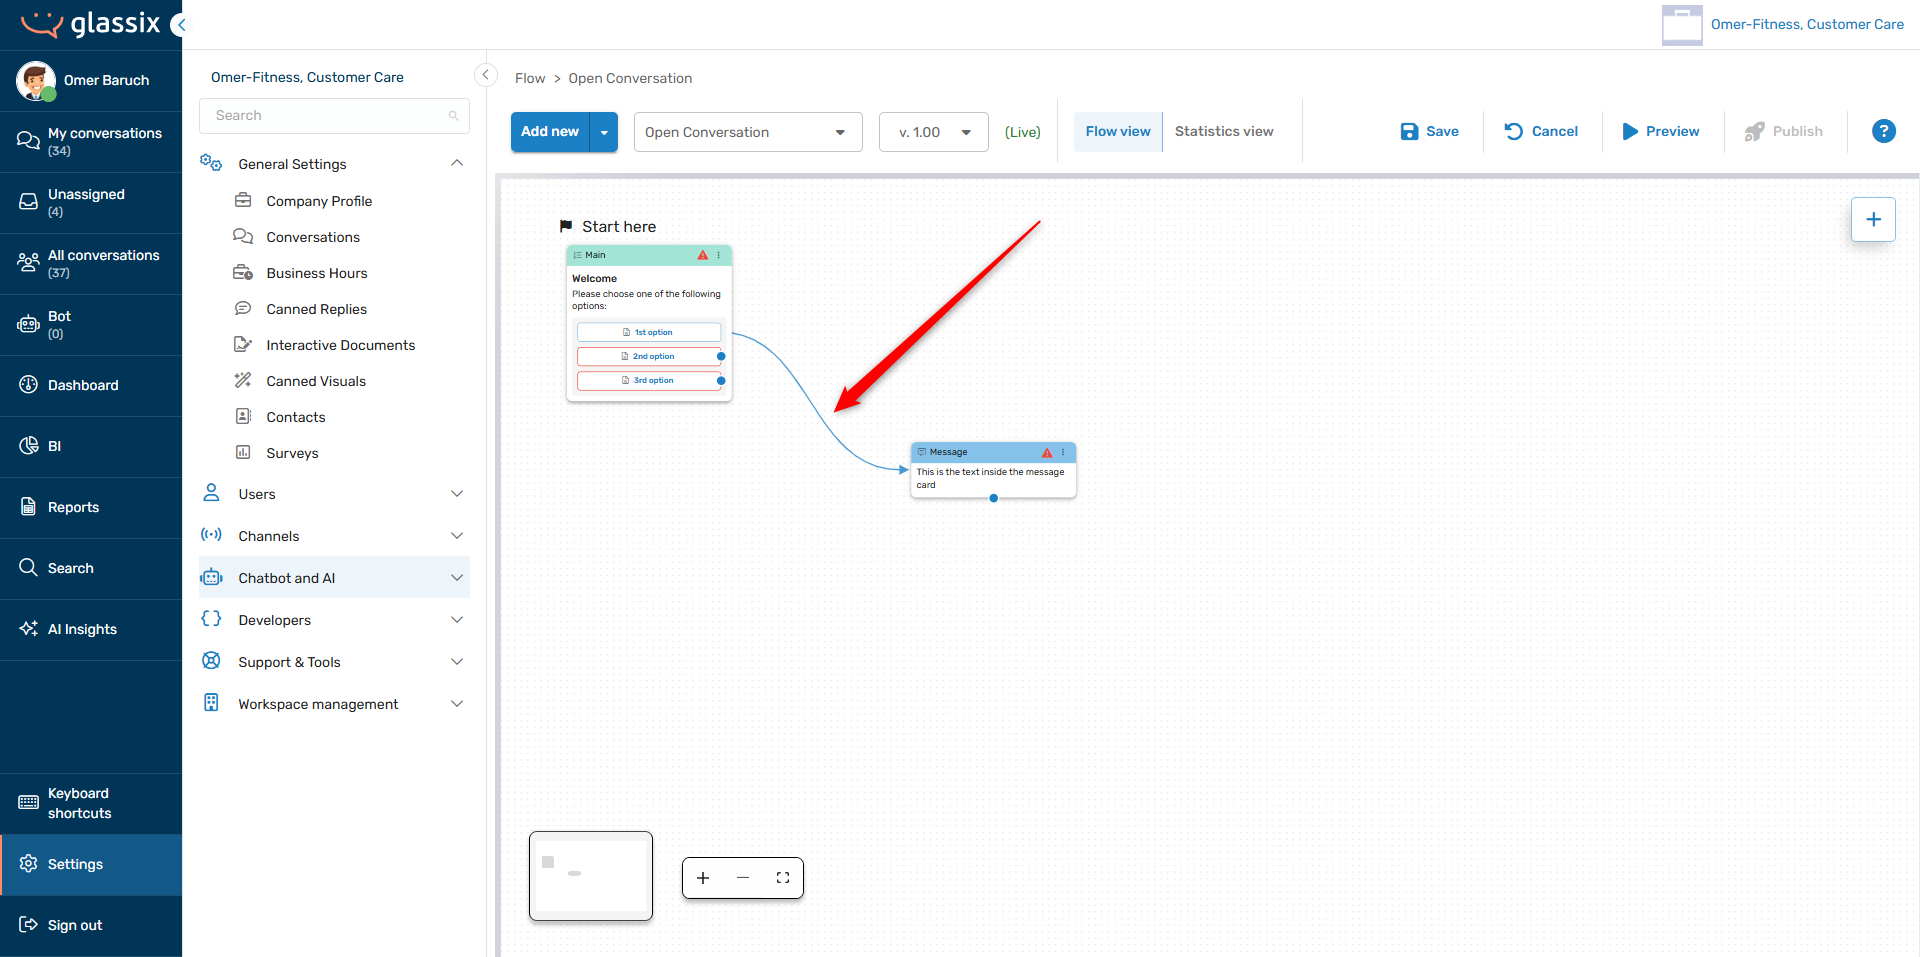
Option 1: Using the + button
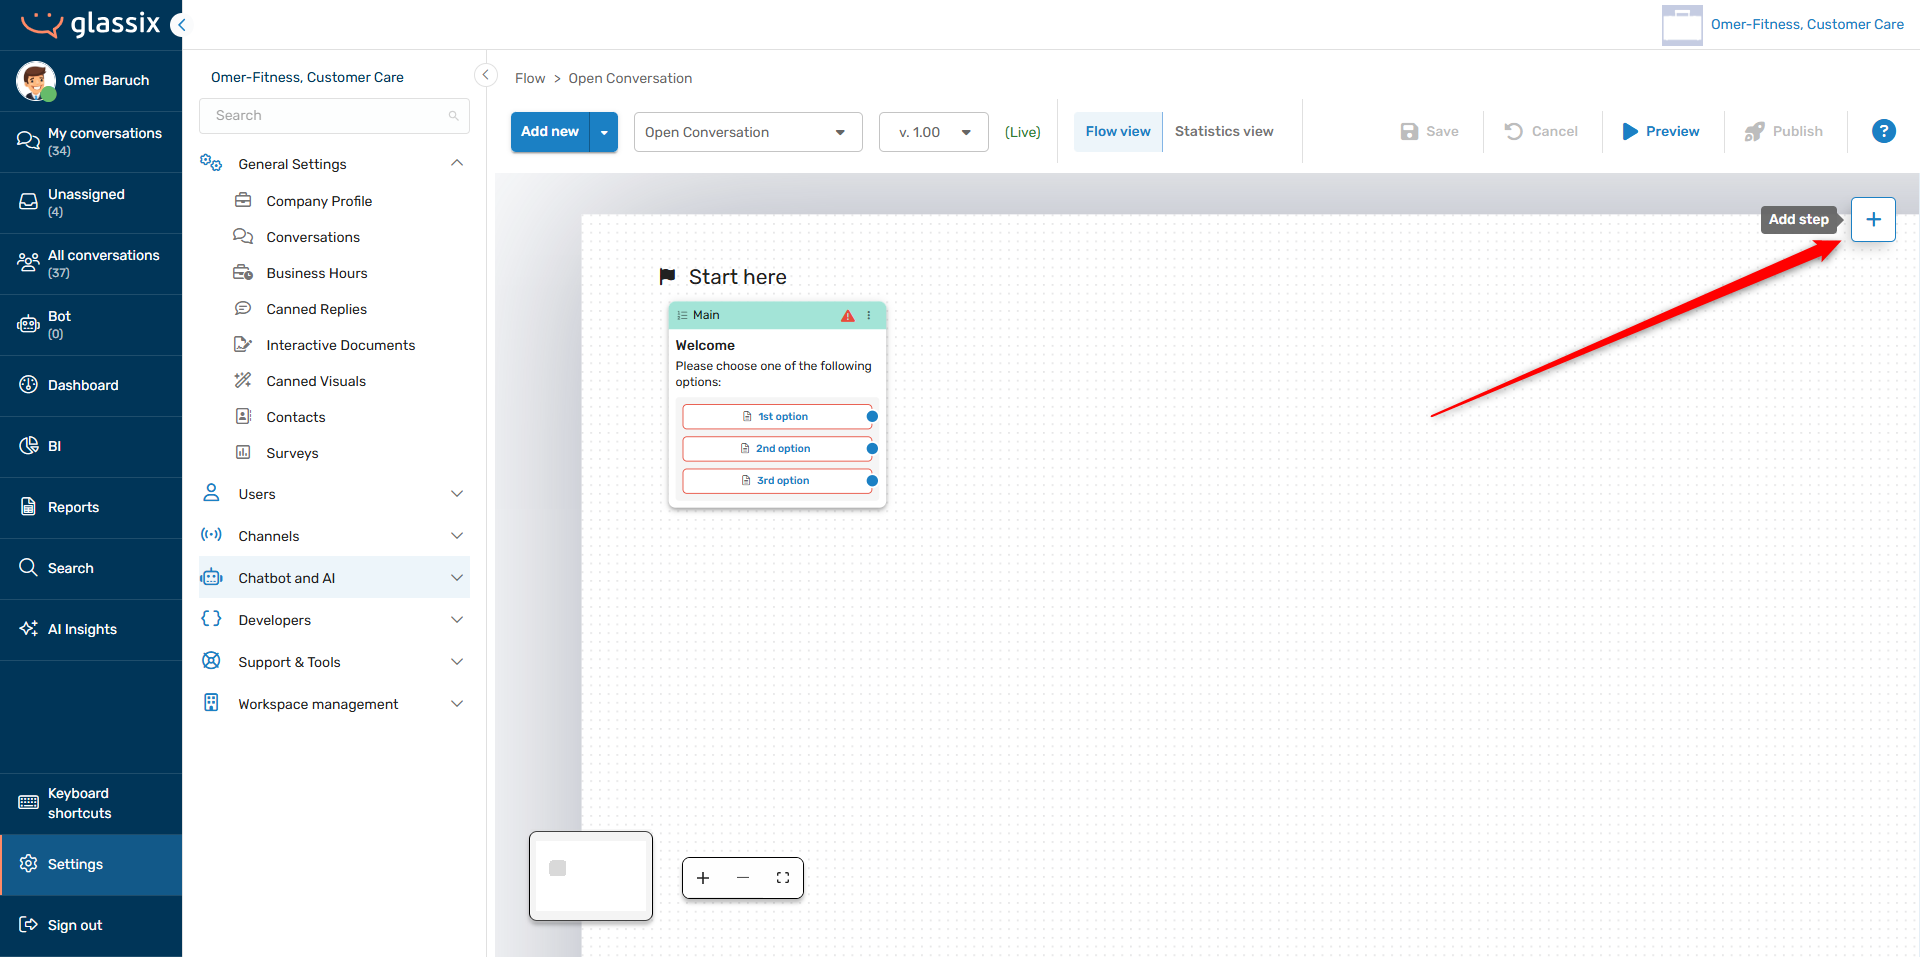
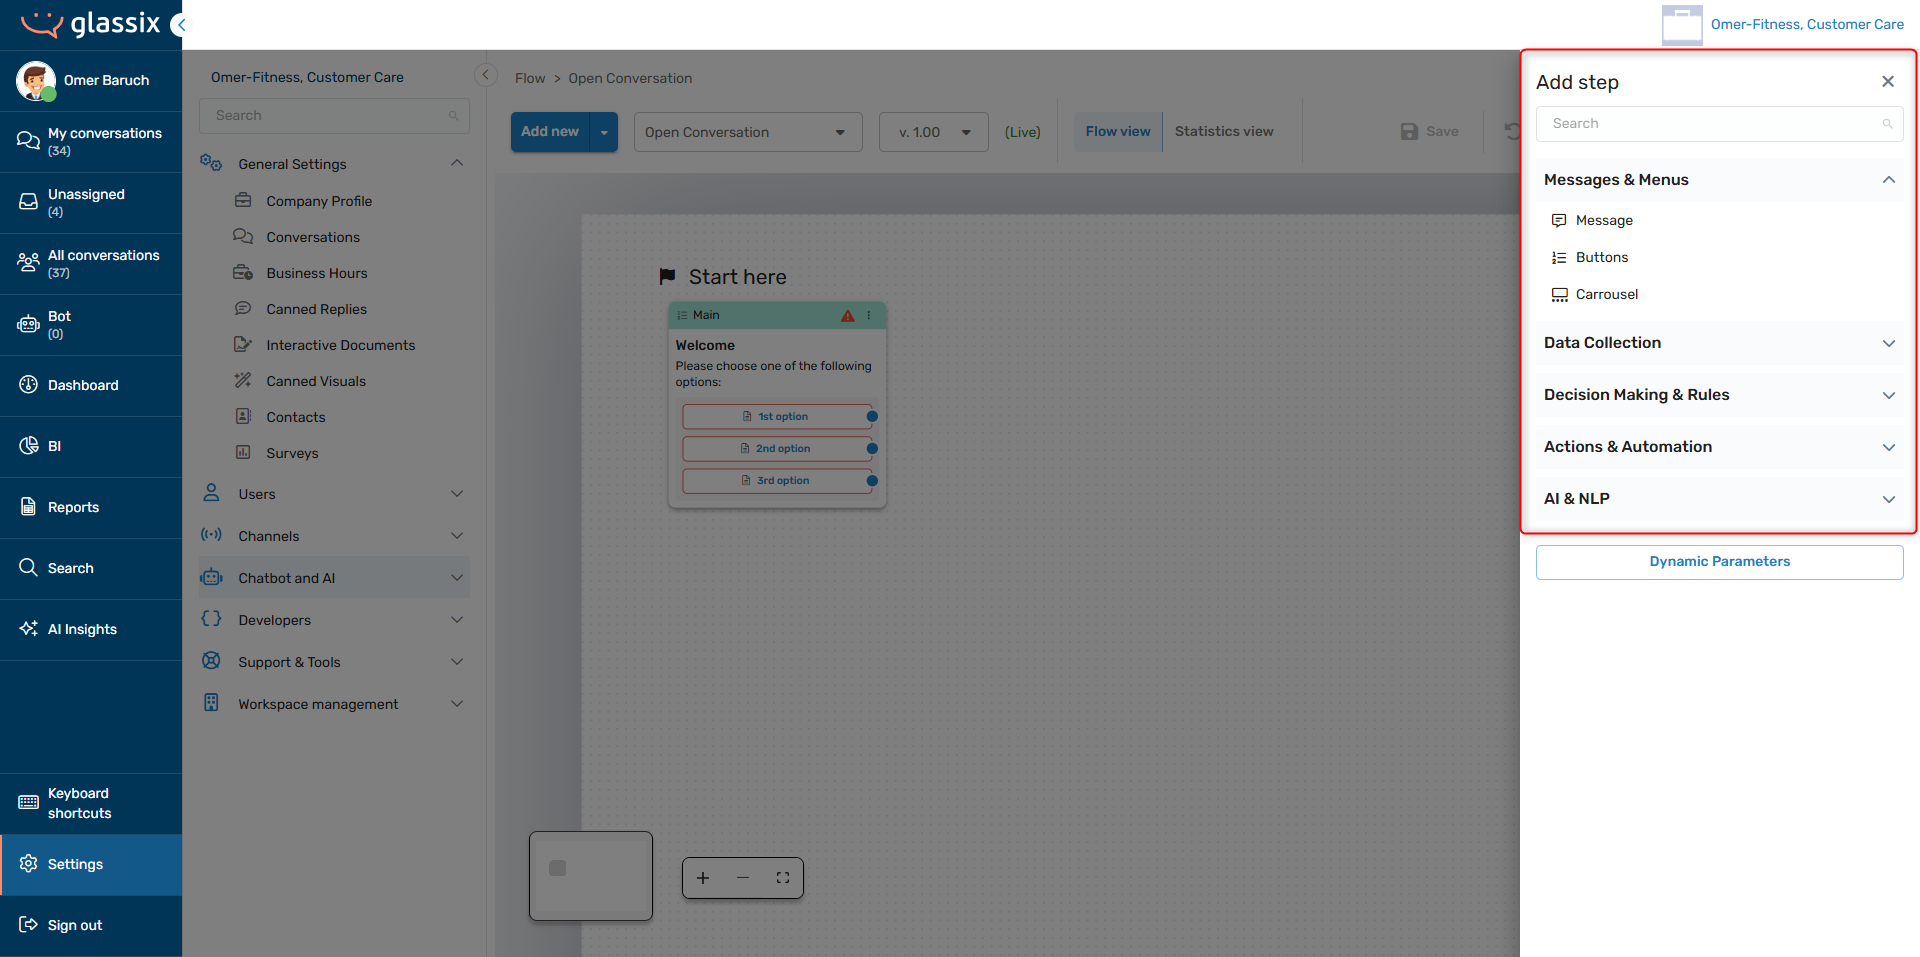
- Click the + in the top right of the Flows Editor:
-
Search for or select the step type you want to add in the slide-out menu:
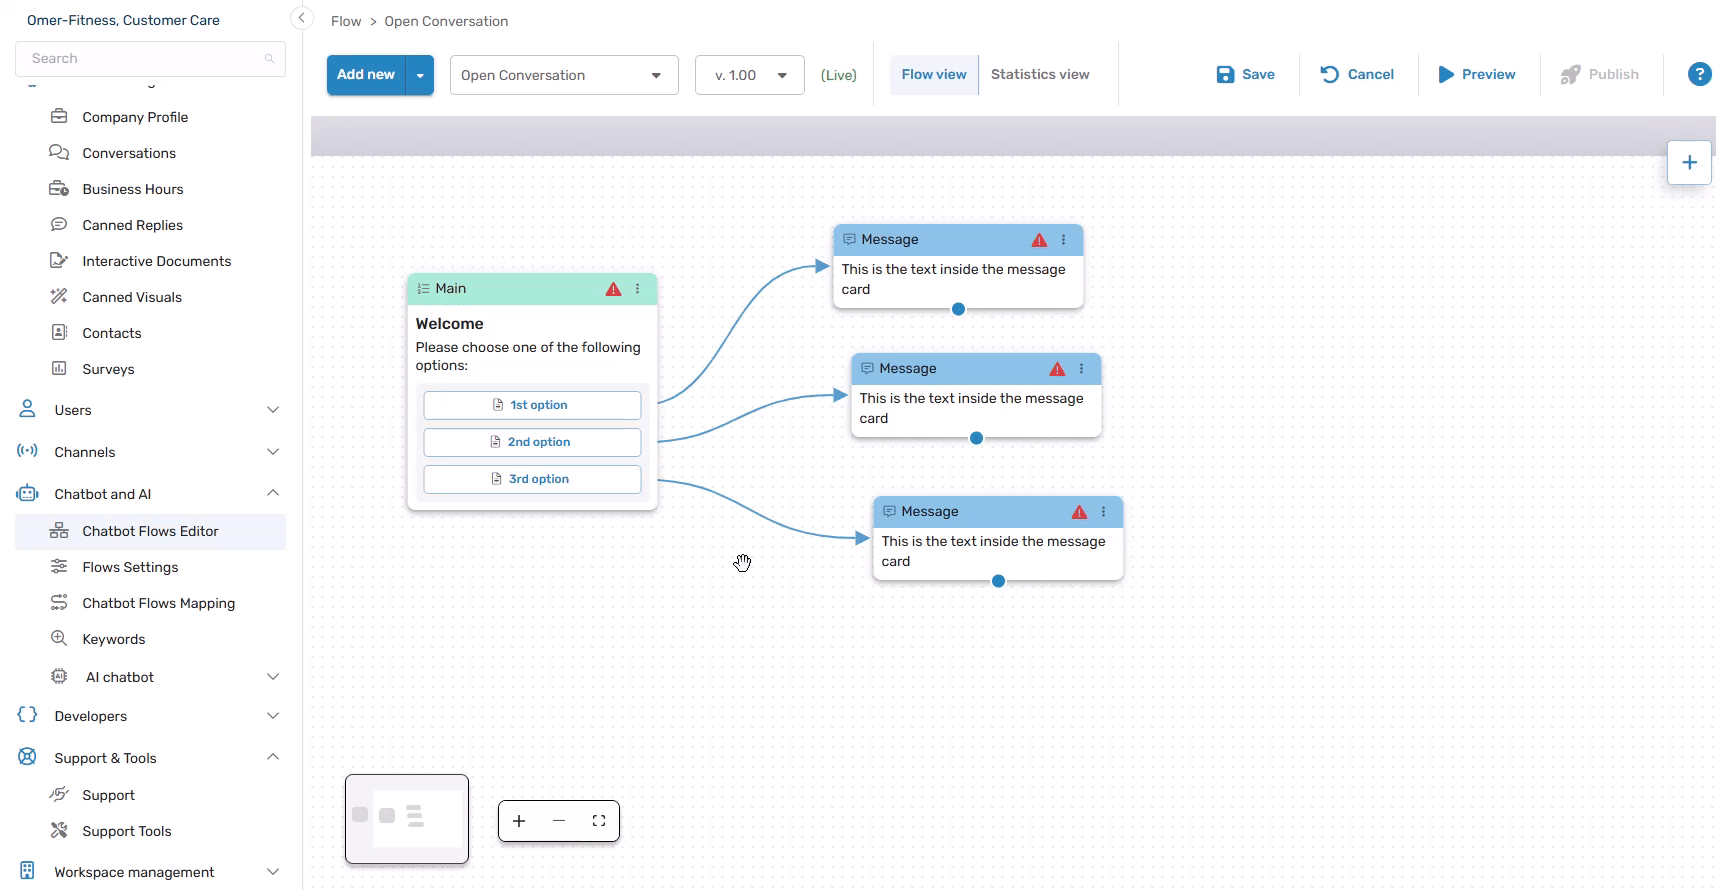
Option 2: Using the right click menu
-
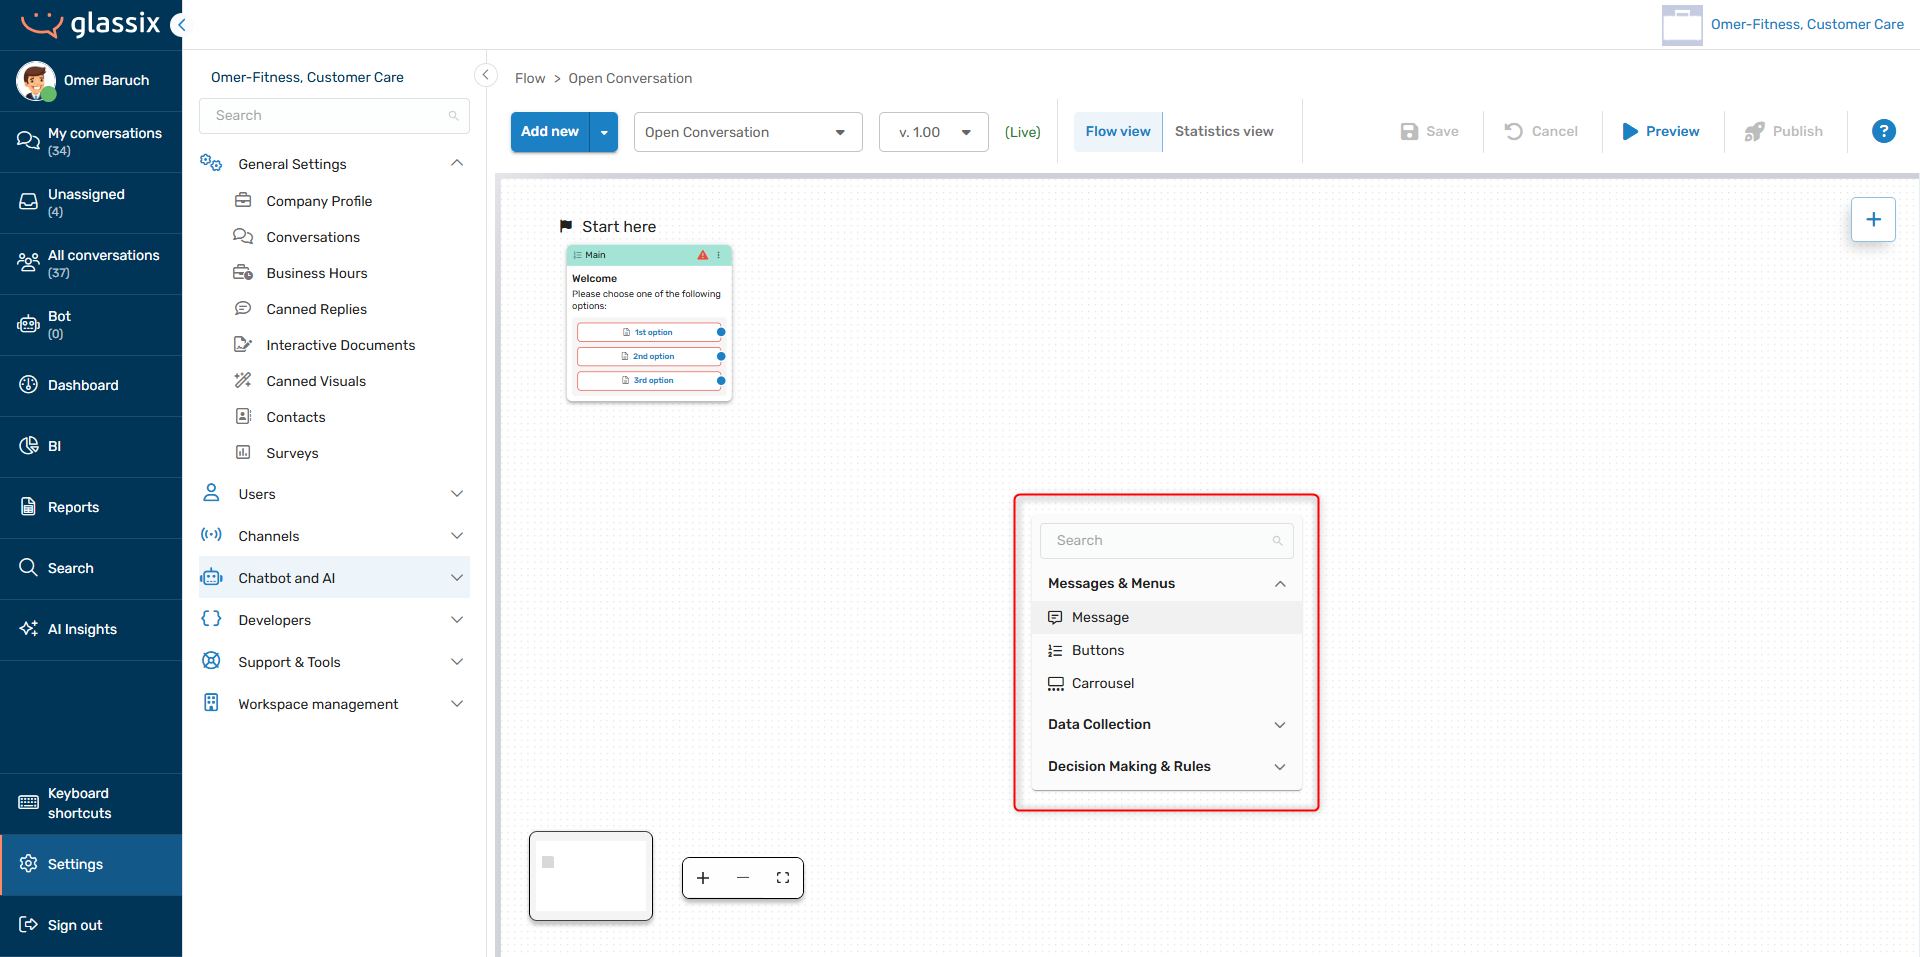
Right click any blank area in the Flows Editor:
-
Search for or select the step type you want to add in the right-click menu:
Option 3: Dragging from an existing flow step
TipDragging from an existing flow step also lets you quickly add actions like redirecting to another flow, or ending a conversation. These actions are otherwise available when editing a flow step.
-
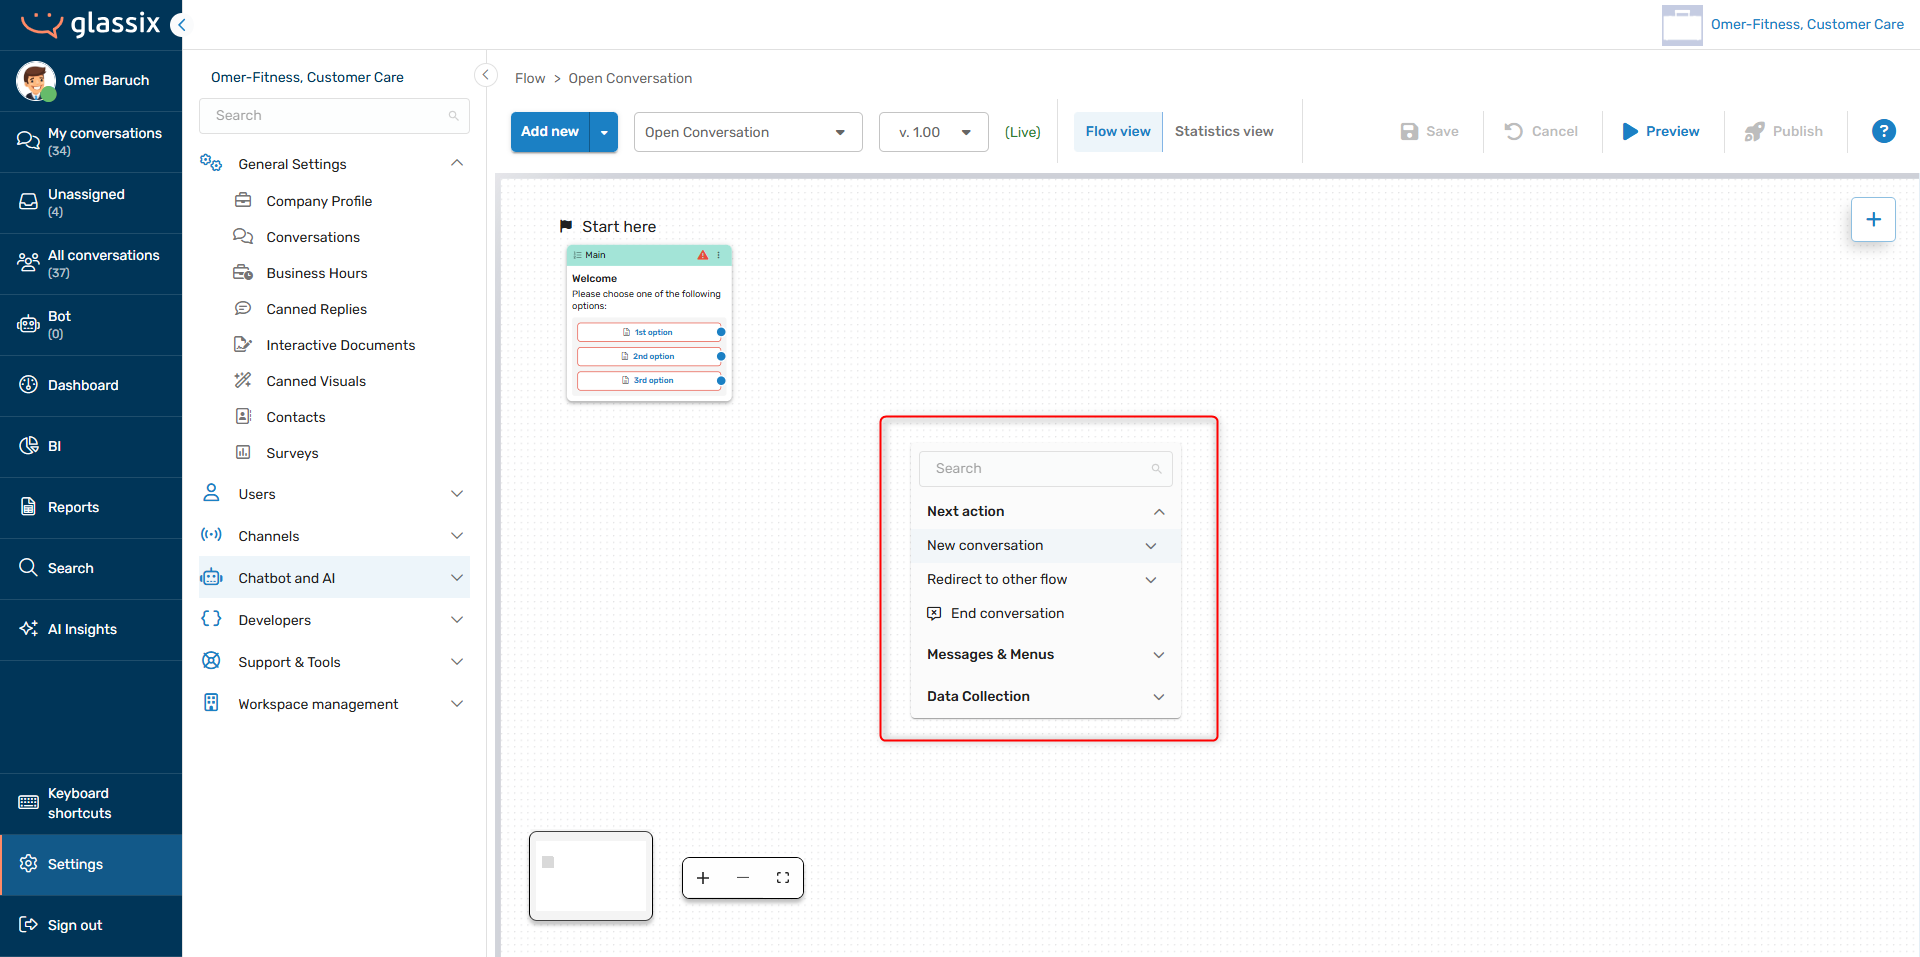
Select a connection point (blue dot) from any existing card and drag to an empty space in the Flows Editor:

-
Search for or select the step type you want to add in the connection menu:
-
Your selection will be automatically connected to the previous flow step:
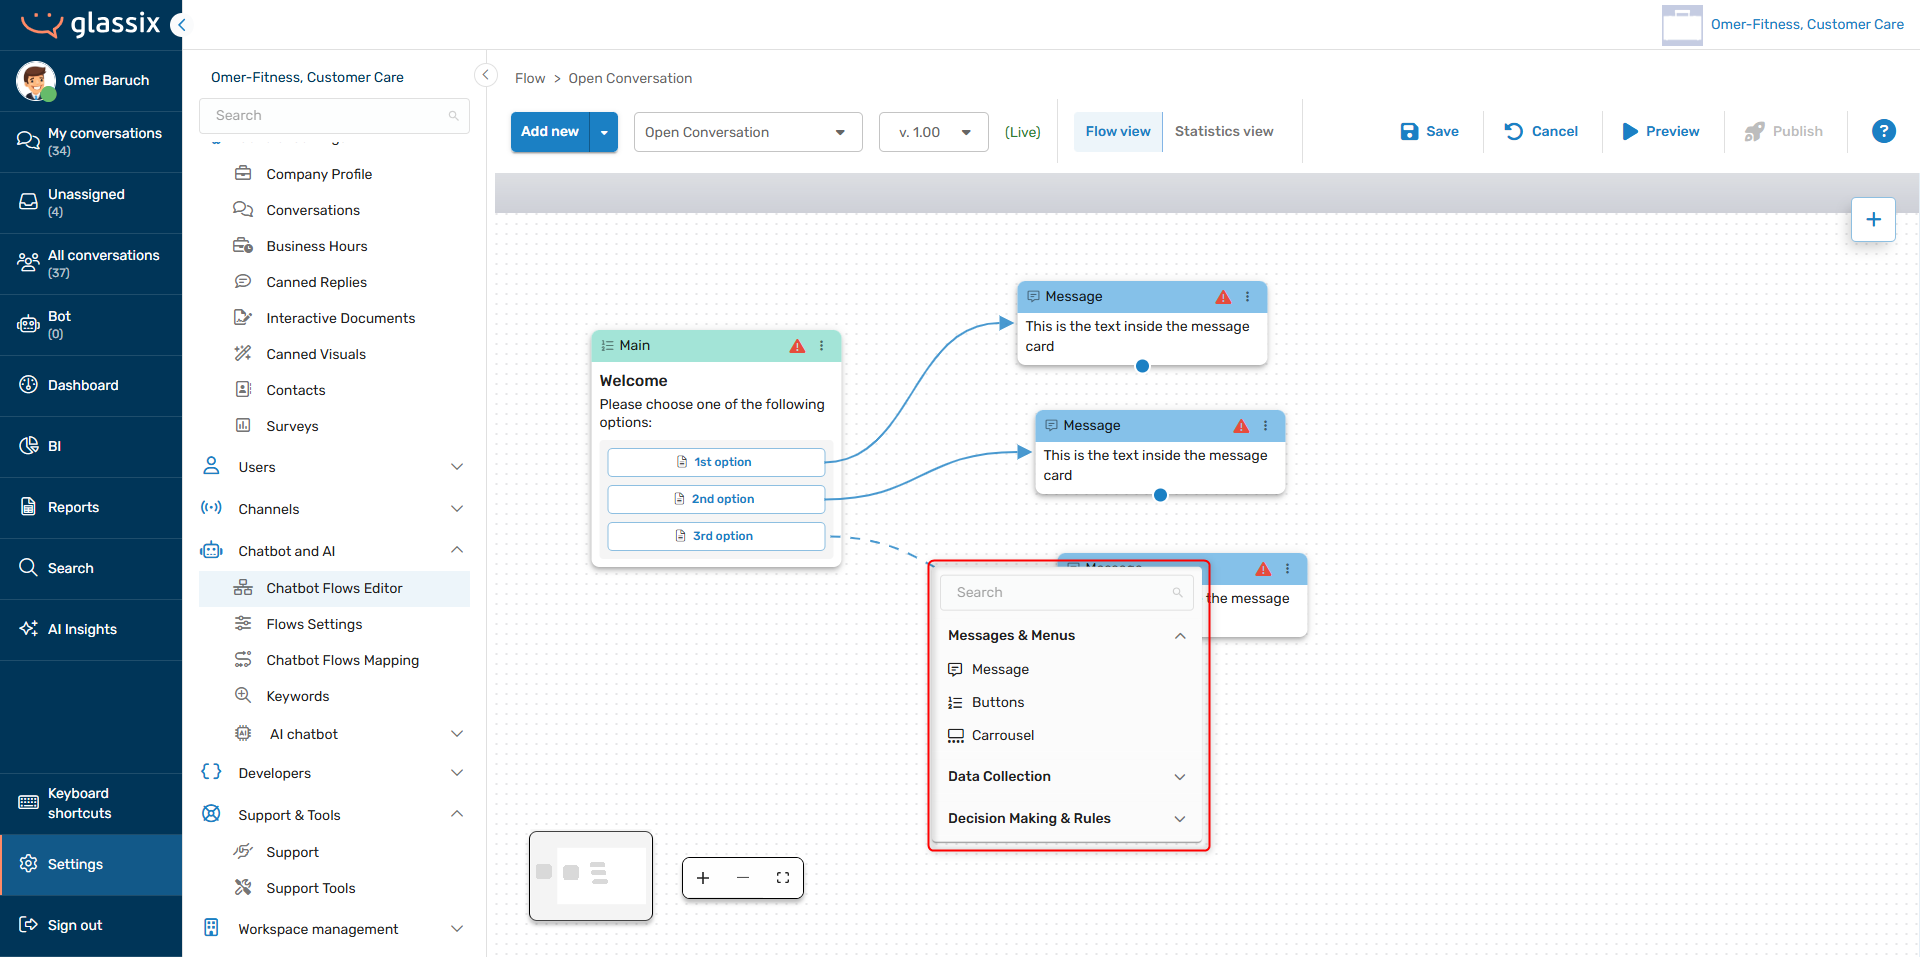
Option 4: Adding to an existing connection between two flow steps
-
Hover over any existing connection between two flow steps (arrow) and click the + button:
-
Search for or select the step type you want to add in the connection menu:
-
Your selection will be automatically connected in place of the previously connected flow step:
Option 5: Duplicating an existing flow step
-
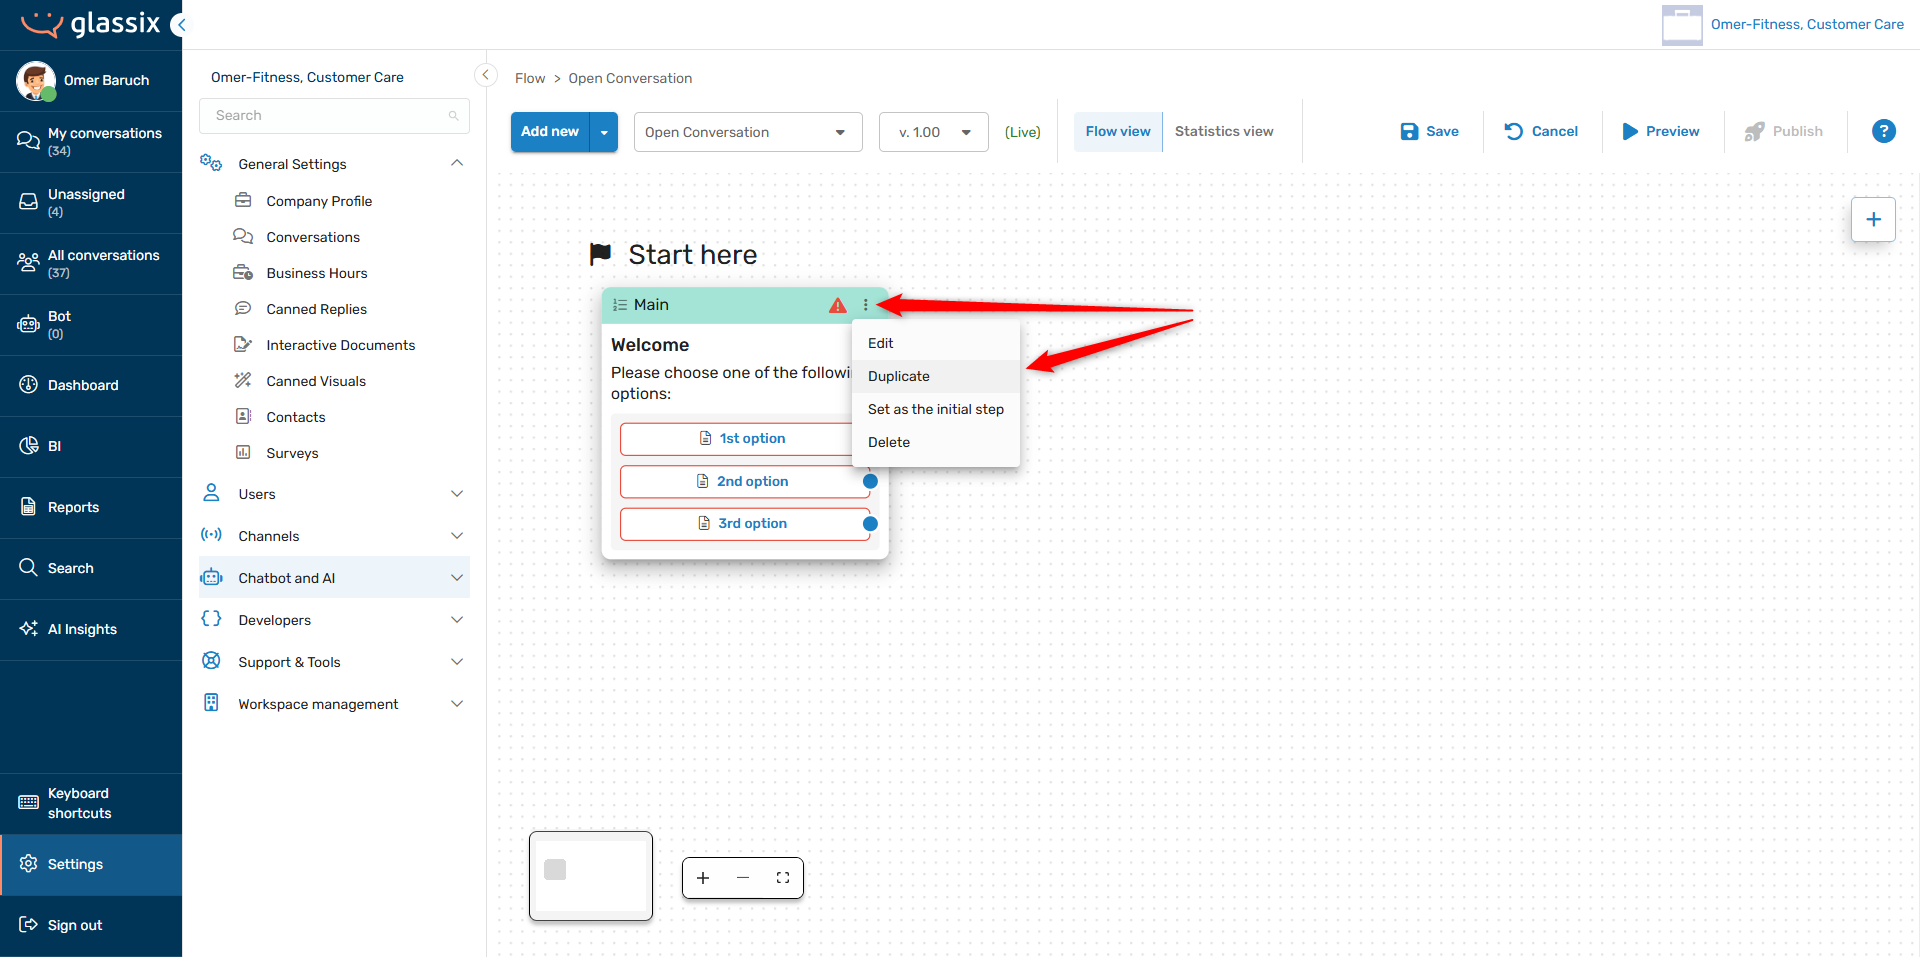
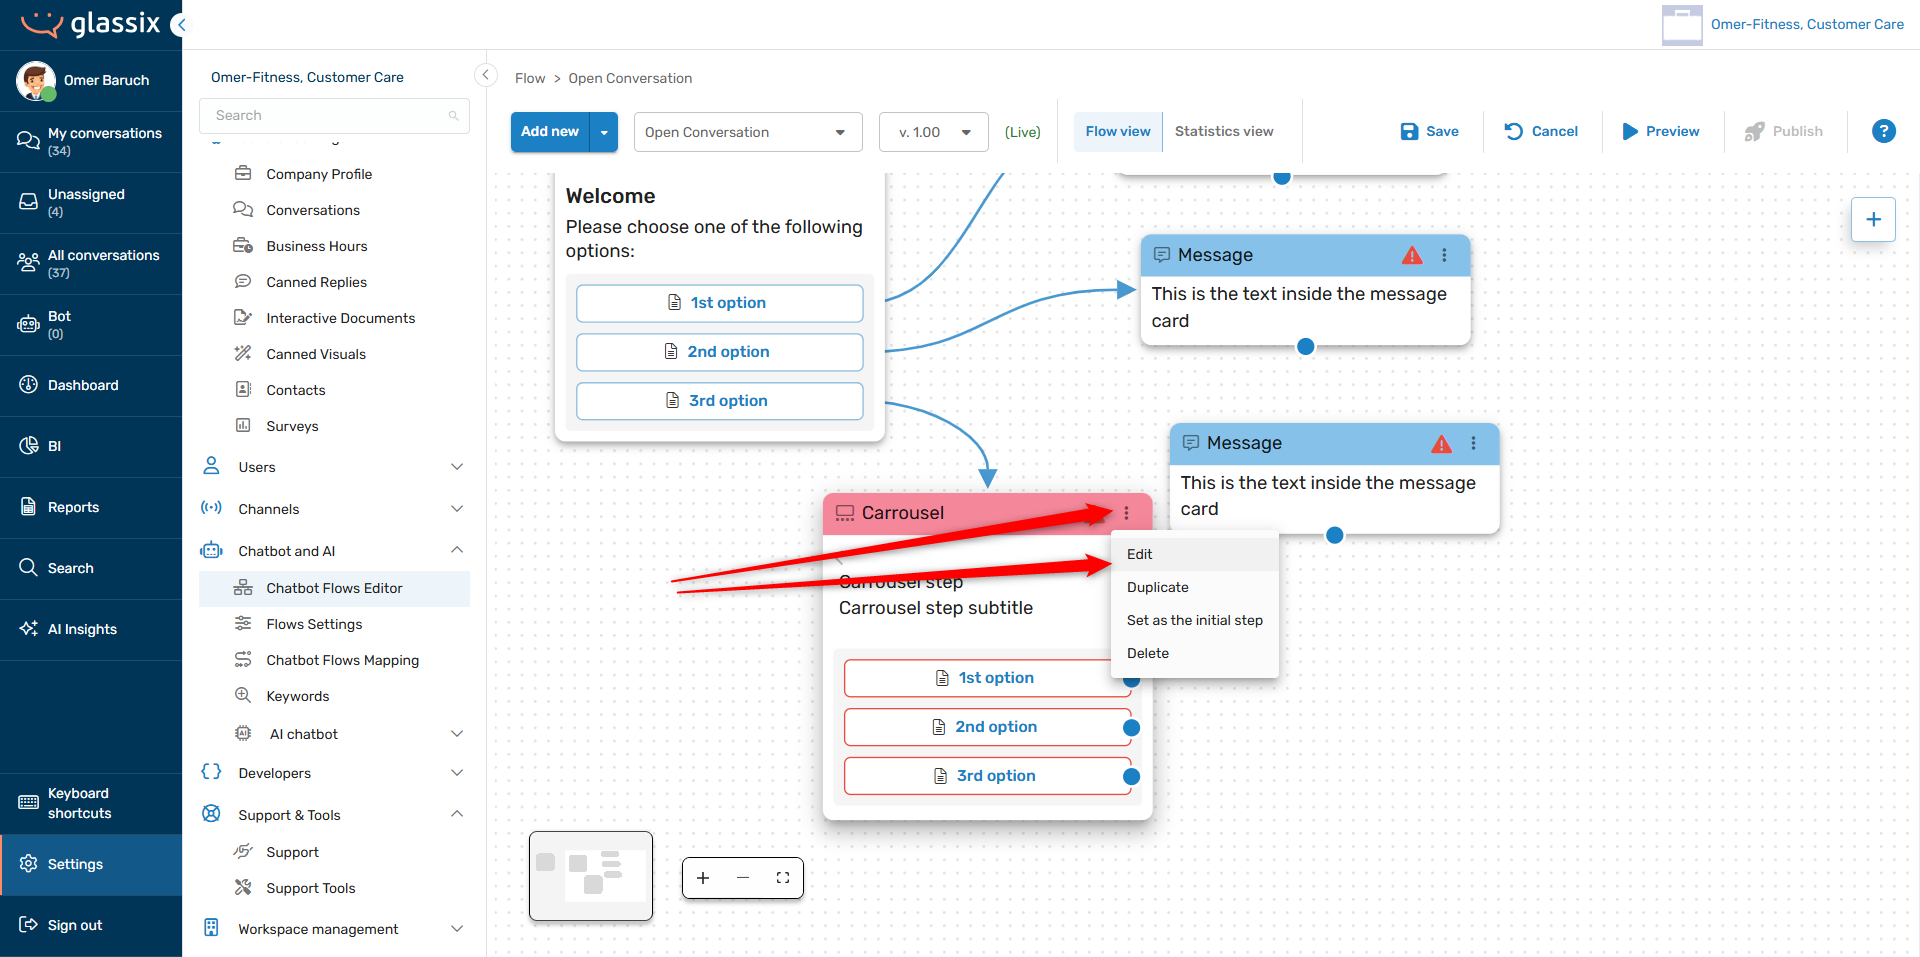
On any flow step, click the three dot menu → Duplicate:
-
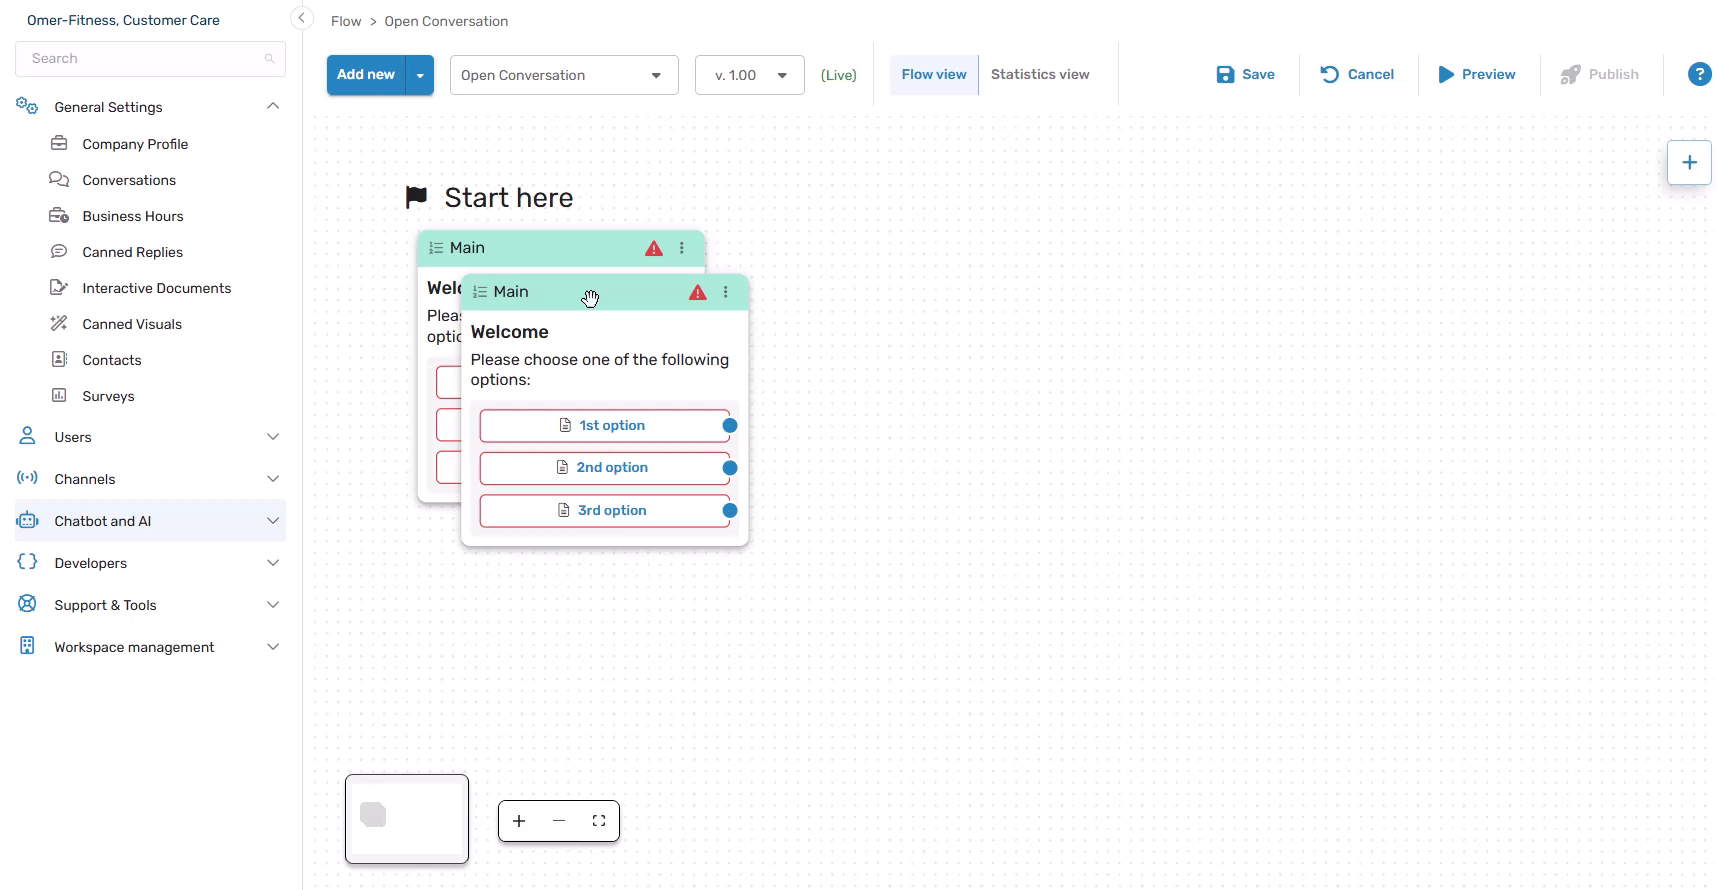
Drag your card to the desired location:
Edit an Existing Step
To edit an existing step which you have already added to a flow, you can either:
-
Double-click anywhere on the step:
-
Click the three dot menu → Edit
Either option will open up the slide-out menu for editing your chosen flow step.
Connect Flow Steps
Flow steps must be connected to a previous step to be included in a flow (except the initial step). Refer to Connecting Steps for more information.
Export and Import Flows
Export a Flow
You may export the most recently published version of any of your flows at any time. This is useful if you would like to keep back ups, transfer flows across workspaces, or share a flow across your departments while keeping edit access department-specific.
TipIf you run into an issue with any of your flows and you need support, you can also provide an export of your flow to your support representative for easier troubleshooting.
To export the most recently published version of a flow, click on the flow selection dropdown → the three-dot menu → Export published (#.##):
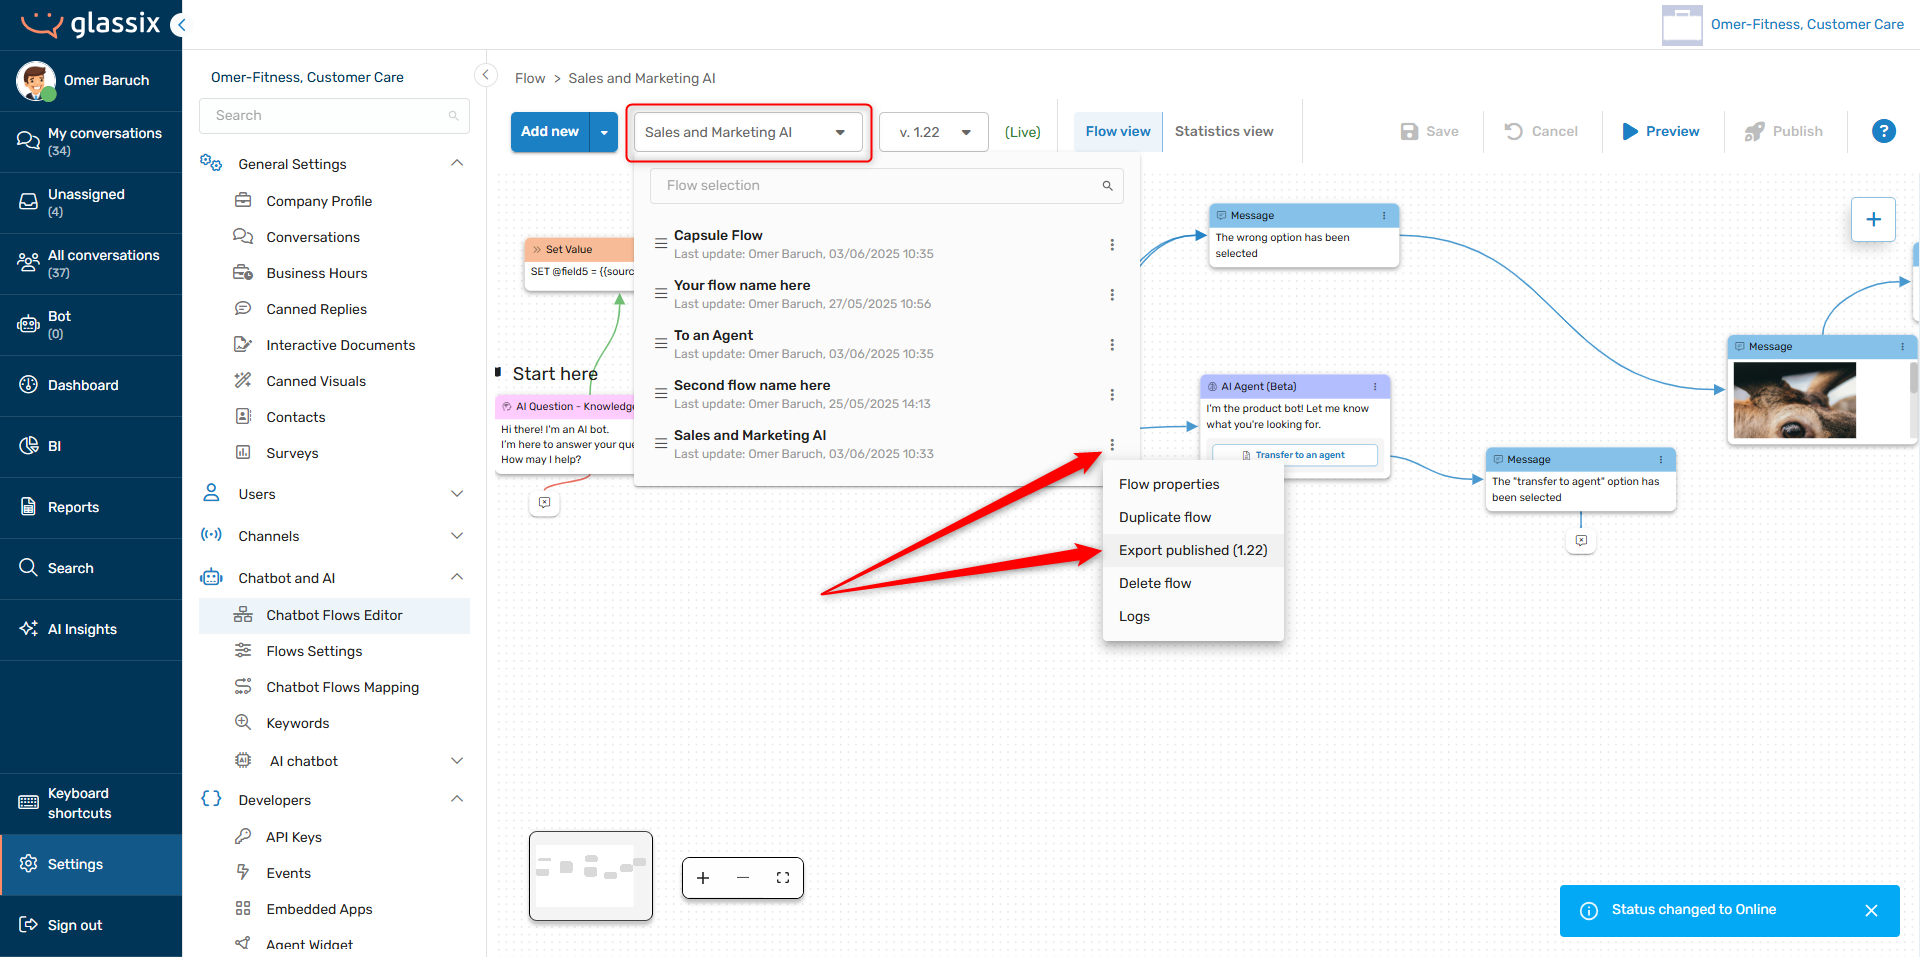
Your flow will then be downloaded automatically as a JSON file.
InfoWhile flow exports are JSON files, they are not human-readable and should not be edited.
Import a Flow
You may import any flow which was exported from a Glassix production workspace.
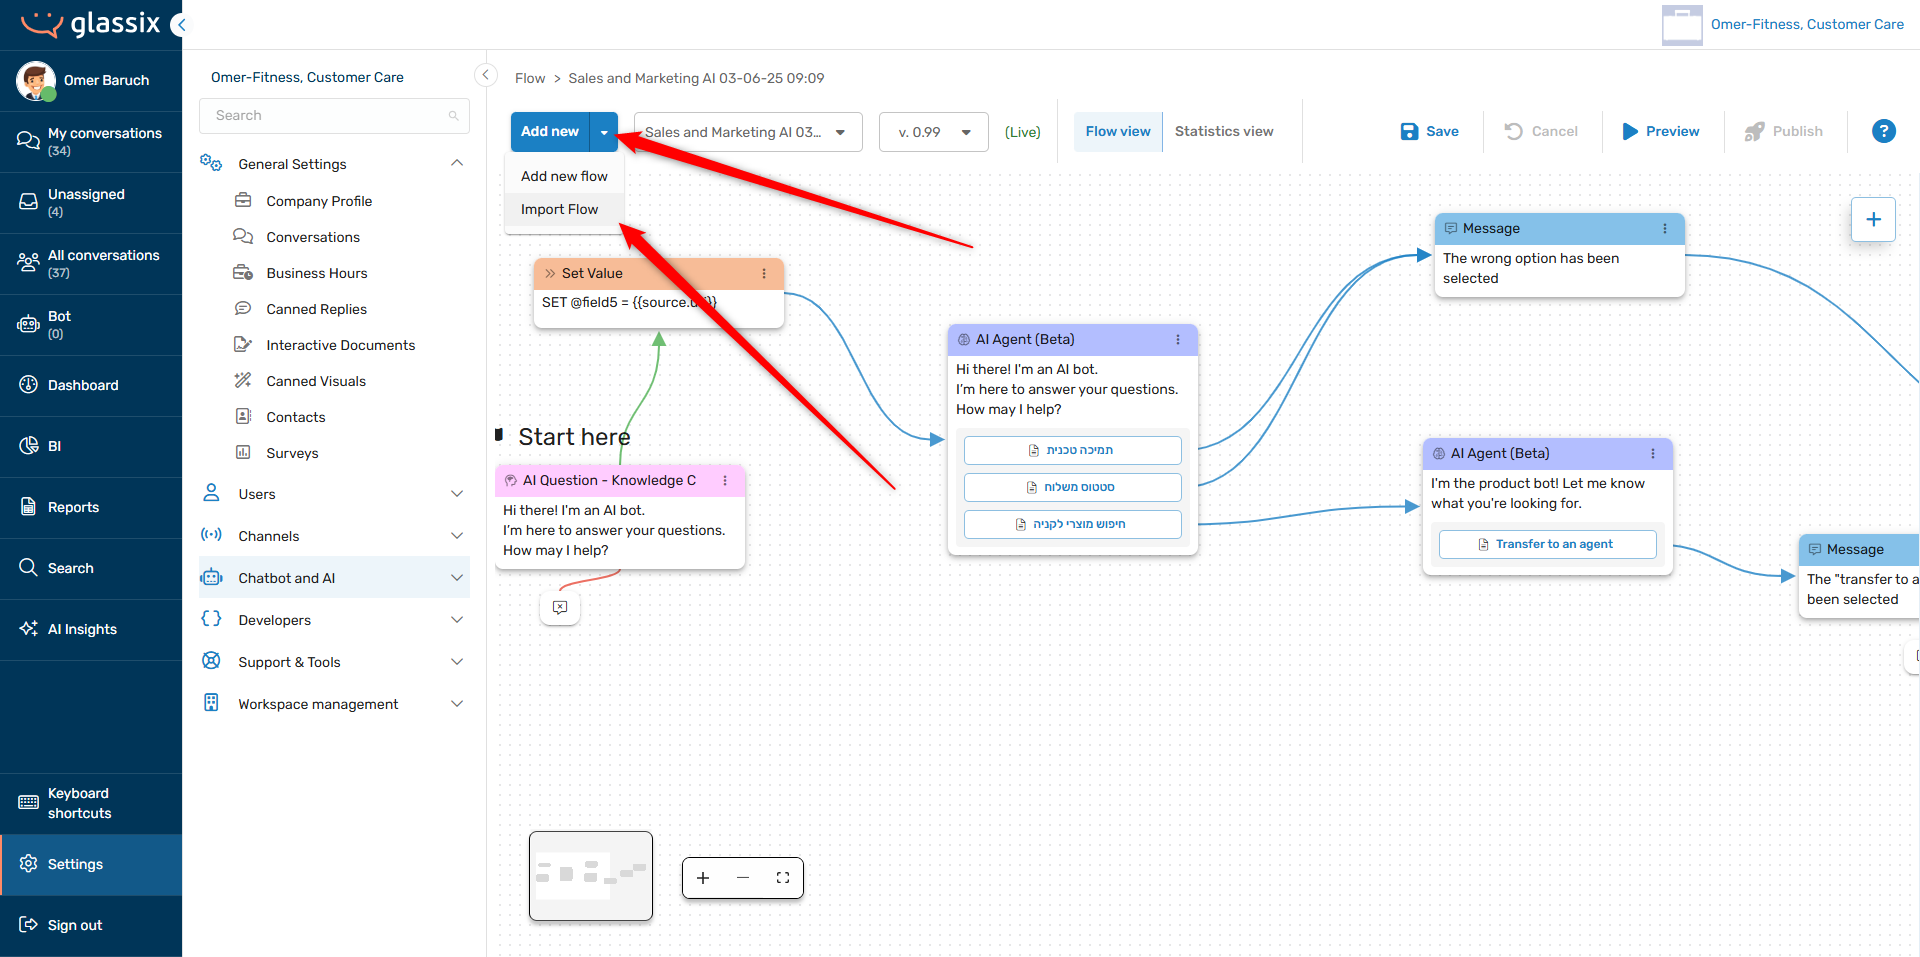
To import a flow, choose the arrow next to the Add new button → Import Flow:
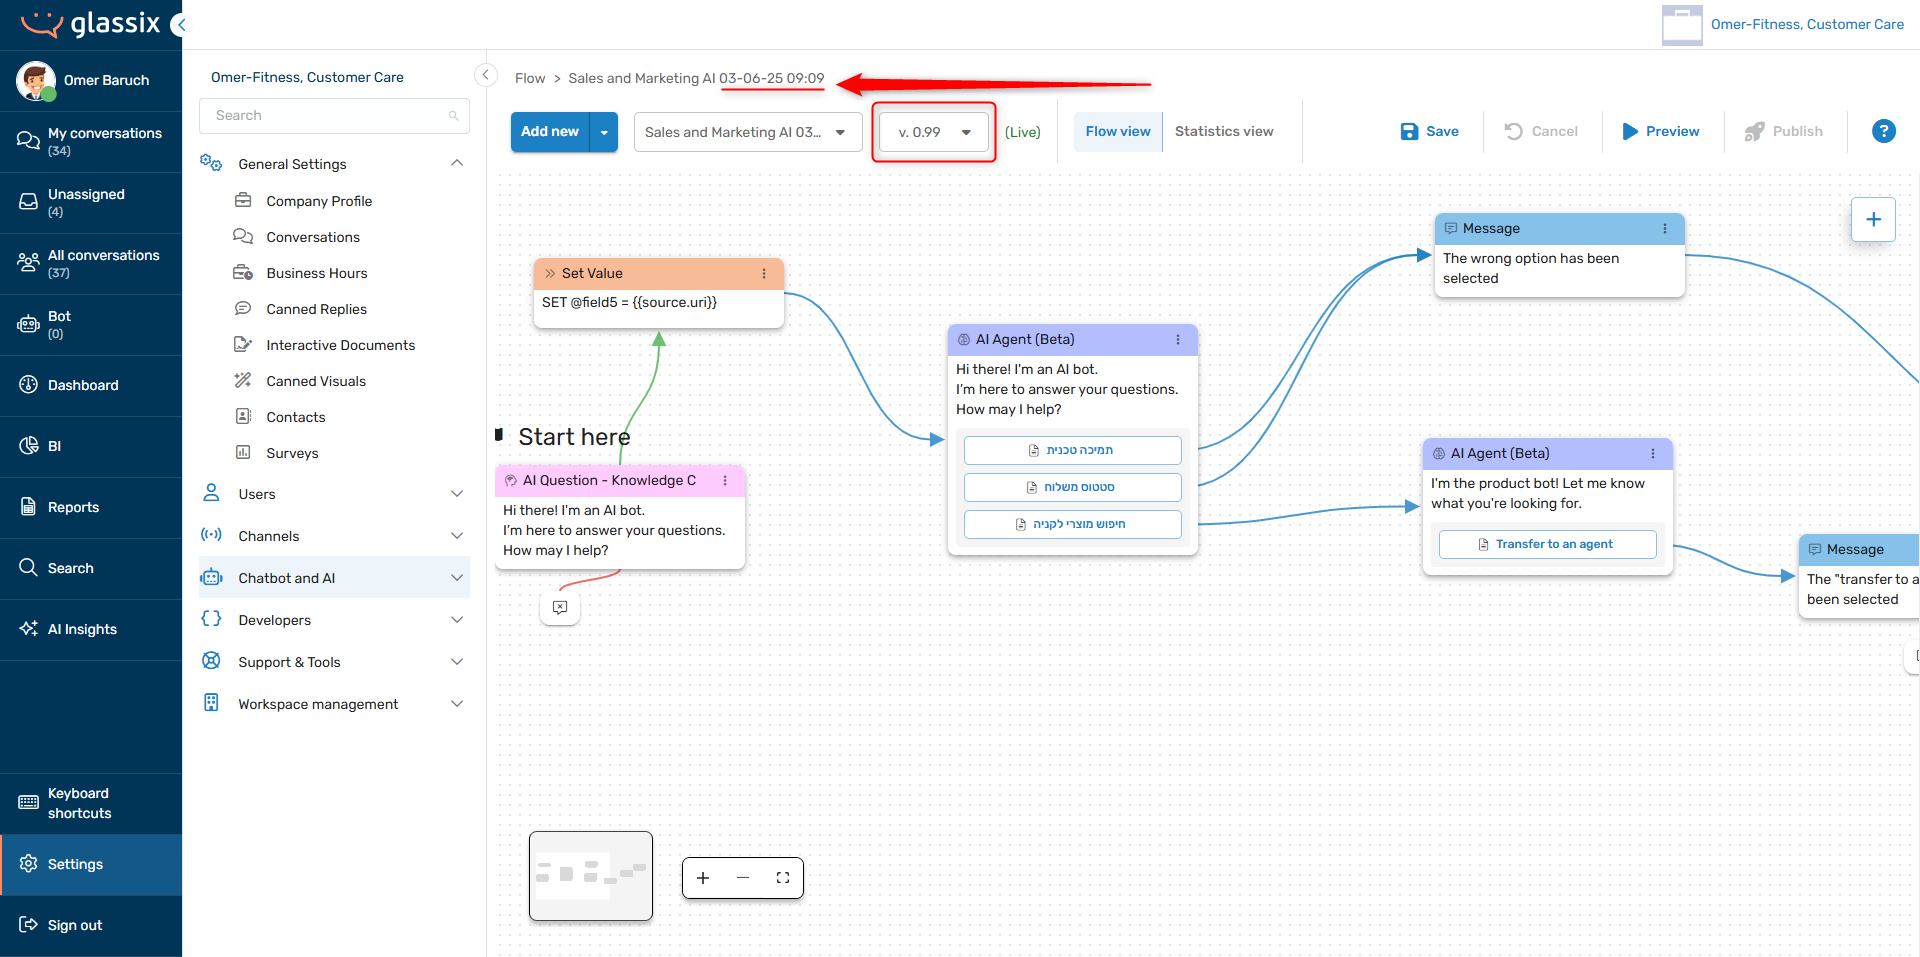
When importing any flow, the time and date of the import will be automatically added to the name of the flow, and the flow will automatically be given the version number 0.99:
When you save and publish your imported flow, the version number will increase to version 1.00 automatically.
If there are any errors in the flow after importing, you'll get a message like the following:
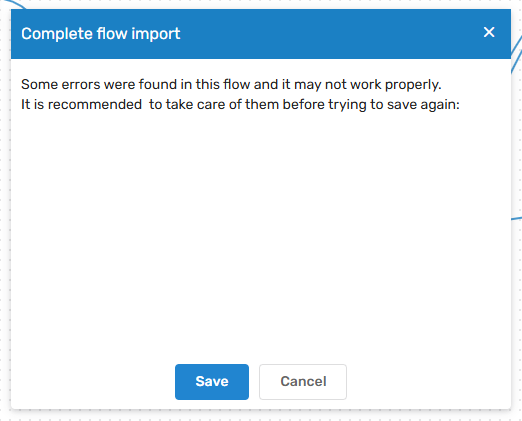
If you get a message like the one above, we recommend choosing Cancel and looking for any errors in the flow before attempting to save and publish your imported flow.
InfoIt's normal to receive a message about flow errors when importing flows, especially if they're coming from other workspaces.
Updated 2 months ago