Validate Outbound Webhooks and Web API
Protect your systems with authentication
Prerequisites:
- You have exposed a public HTTPS endpoint to receive events
- You have a valid API key
Overview
Your system should validate that the data received via webhooks and Web-API calls from bots and flows was sent by Glassix before responding to the request. Such validation is crucial for securing data and protecting your systems and servers from abuse.
We sign all Event Notification payloads with two SHA1 signatures included in the POST request's headers:
- X-Hub-Signature
- X-Glassix-Auth-Signature
both are preceded with sha1=. Choose either of them for validation.
Validate Payload Using X-Hub-Signature
- Generate a SHA1 (a secure hash algorithm) using the payload and your API Secret as a key to the hash.
Create a hash using the JSON string contained in the body of the
POSTas input and your API secret as the key. - Verify that your hash is identical to the signature in the X-Hub-Signature header (everything after
sha1=):
Testing X-Hub-Signature Validation
Tip:Use this website for testing.
- In the Copy-paste, the string here box, paste the JSON body you received at your webhook/web API endpoint.
- In the Secret Key box, enter your API secret.
- In the Select a message digest algorithm drop-down, click SHA1.
- Click COMPUTE HMAC.

- Verify that X-Hub-Signature (everything after
sha1=) you received is identical to the signature in the Computed HMAC window.
Example: X-Hub-Signature: sha1=ccfc9fdfc967c61c46339577e4ac0f7193521eeb.

Validate Request Using X-Glassix-Auth-Signature
- Generate a SHA1 signature using the X-Glassix-Auth-Date header and your API Secret as a key to the hash.
Create a hash, using the property X-Glassix-Auth-Date as input and your API secret as the key.
- Verify that your hash is identical to the signature in the X-Glassix-Auth-Signature header (everything after
sha1=). - Validate that no attempt at date spoofing has been made.
Protect against data spoofing
To protect against data spoofing, we recommend the following protocol:
- Your webhook/web API records the sys time at which the POST request was made.
- Compare that date-time stamp to the X-Glassix-Auth-Date in the header.
- To ensure that you have not received an intercepted header, we recommend treating a difference of +/- 5 mins between the two date-time stamps as potentially malicious.
Testing X-Glassix-Auth-Signature Validation
Tip:Use this website for testing.
- In the Copy-paste the string here box, enter the X-Glassix-Auth-Date you received at your webhook/web API endpoint.
- In the Secret Key box, enter your API secret.
- In the Select a message digest algorithm drop-down, click SHA1.
- Click COMPUTE HMAC.

Verify that X-Glassix-Auth-Signature (everything after sha1=) you received is identical to the signature in the Computed HMAC window.
Example: X-Glassix-Auth-Signature: sha1=ec55832cabea8d47a037babdca1c4112c317e6a3

Add Custom Request Headers
Note:Custom request headers cannot be set or changed for webhooks which have already been sent. Any resends will have the same headers as the original webhook.
You can set custom request headers for validating the data that are being sent to your webhook's/web API's URL.
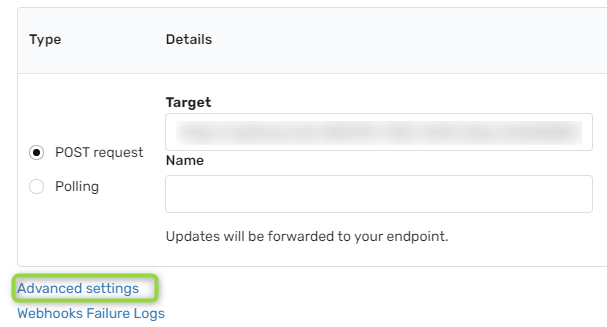
- Log into your Glassix account
- Go to Settings.
Settings is the cog icon
- In the Developers section, click on Webhooks.
- Click Advanced Settings.
5.a) In the Header Hey and Header Value text boxes, enter your desired headers.

5.b) Optional. Click New Header and repeat step 5.a to add more headers.
- Click Save.
Outbound IP Addresses
Warning:This list is updated from time to time and is not definitive. We, therefore, do not recommend implementing "allow-lists", i.e., filtering requests based on IP, as these addresses can vary.
Webhooks and chatbot requests:
| IP addresses |
|---|
| 13.70.16.77 |
| 13.72.99.16 |
| 20.50.248.137 |
| 20.53.168.19 |
| 20.73.204.39 |
| 20.195.97.9 |
| 40.74.245.255 |
| 40.83.150.252 |
| 40.115.68.94 |
| 52.155.91.26 |
| 191.235.85.21 |
| 20.67.80.139 |
| 13.94.226.30 |
Functions:
| IP addresses |
|---|
| 3.70.39.119 |
| 3.76.97.199 |
| 13.60.101.229 |
| 13.49.14.201 |