Events Configuration
Overview
Events are how Glassix can communicate with your systems.
Events are meant to trigger actions in your system or functions, such as Ticket documentation, Creating a new Ticket, and more. Read more on the types of events Glassix has here.
Prerequisites:
- Log into a Glassix account
- Expose a public HTTPS endpoint to receive events
Webhooks
Webhooks allow actions in our system to be communicated to your system., e.g.:
- Ticket documentation.
- A new Ticket
If you can't support webhooks, an alternative method of polling may be applied.
Define a Webhook URL
- Go to Settings.
Click on the symbol in the agent dashboard.
- In the Developers section, click on Events →Webhooks → Add +.
- Type a name for your webhook in the Name text box.
- In the Target text box, type <Your HTTPS Endpoint>.
- Use the checkbox to choose one or more desired Events.
- Click Save.
Info:When an event occurs in our system, a
POSTrequest containing all the relevant data will be sent to your URL.
Tip:While testing, you can use ngrok to temporarily allow requests from Glassix to tunnel to a localhost port on your computer.
A simpler way is to use webhook.site to inspect and debug webhook requests.
Response
Important:Requests time out after 20 seconds (first request) or 5 seconds (retries).
This means that we require a response that you received the webhook within 20 seconds (first request) or 5 seconds (retries). If we don't receive this response, we will cancel the request with a timeout error.
If there are 3 or more errors during one day, an email notification will be sent to workspace admins.
We expect a successful status code response (200–299) from your target URL.
If we don't receive a successful status code immediately, we'll keep the event in the queue for up to 3 days. Any events in the queue will be resent to your endpoint - at increasing intervals - until a successful status code is received, or until 3 days have passed (whichever comes first).
Webhook Validation
Note:Custom request headers cannot be set or changed for webhooks which have already been sent. Any resends will have the same headers as the original webhook.
We strongly advise validating that Glassix sent the data received via webhooks before digesting the request. Such validation is crucial for securing data and protecting your systems and servers from abuse.
Dedicated custom request headers can be added manually as an additional layer of precaution.
Further info regarding webhooks validation customer request headers can be found here.
Webhook Failure Logs
Note:Any failures you see in the webhook failure logs are due to either:
- An incorrect target URL
- An issue with the receiving server at the target URL
We keep logs of the 3,000 most recent failed requests to your target URLs in the current month, including any retries. These logs are available from the Events screen by choosing the Webhooks failure logs option:
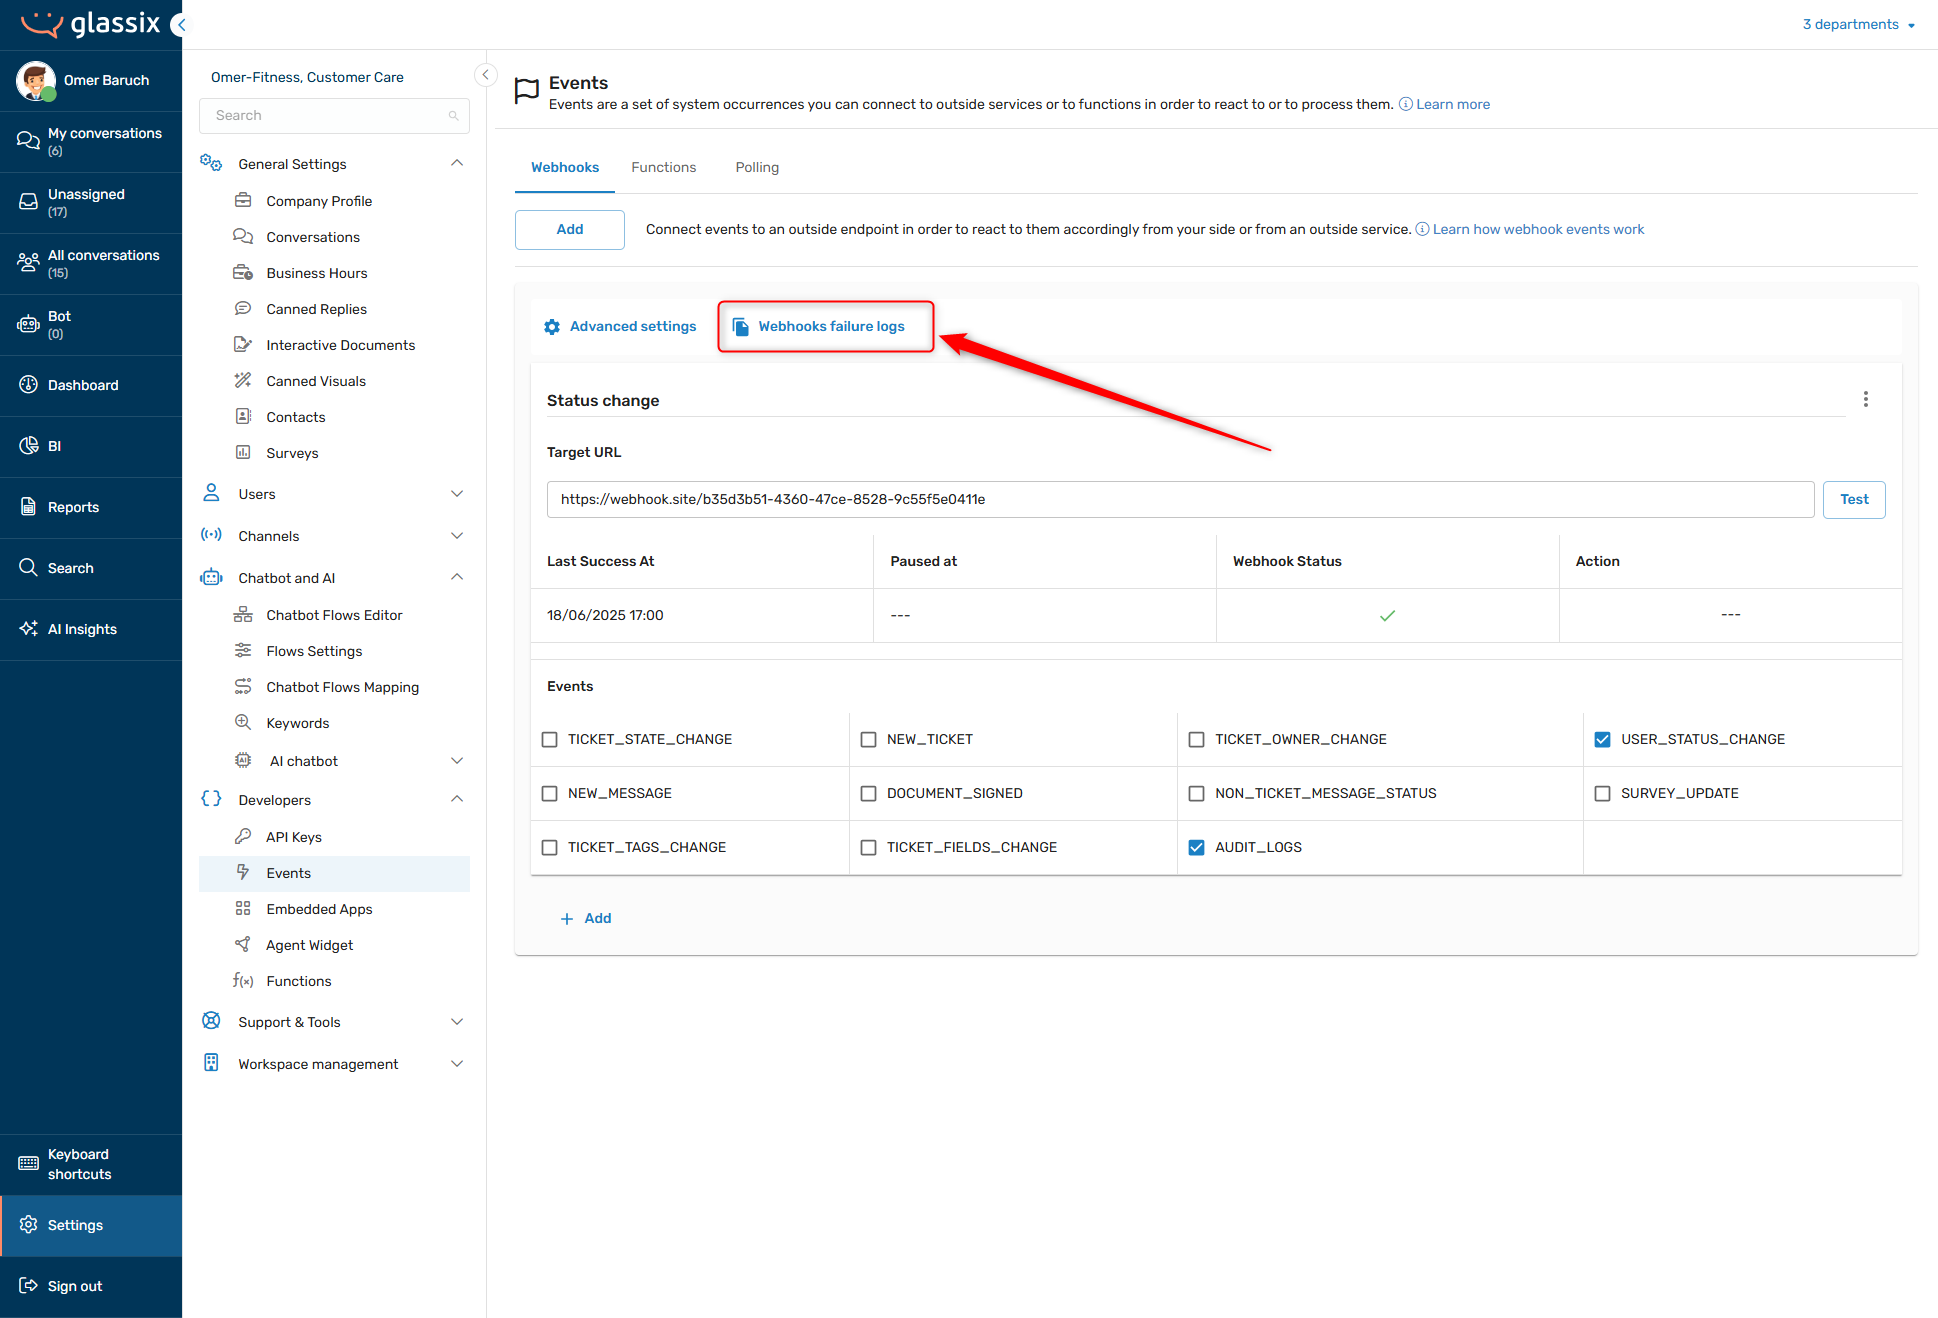
Tip:Webhook failure logs contain failures from all webhooks in the department.
A subset of the log data is available in the UI for quick reference, while full log data is available by choosing the Download as Excel option:
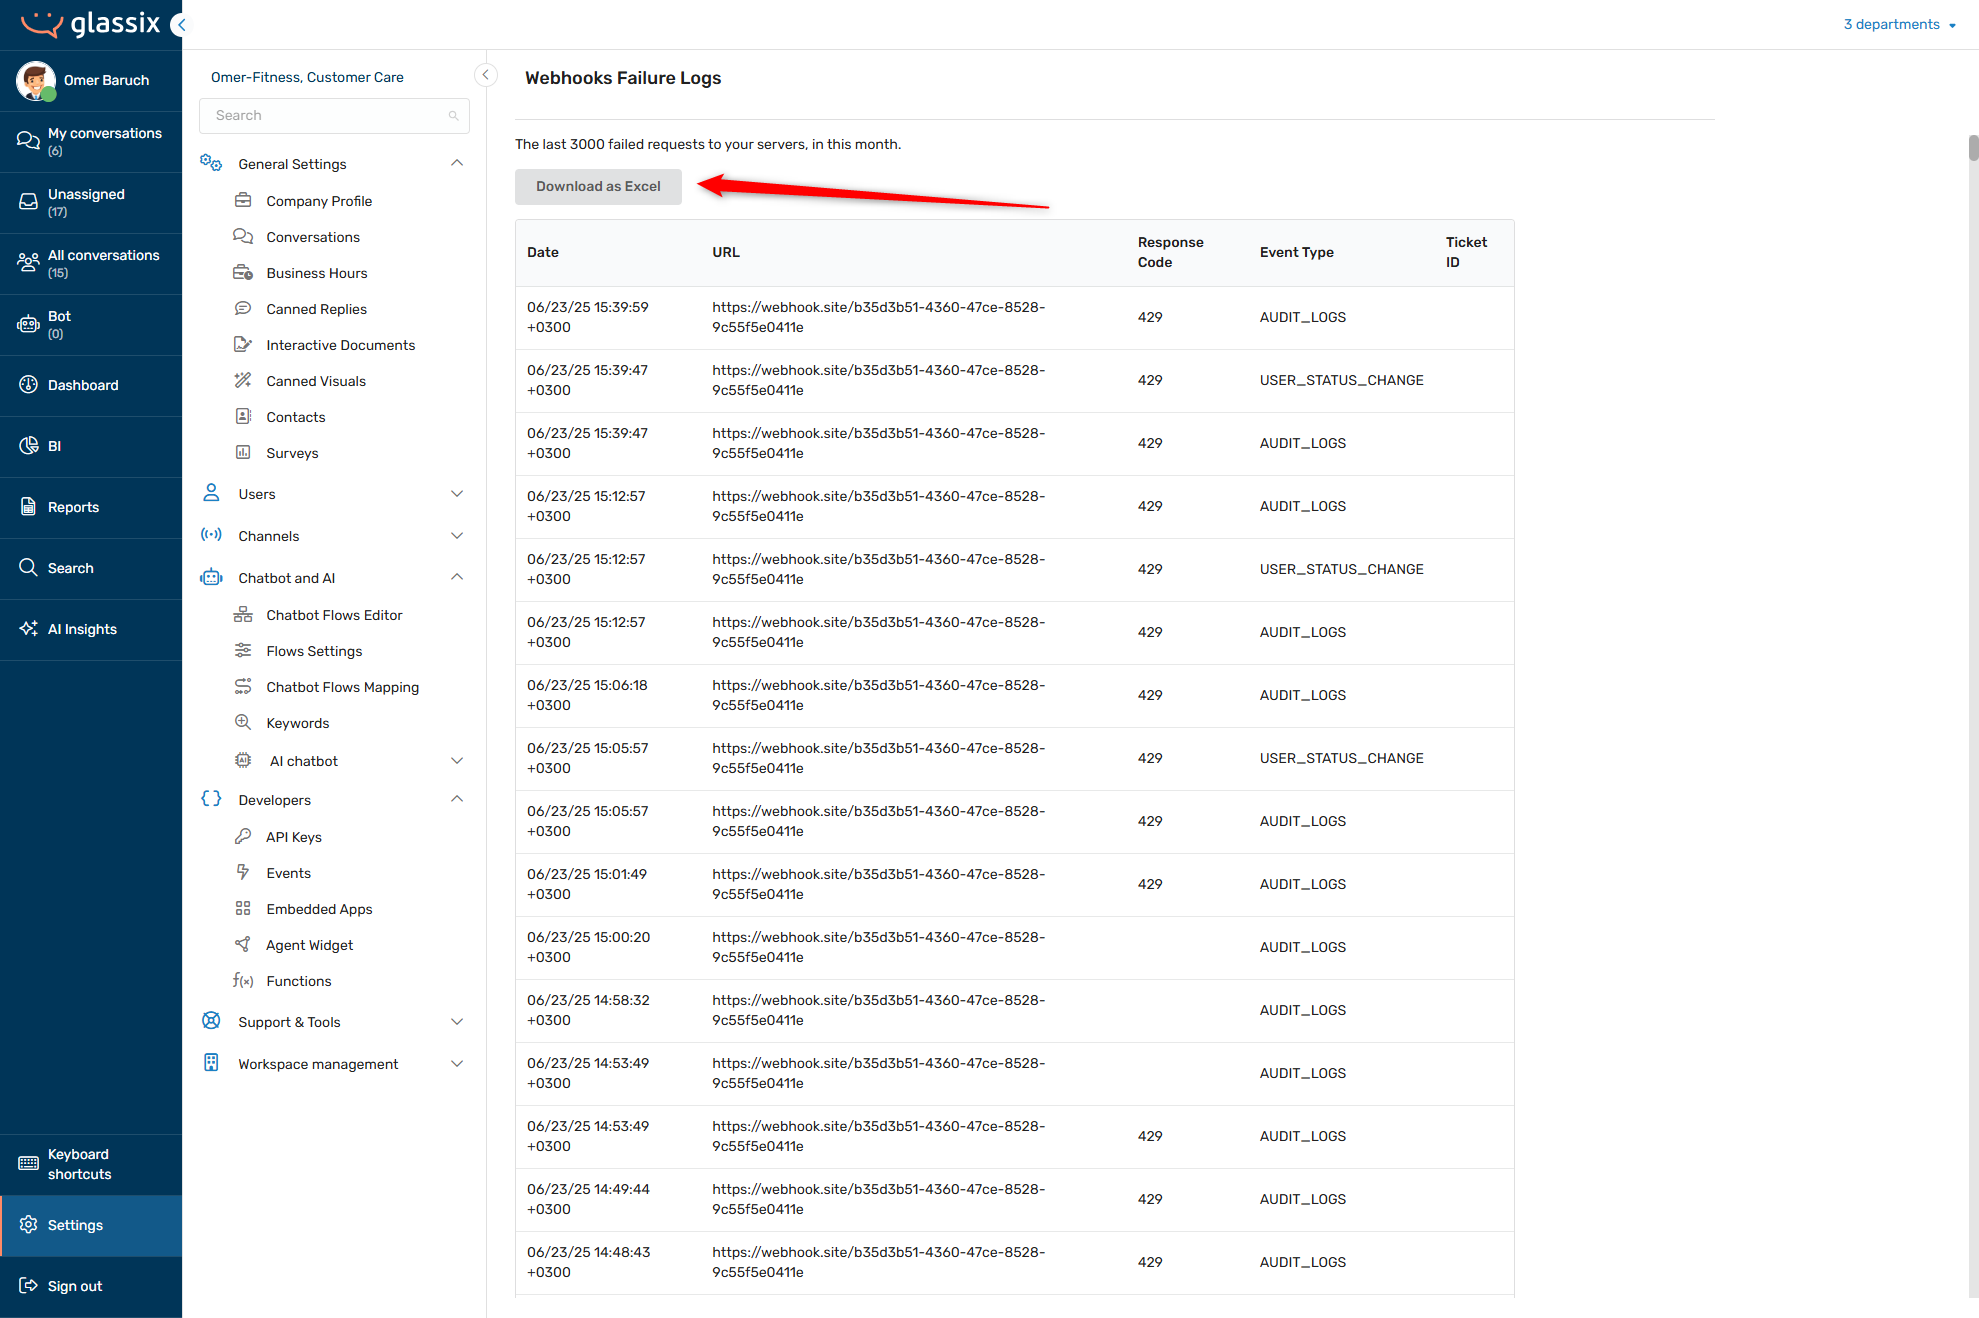
The following fields are available in the full log data:
- Date - timestamp of the request
- URL - your chosen target URL for the request
- Response Code - the response we got back from the receiving server at your target URL
- Event Type - the Glassix event which triggered the request
- Ticket ID - if available, the ID of the ticket which triggered the event. If blank, the event was not related to a ticket (for example, user status changes are not related to a ticket)
- Send Count - how many times have we tried to send this request to your target URL (any number greater than one (1) indicates a retry)
- Outbound IP Address - the IP address we sent the request from
- Trace ID - unique ID for this request, sent in the x-glassix-trace-id header of the request and useful for reconciling your logs with ours
- Request Duration - how long we spent sending this request before receiving a response or before the request timed out
- Error - the human-readable error message, if there is one
- Request Body - the contents of the request
Functions
If you don't have an outside endpoint for receiving webhooks, you can trigger a Function according to specific events. When the event is triggered, it will send the information to your function.
Read more on Functions here.
- Go to Settings.
Click on the symbol in the agent dashboard.
- In the Developers section, click on Events →Functions → Add +.
- Fill Name and select Events, Function
- Click Save.
Polling
If you can't set an endpoint to receive the events via webhooks, you can use long polling to get the events. This is useful when your servers can't be exposed to incoming requests.
Define Polling
- Go to Settings.
Click on the symbol in the agent dashboard.
- In the Developers section, click on Events →Polling.
- Enable the "Enable polling" toggle.
- Use the checkbox to choose one or more desired Events.
- Click Save.
Updated 10 months ago