Ticket Lifecycle
Prerequisite
Learn about the stages of a ticket, such as open, pending, snoozed, and closed, here.
Overview
In this article, we will understand the dynamics of a ticket lifecycle since it is essential for efficient tracking and resolution of customer issues. These tickets can originate from multiple channels such as email, WhatsApp, web chat, and others, which then move through different queues based on priority, SLAs, and unique configurations before closure. Glassix's unified omnichannel ticketing and AI-driven support help provide better responses to customers.
Ticket Creation
The platform automatically creates a ticket when a customer reaches out through any supported channels, like web chat, WhatsApp, text message, email, or social media channels like Facebook, Instagram, TikTok, etc.
Here's an example of a web chat. When you go to Glassix, click on the chatbot, and submit your query, this creates a ticket. Similarly, tickets are created via the other supported channels when customers reach out.

An agent could also manually create a ticket for the customer, for example, if the customer reaches out via phone call.
You could also create tickets using our API here. At this stage, a ticket is in an Open state.
Ticket Assignment
Whenever there is a new ticket, it gets automatically assigned to an available agent based on the platform's algorithm. If no agents are currently available, the ticket is in the Unassigned Queue, waiting to be assigned. Meanwhile, the system automatically responds to the customer if automated messaging is enabled.
While in the Unassigned Queue, the algorithm continuously checks for agent availability and assigns the ticket when someone becomes free. And then there's also an option never to assign automatically - the ticket will just sit in the Unassigned Queue until someone pulls it into their inbox manually. During this entire process, the ticket remains in the Open state.
Once assigned, the ticket moves from the Unassigned Queue to the agent's My Conversations Queue, essentially their inbox. At this stage, when an agent responds to the ticket, the ticket state moves to the Pending state. It remains in the Pending state even when the agent waits for the customer's response.
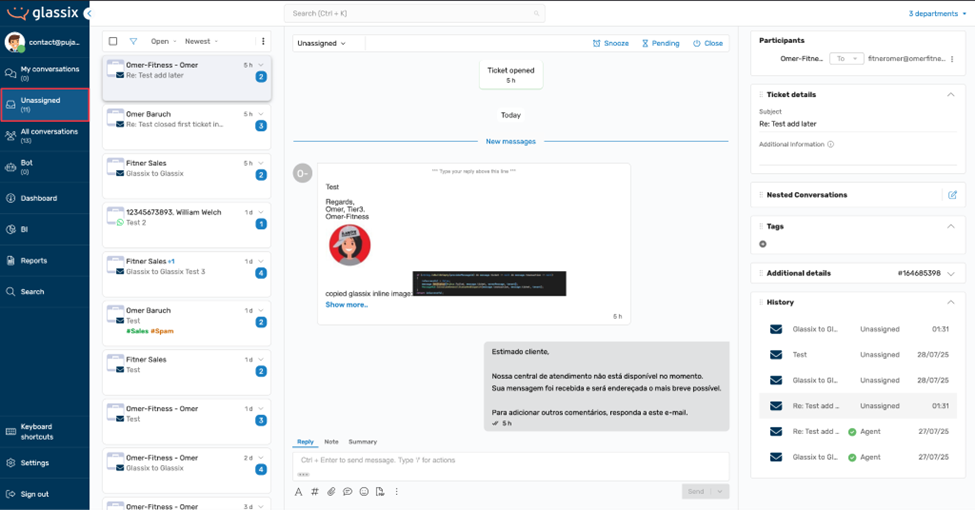
When you click on a particular ticket, the details about the ticket, like participants, ticket details, nested conversations, etc., are on the right side. We will discuss these fields in the next section. These fields help provide more details and manage the ticket.
Note:
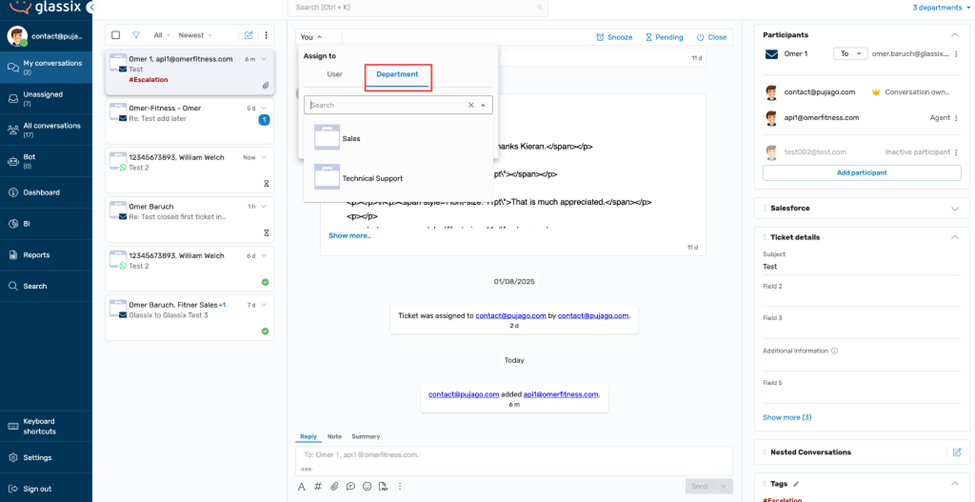
Tickets can be reassigned not just to other agents or bots, but also across departments. For example, a ticket can be sent to the Sales department to discuss pricing.
Ticket Investigation and Prioritization
Once a ticket is assigned to an agent, the ticket is in the Open state, and the agent continues to answer the customer and determine the next steps. If a response is needed from the customer, the agent may leave the ticket in the Open state or switch it to Pending to indicate they are awaiting a reply.
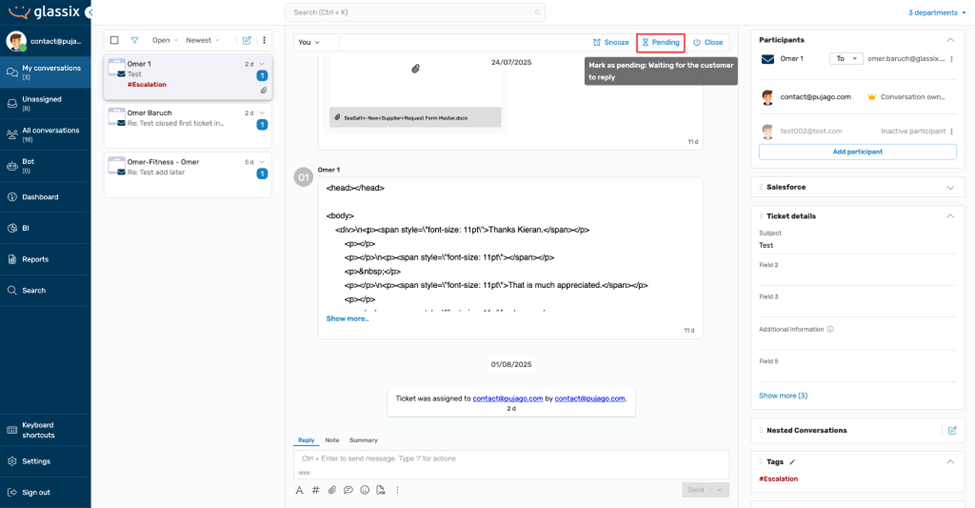
If the agent needs to wait on internal feedback or action, they can Snooze the ticket temporarily, allowing it to reappear automatically after a set duration.
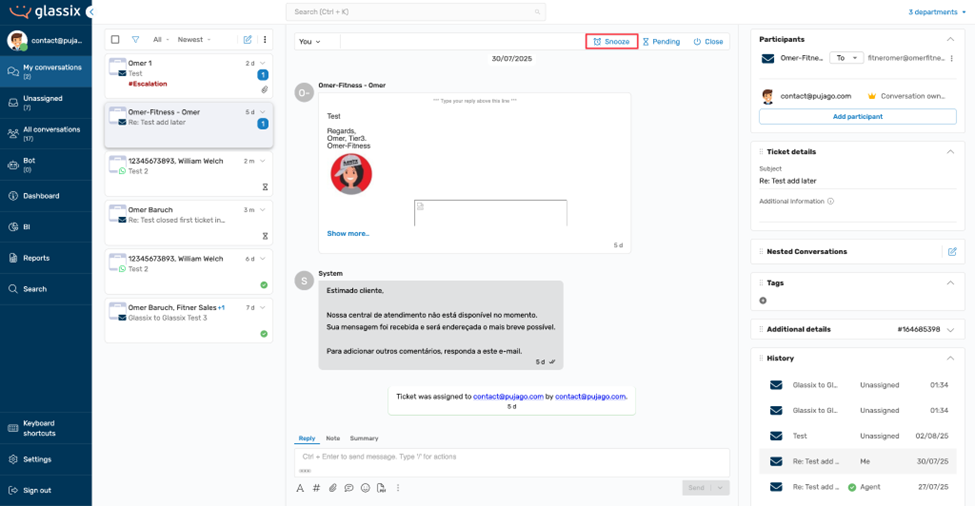
Snoozing temporarily allows a conversation to pause, and the ticket will automatically reopen after the designated time. If a ticket is closed and the customer replies within a timeframe set by the organization, the same ticket will reopen. However, a new ticket will be created to handle the follow-up separately if the response comes in after that window has passed.
Note:
A snoozed or pending ticket remains in the same queue unless specified otherwise by adding a public note.
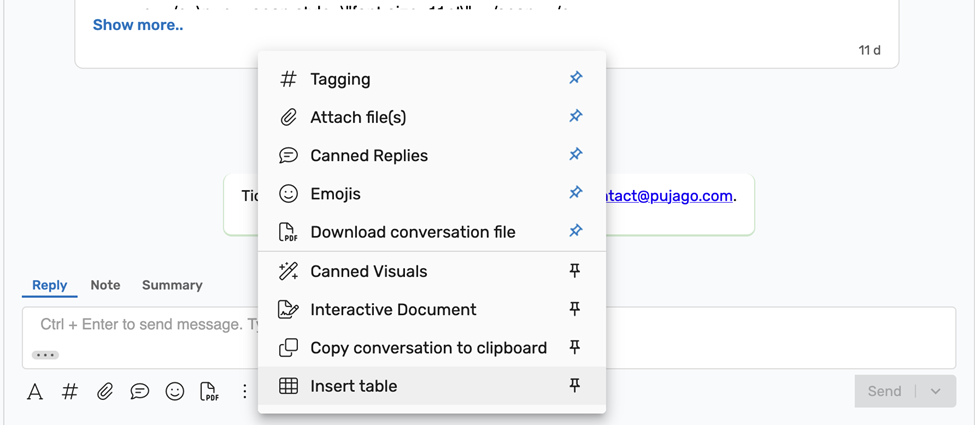
Throughout the ticket's lifecycle, agents can access several productivity tools to enhance their workflow:
- Each ticket supports normal replies and internal notes (under the Note tab), allowing for external communication and internal collaboration
- The Summary tab is AI-driven, which helps summarise the ticket conversation
- Agents can apply tags directly from the sidebar or inline using hashtags
- Canned replies, or macros, are available to streamline responses to frequently asked questions
- Support for file attachments, emojis, and PDF download, with the option to pin essential tools to the agent's toolbar for quick access
Ticket Prioritization
Each channel has its own assignment rules, which the admins manage. Most customers use automatic assignment, where tickets are routed based on a defined hierarchy.
For example, the system checks for VIP tags first. If not found, it looks for other tags to assign tickets to specific agents or departments. If no tags match, it falls back on agent availability. The order of channel priority, such as texts first, then WhatsApp, Instagram, and email, is also considered if defined.
If all else is equal, tickets are assigned based on their waiting time. Breached SLA tickets are assigned immediately. While agents simply see tickets flow into their My Conversations view, the routing logic behind it ensures efficiency and priority handling.
Ticket Details
The following section speaks about the ticket details:
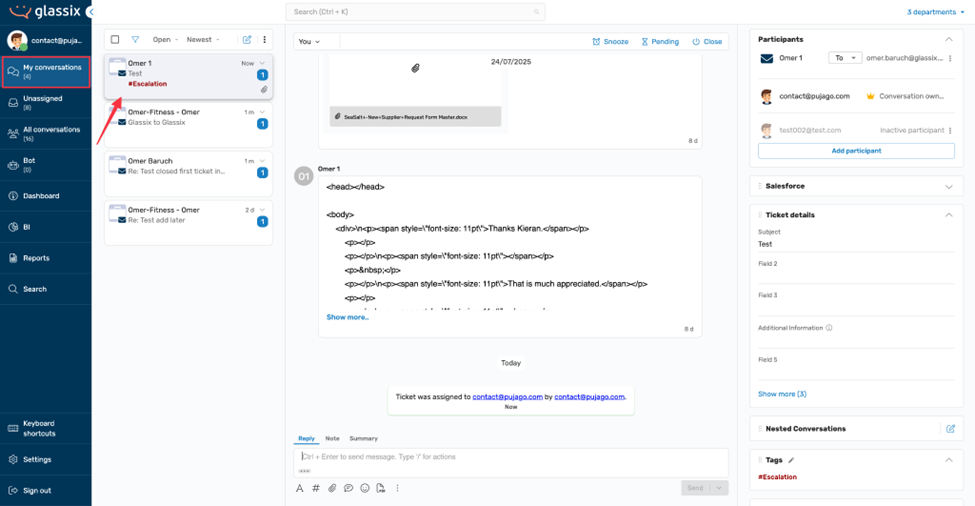
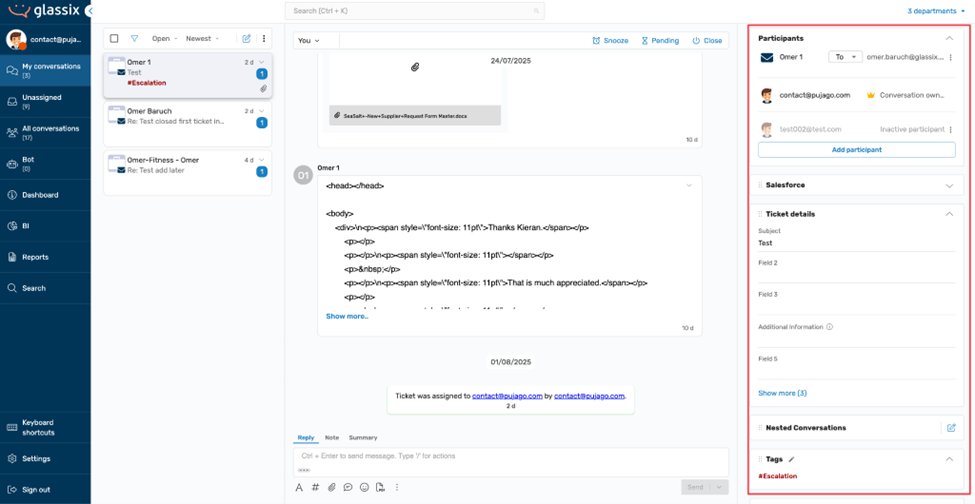
Adding a Participant
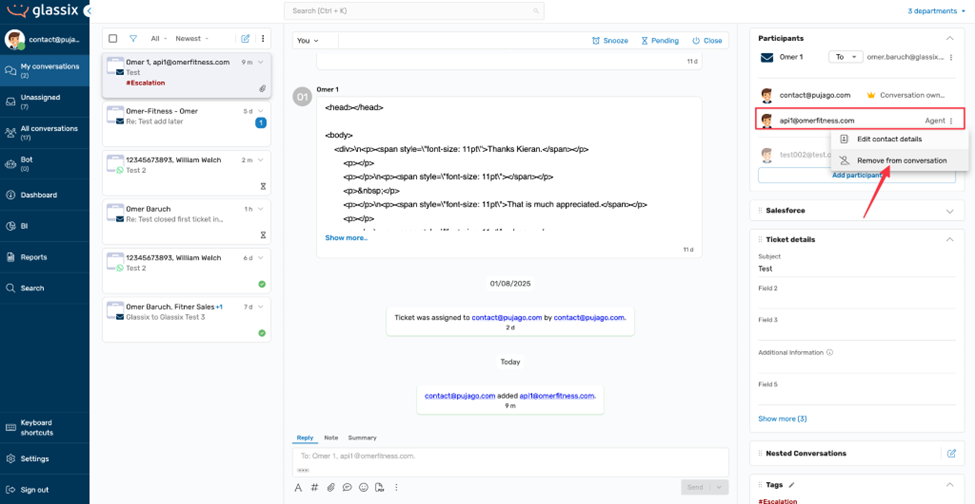
Any existing Contacts or Agents can become Participants in a ticket when they engage in a conversation. These additional participants can be added to provide more input to resolve the ticket. Participants and agents can be added or removed from tickets at any point. Agents can also reassign tickets to bots mid-conversation, for instance, to handle ID verification.
Note:
Outbound messaging is supported on select channels like SMS, WhatsApp, and email, but not on platforms like Facebook due to external limitations.
To add a participant to a ticket, click Add Participant.
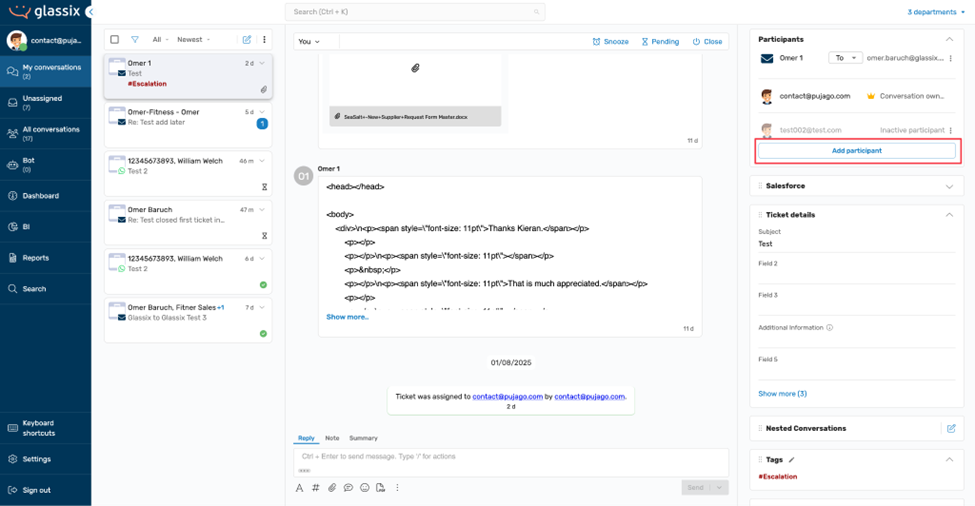
Add the customer and contact details in the next pop-up and click Save changes.
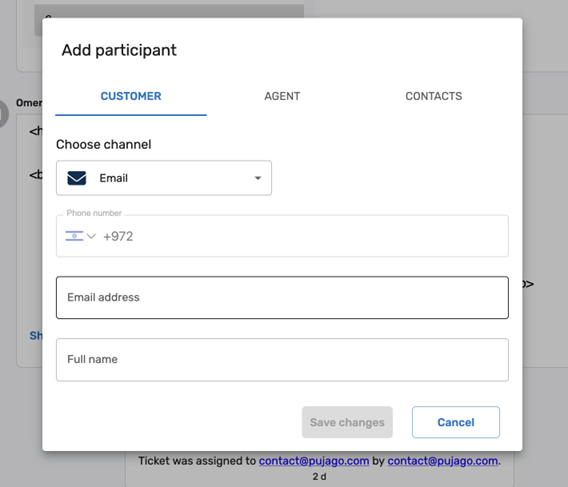
The participant is now available to provide input on the ticket. To remove the participant, click the three-dot menu and choose Remove from conversation.
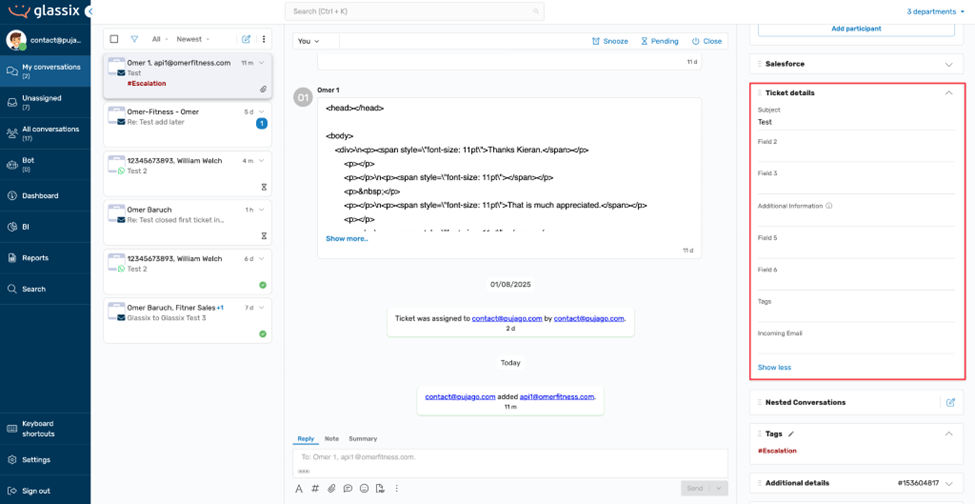
Ticket Details
The ticket details fields provide more insight into the ticket. Many of these fields can be auto-filled by AI if the feature is enabled. The AI populates them based on available inputs, but all fields can also be manually edited. Importantly, any AI-suggested content is never sent automatically; it always requires agent review and confirmation before sharing.
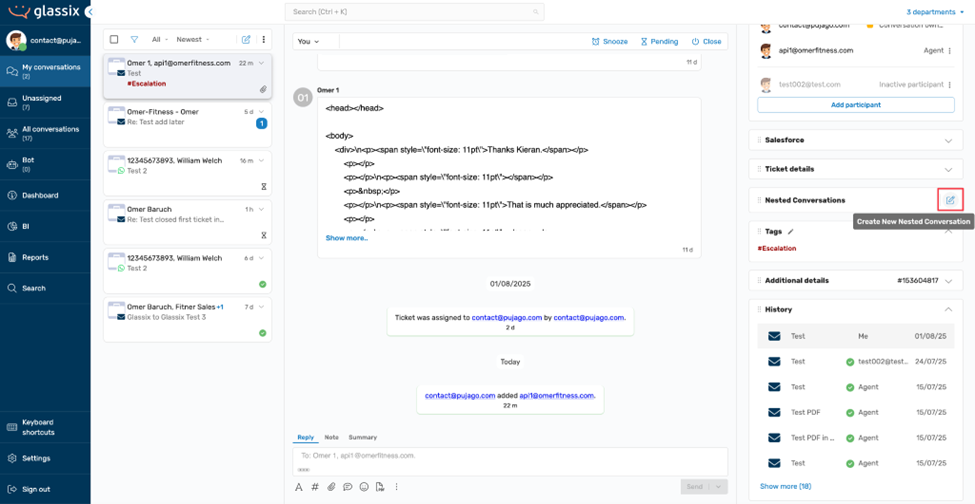
Nested Conversations
When a ticket lands in your inbox and if you're part of the sales team but need input from your engineering or product team, you can use a Nested conversation. This feature allows you to create a child ticket within the main ticket. The nested conversation is private; the customer can't see it. It's intended for internal collaboration between agents or departments.
To create a nested conversation, click on the nested conversations button.
Next, a pop-up appears where you can enter the contact and ticket details.

Click on Create to create the nested conversation.
- The nested ticket can include the full conversation history of the parent ticket or be started fresh
- Nested conversations are not visible in general queues like Unassigned or My Conversations. They only appear under the Nested Conversations section within the parent ticket
- Any update in a nested conversation affects the parent ticket despite being hidden from regular queues. So if the parent ticket was closed, snoozed, or pending, and the nested conversation receives a new message, both tickets automatically reopen
Tagging
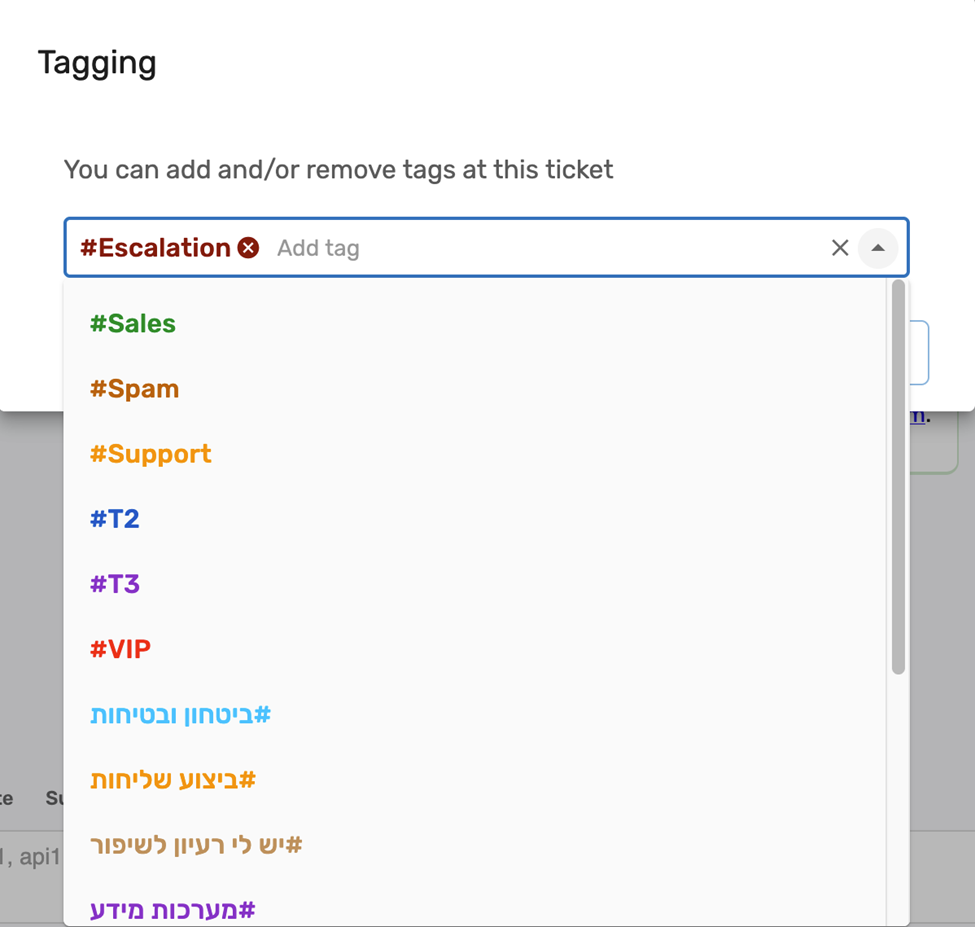
Tags play a key role in automation and ticket routing. Unlike fields, which agents can freely fill out, admins can predefine tags, which agents cannot create. Agents can only add or remove tags from tickets. Admins define tags in the Settings panel, which is only accessible to them. From there, they can create tags, assign colors, and specify which tags are visible to agents or bots.
To add a tag, click the pencil icon, followed by the plus sign.
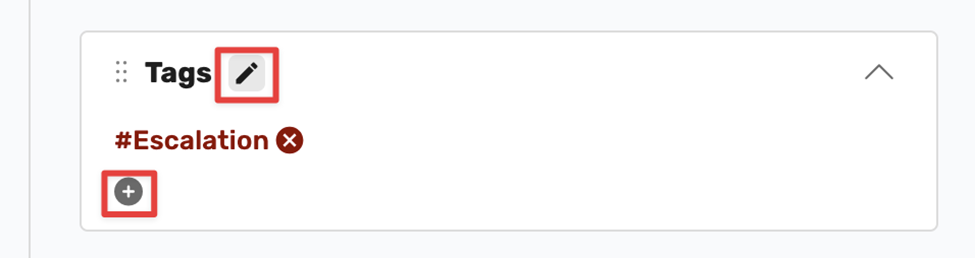
Choose the tag from the list and click Save.
To remove a tag, click on the cross sign beside the tag.
Additional Details
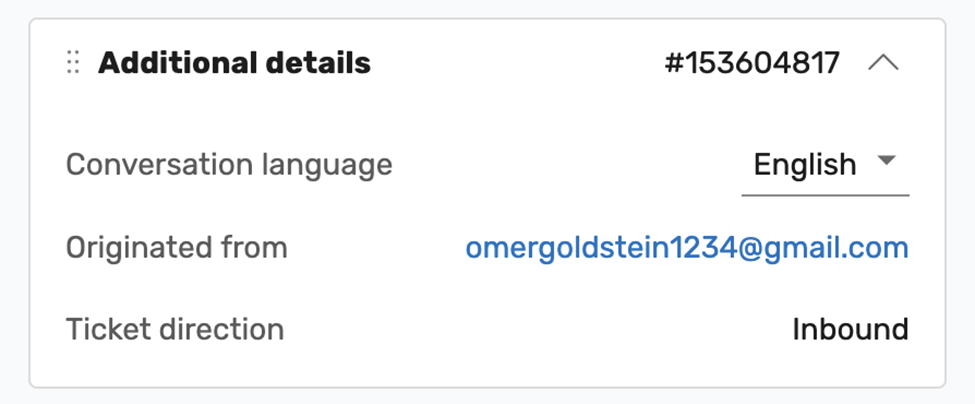
Under additional details, you can find the language setting. Language settings determine which macros and message templates are available and control which automation flows are triggered behind the scenes. This means you can run different automation workflows for different customer groups. For example, Spanish-speaking customers can have a different experience from American or British customers. The selected language automatically sets the corresponding region, and the rest of the settings adjust accordingly.
History
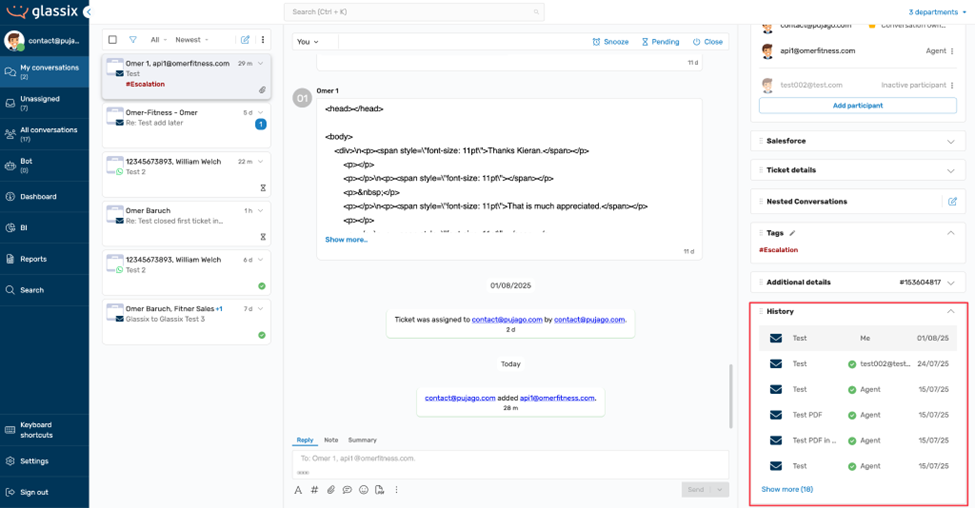
A history view is available on the ticket, which allows agents to browse previous tickets involving the same primary participant. This view is interactive and displays full conversation threads, but you'll need to open the actual ticket if you want to take any action. While nested conversations don't appear in this history view, previous interactions tied to the customer will. Helping agents quickly understand past context during the current ticket lifecycle.
Note:
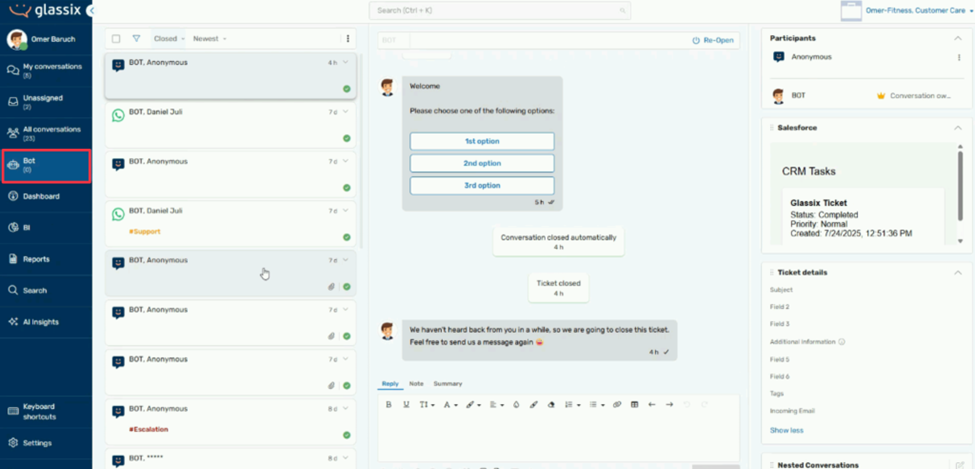
Tickets handled entirely by bots or returned to bots after brief human interaction are stored in a separate Bot queue. To avoid overwhelming the interface, these tickets don't appear in any agent's or all-conversations queue, especially for large teams receiving thousands of bot-handled tickets per minute. A ticket remains in the Bot view unless assigned to or pulled by a human agent.
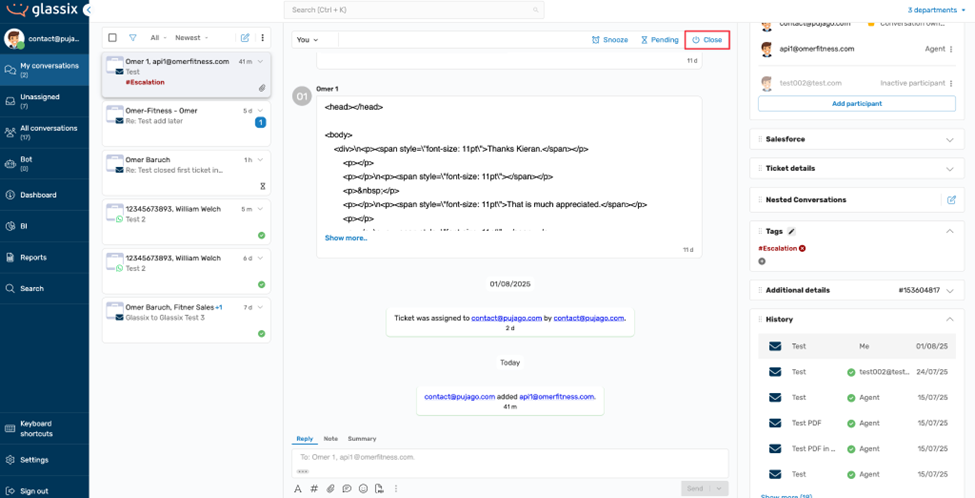
Ticket Resolution and Closure
The agent closes the ticket when the issue is resolved, marking the end of the ticket's lifecycle. The ticket is now in the Closed state.
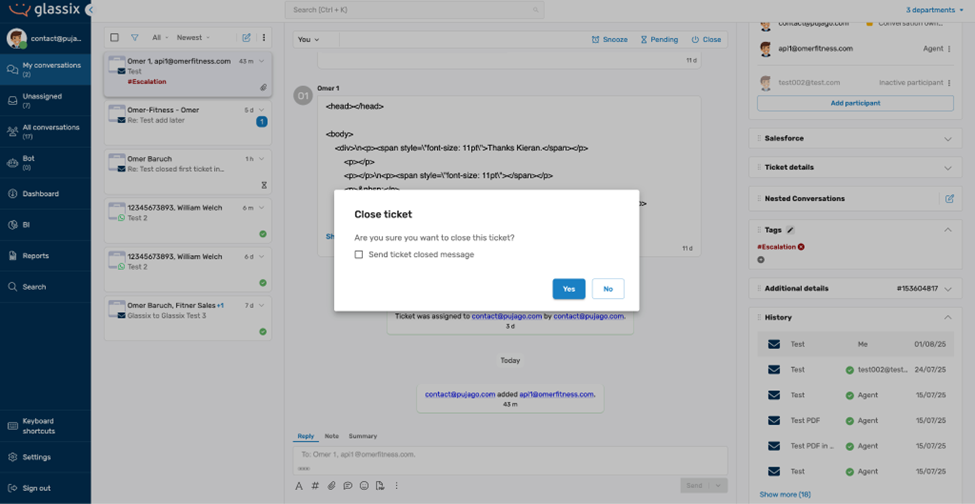
At the point of closure, the system may prompt the agent to complete a summary, apply relevant tags, or fill out any mandatory fields. While AI can assist in generating summaries or suggesting field entries, nothing is ever submitted automatically. Agents review and approve all AI-generated content before closing the ticket.
Updated 11 months ago