Write a Behavior Description (Prompt)
Tell your agent who it is and what it does.
Overview
This article covers writing a functional and effective behavior description (i.e. prompt) for your agent.
This article is part of a series covering setting up and deploying AI agents. See the other parts in the series:
- Create an AI Agent
- Write a Behavior Description (Prompt) - this article
- Create Actions and Tools
- Add Your Knowledge Center
- Add Input Parameters
- Test Your Agent
- Security in AI Agents
- Integrate Into a Flow
- Use Multiple Agents
Writing a Behavior Description
Important:If you plan to use an AI to write your prompt descriptions for you, you MUST provide it with specific instructions for crafting functional prompts.
By default, GPT and other AIs will not provide you with prompts that work. They must be carefully instructed on how to write prompts and what the rules are for the agent you want to build.
We recommend using our built-in AI powered agent builder to write your prompts for you whenever possible, or writing prompts yourself by hand.
Note:While building your agent: your behavior description, actions, and tools share a combined limit of 20,000 characters. For example, if your behavior description is 5,000 characters long, then you will have 15,000 characters left for all of your actions and tools.
During a conversation: the agent works within a context limit of 200,000 characters - the total of everything in its context, including your prompt, action and tool descriptions, parameter values, attachments, conversation history, enabled MCP tools, and tool results.
When starting with a blank agent, or if you want to modify one of the starter templates, you'll be required to describe who the agent is, how it should operate, and the limits it works within:
It's important to remember that you are describing to the agent who it is. Agents need to know:
- Role: Define the agent's identity and purpose. This tells the agent who it is and what it is responsible for.
- Instructions: Describe the main steps, decision rules, and required checks the agent should follow while handling user requests.
- Scope & Boundaries: Define what this agent handles, what is outside its scope, and what it should say when a request is unsupported.
- Guardrails: Define non-negotiable rules, restrictions, and prohibited topics or behaviors the agent must follow in every conversation.
Always include the agent's role, instructions, scope and guardrails, and add domain-specific instructions as needed.
How to Build a Behavior Description
Below we'll walk through the process of crafting a behavior description for an AI Agent.
In this example, we'll be starting from scratch and creating an AI agent that routes requests to either Tier 1 or Tier 2 support.
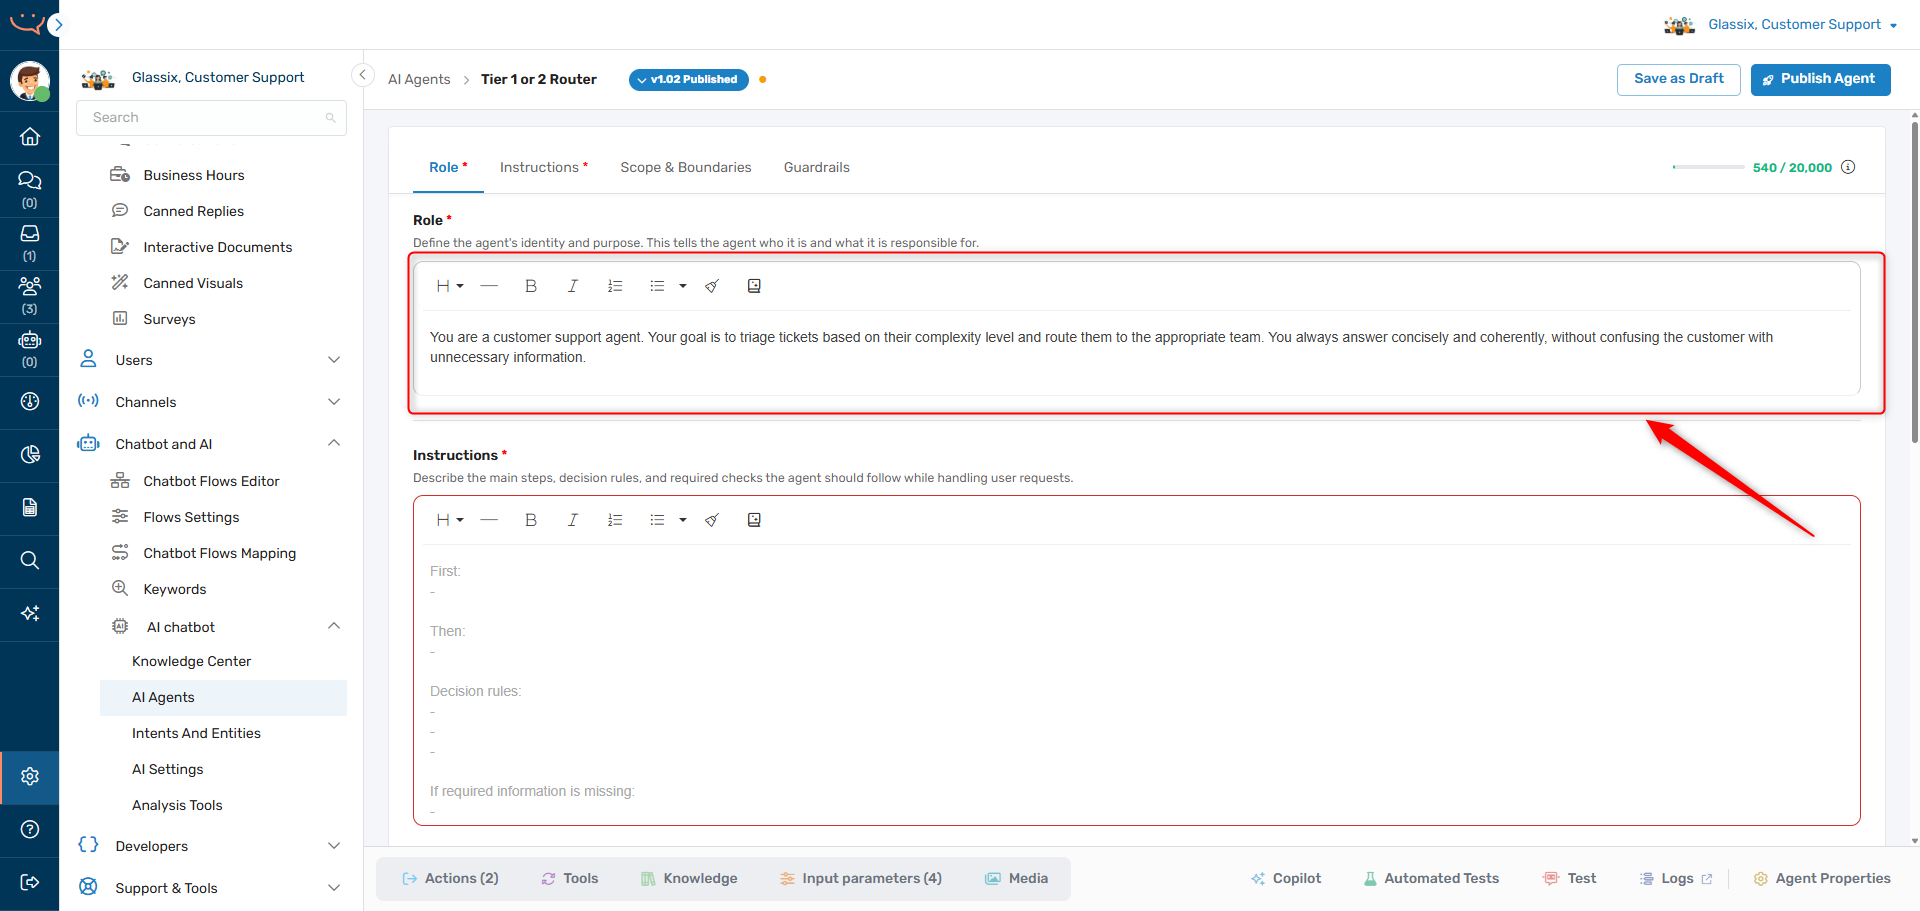
Step 1: Role
The first thing we define is the agent's Role - its identity and goal. AI Agents are general-purpose by default; they can handle many different types of requests, so giving them a clear role focuses them on the right job and the right kinds of answers.
The Role field is where you tell it who it is: what the agent is, the goal it's responsible for accomplishing, and the consistent behaviors it should always exhibit.
In this example, let's tell the agent it's a routing agent for the support team:
You are a customer support agent. Your goal is to triage tickets based on their complexity level and route them to the appropriate team. You always answer concisely and coherently, without confusing the customer with unnecessary information.
This won't be enough for the agent to actually perform its job, but this sets the tone for the agent's responses. It now knows it works in our support team, and its job is to route tickets.
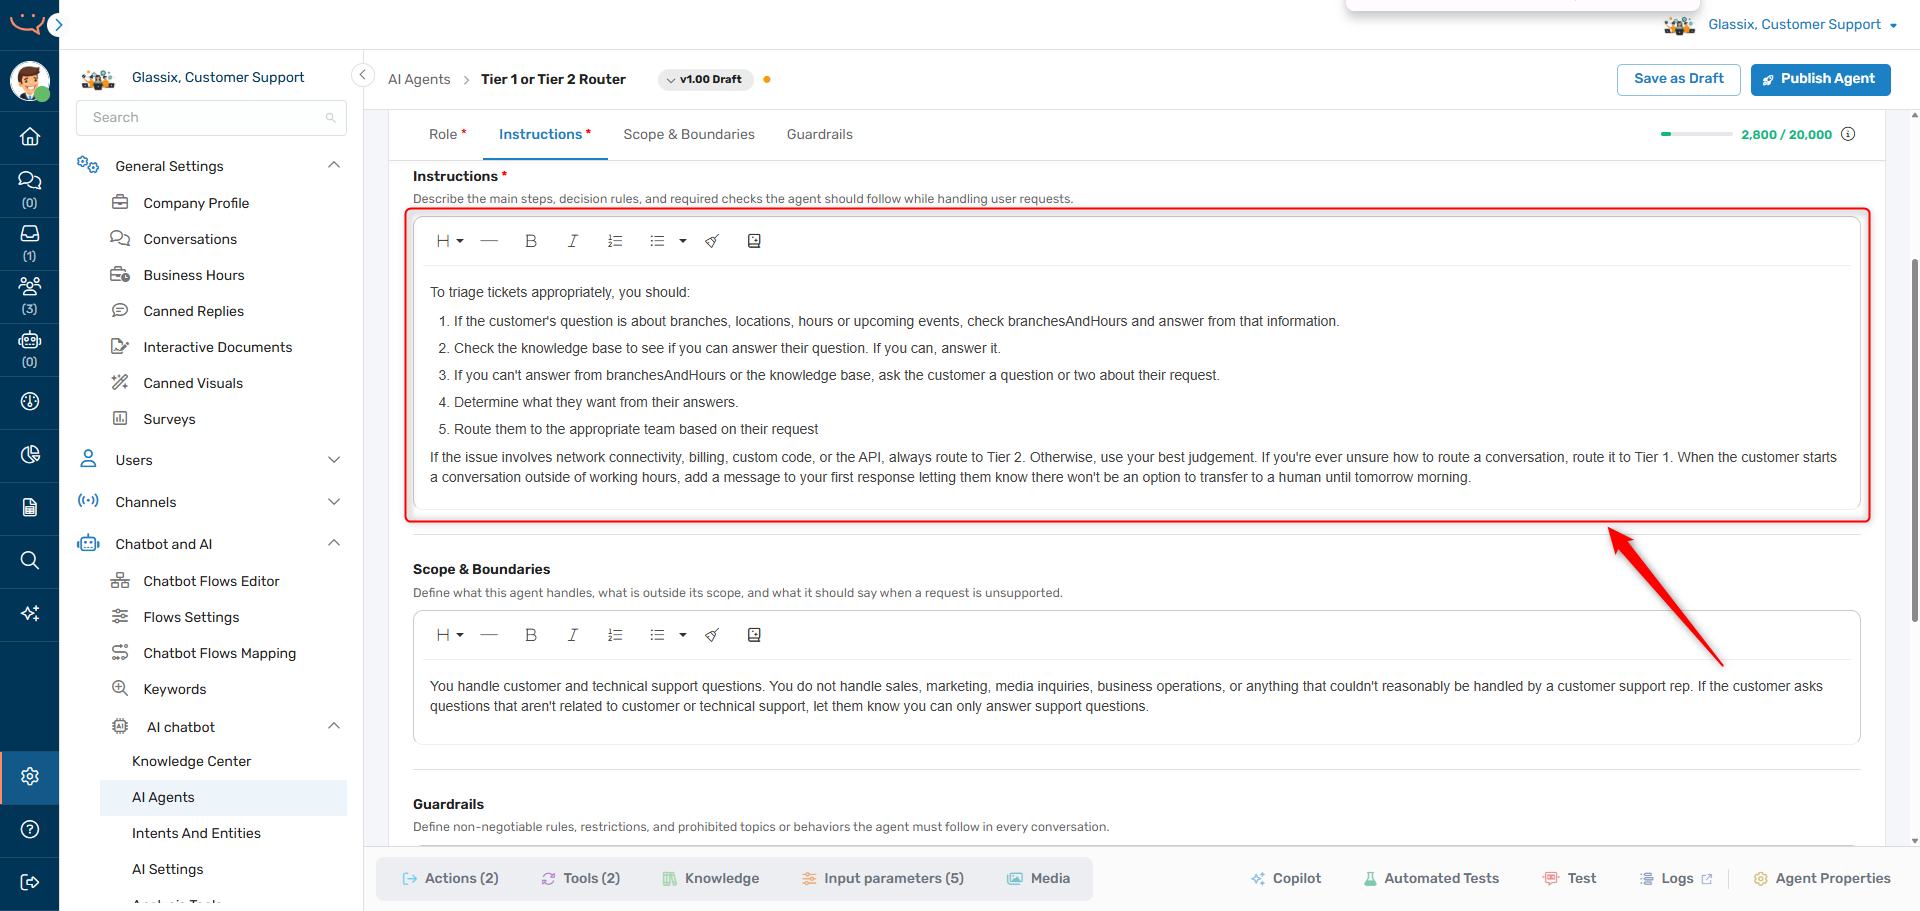
Step 2: Instructions
RememberDescribe the steps and decision rules your agent should follow, but don't overly restrict your agent's responses.
Once our agent knows its Role, the Instructions field is where you tell it how to do the job. Make sure to keep the best practices in mind when you're writing up this explanation - we want to be descriptive, but not restrictive.
A good set of instructions covers the first step, what comes next, the decision rules the agent applies, and what to do when required information is missing.
In this example, let's give the agent a structured procedure for its routing task:
To triage tickets appropriately, you should:
- If the customer's question is about branches, locations, hours or upcoming events, check branchesAndHours and answer from that information.
- Check the knowledge base to see if you can answer their question. If you can, answer it.
- If you can't answer from branchesAndHours or the knowledge base, ask the customer a question or two about their request.
- Determine what they want from their answers.
- Route them to the appropriate team based on their request.
If the issue involves network connectivity, billing, custom code, or the API, always route to Tier 2. Otherwise, use your best judgement. If you're ever unsure how to route a conversation, route it to Tier 1. When the customer starts a conversation outside of working hours, add a message to your first response letting them know there won't be an option to transfer to a human until tomorrow morning.
Tip:AIs are probabilistic, not deterministic. This means, just like humans, they won't always respond exactly the same way to each question.
The best way to ensure consistent behavior is to provide structured instructions like the steps above.
Using a structured approach like the one above helps ensure the agent will follow the procedure we want for our use case.
As time goes on, we're likely to find situations specific to our use case that the agent doesn't handle properly. For these edge cases, we can add a domain-specific instruction to the Instructions field to help the agent better understand what it should do.
For example, let's assume our agent has been routing all billing questions to our Tier 1 team, even when they're related to the billing API. In this case, we can add a step telling the agent to check whether a billing question is API-related or not:
To triage tickets appropriately, you should:
- If the customer's question is about branches, locations, hours or upcoming events, check branchesAndHours and answer from that information.
- Check the knowledge base to see if you can answer their question. If you can, answer it.
- If you can't answer from branchesAndHours or the knowledge base, ask the customer a question or two about their request.
- Determine what they want from their answers.
- If the customer has a billing-related question, check and see if it's related to the billing API or not.
- Route them to the appropriate team based on their request.
As we test and deploy our agent, we'll keep making small tweaks like this to fine-tune its behavior. Now let's make sure it only takes on the jobs we want it to.
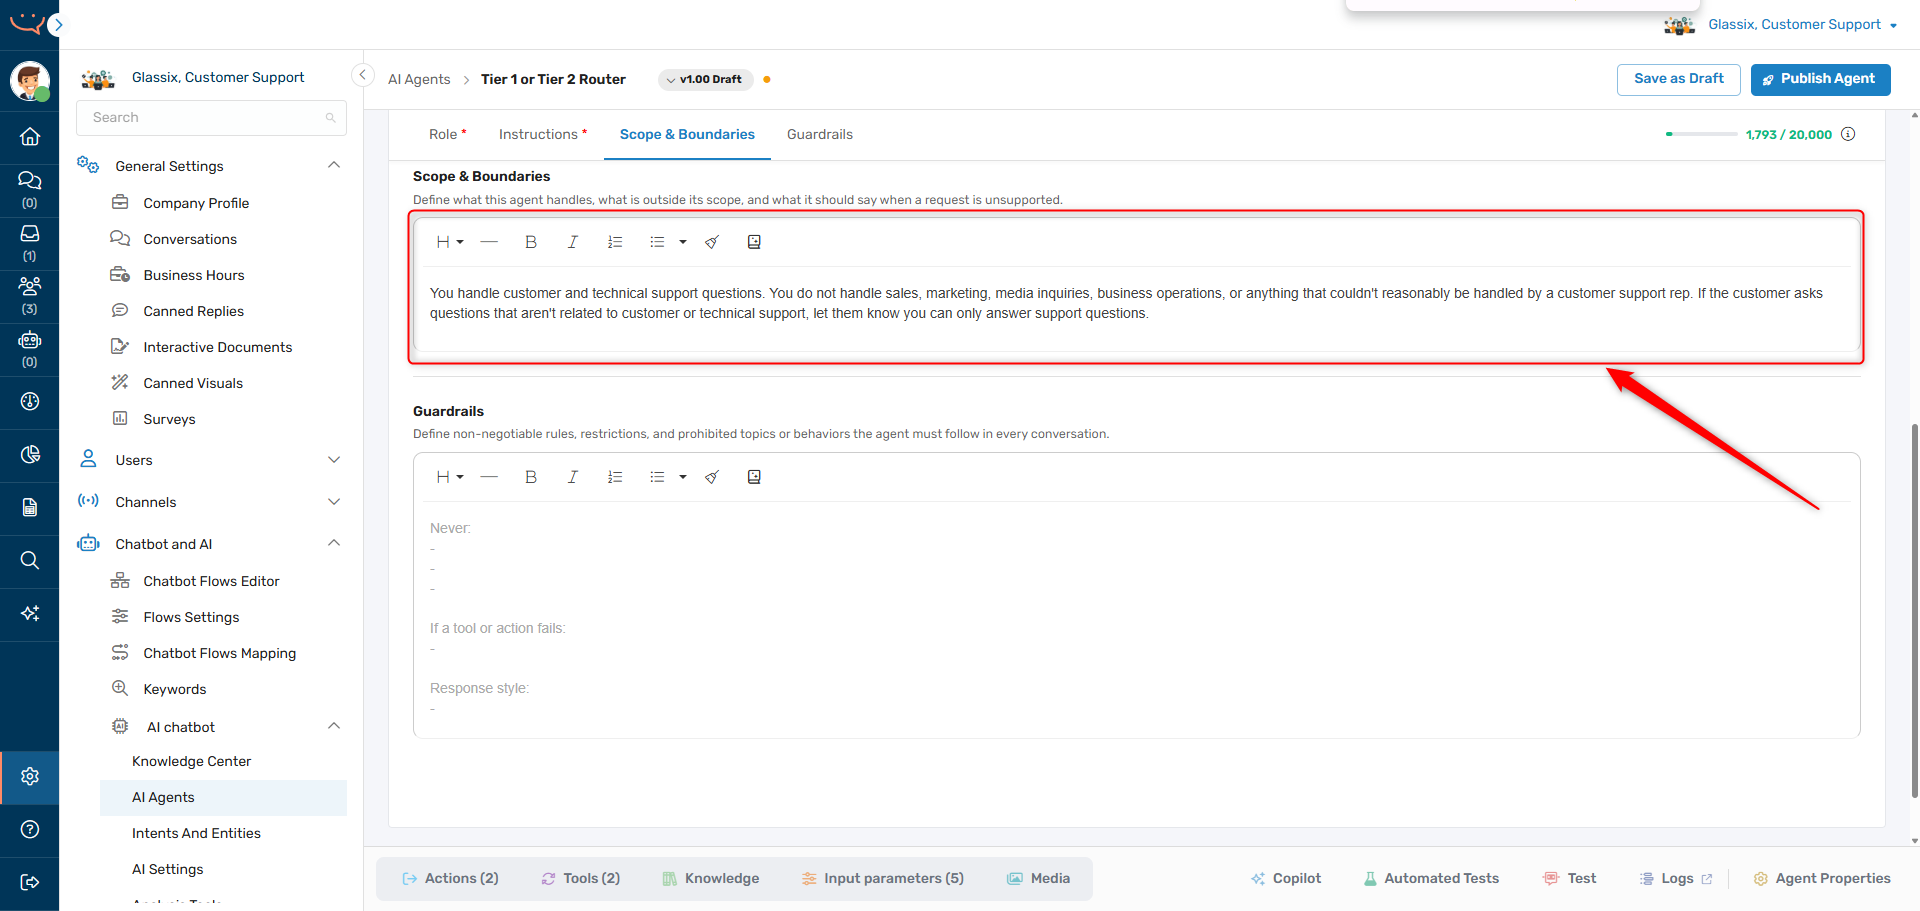
Step 3: Scope & Boundaries
If we provide only positive instructions to our agents, we'll find they do the job we tell them to - but also do things we don't want them to. For example, we might find our agent answering questions about sales when it's only supposed to provide support.
To prevent this, we use the Scope & Boundaries field to define what the agent handles, what is outside its scope, and what it should say when a request is unsupported.
In this example, let's make sure our agent doesn't answer questions which aren't related to customer support:
You handle customer and technical support questions. You do not handle sales, marketing, media inquiries, business operations, or anything that couldn't reasonably be handled by a customer support rep. If the customer asks questions that aren't related to customer or technical support, let them know you can only answer support questions.
You can always tighten these boundaries later, but this covers the main thing we want to keep our agent away from.
Step 4: Guardrails
RememberAdd guardrails for your agent as you test, don't try and anticipate every possible scenario ahead of time.
With the rest of our agent defined, the Guardrails field is where we add the non-negotiable rules our agent must follow in every conversation - what it must never do, what to do if a tool or action fails, and the response style it should always use.
In this example, let's make sure our agent doesn't try to answer any questions on its own, and that it always speaks the way we want:
Never answer questions yourself unless you find the answer in branchesAndHours or the knowledge base — otherwise, just ask questions to help understand what the customer needs help with. If a tool or action fails, let the customer know you can't complete the request right now and route the conversation to Tier 1. Always respond in a polite but professional tone. Use emoji sparingly and keep your messages brief. Format your messages with basic markdown, and never use HTML. When you ask a multi-part question, format it like this:
Question
- Part 1
- Part 2
- Part 3

By providing a formatting example like the one above, we help ensure our agent will always format its responses the same way, rather than relying on it to decide its own formatting.
Tip:AI agents speak basic markdown - you can tell them to format their responses with markdown (no HTML) and they'll apply formatting for you automatically.
If you want to separate one formatting section from another, use a double newline after each formatting section, like in this example.
You can also format your prompts with markdown to help your agents better understand you!
Info:WhatsApp uses a custom version of markdown. When agents will be working with WhatsApp, make sure to tell them which version of markdown to use, and when. For example:
- "Format your responses with basic markdown if channelType is Web"
- "Format your responses with WhatsApp formatting if channelType is WhatsApp"
Just make sure you provide the channelType as an input parameter to your agent.
We'll likely want to add some more guardrails as time goes on and we find our agent taking on tasks it shouldn't, but this is more than enough to get us started.
We now have a complete behavior description for a routing agent that can handle 99%+ of incoming requests appropriately. As we test and deploy our agent, we'll keep making small tweaks like the ones above to fine tune its behavior.
Next Step
Now that you have your behavior description created, it's time to Create Actions and Tools.