Use Custom Headers in Voice Flows
Pass data to and from your telephony provider
Overview
Custom SIP headers allow you to pass additional data between your telephony infrastructure and your voice flows. This is useful when you need to send additional information like customer identifiers, session tokens, or routing information alongside a voice call.
Custom headers can be captured and used for both inbound and outbound calls:
- Inbound: Headers from an inbound call can be saved to dynamic parameters for use in your flow
- Outbound: Custom headers can be added when transferring a call to an external destination
Receive SIP Headers
When an inbound call arrives through a SIP connection, the SIP INVITE may include custom headers set by your PBX, SBC, or carrier. You can capture any one of these headers and make its value available inside your flow in a dynamic parameter.
Info:The value of the header can be any UTF-8 string but the key is restricted to the ASCII character set (A-Z, a-z, 0-9)
This is done by creating a dynamic parameter whose key is SIP_ followed by the header's name. When a call arrives, the system will automatically fill this parameter in with the header's value.
Tip:The automatic matching is case-insensitive and underscores and hyphens are interchangeable.
If the header in your SIP INVITE is called
Account_ID, for example, any of the following dynamic parameters will match and be filled automatically:
SIP_ACCOUNT-IDSIP_account-idSIP_account_IDSIP_Account_ID
Creating Dynamic Parameters for Incoming SIP Headers
-
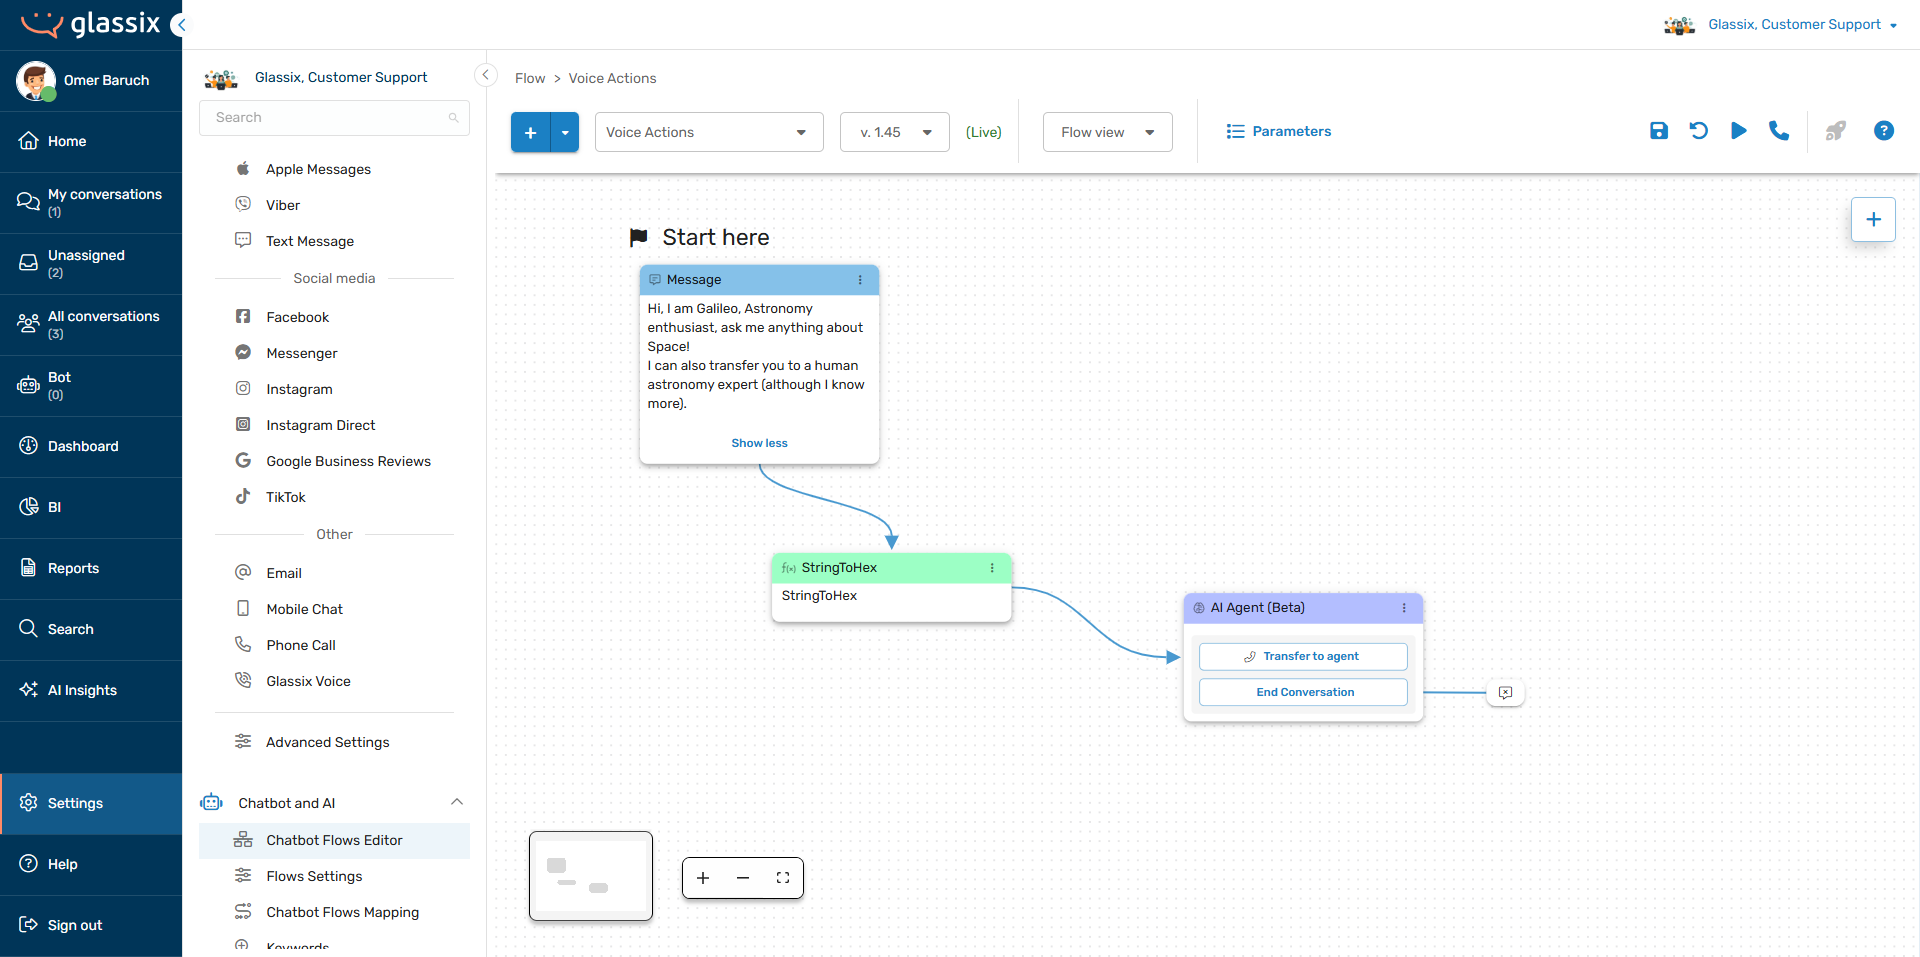
Go to Settings → Chatbot and AI → Chatbot Flows Editor (or click here) and select your voice flow:
-
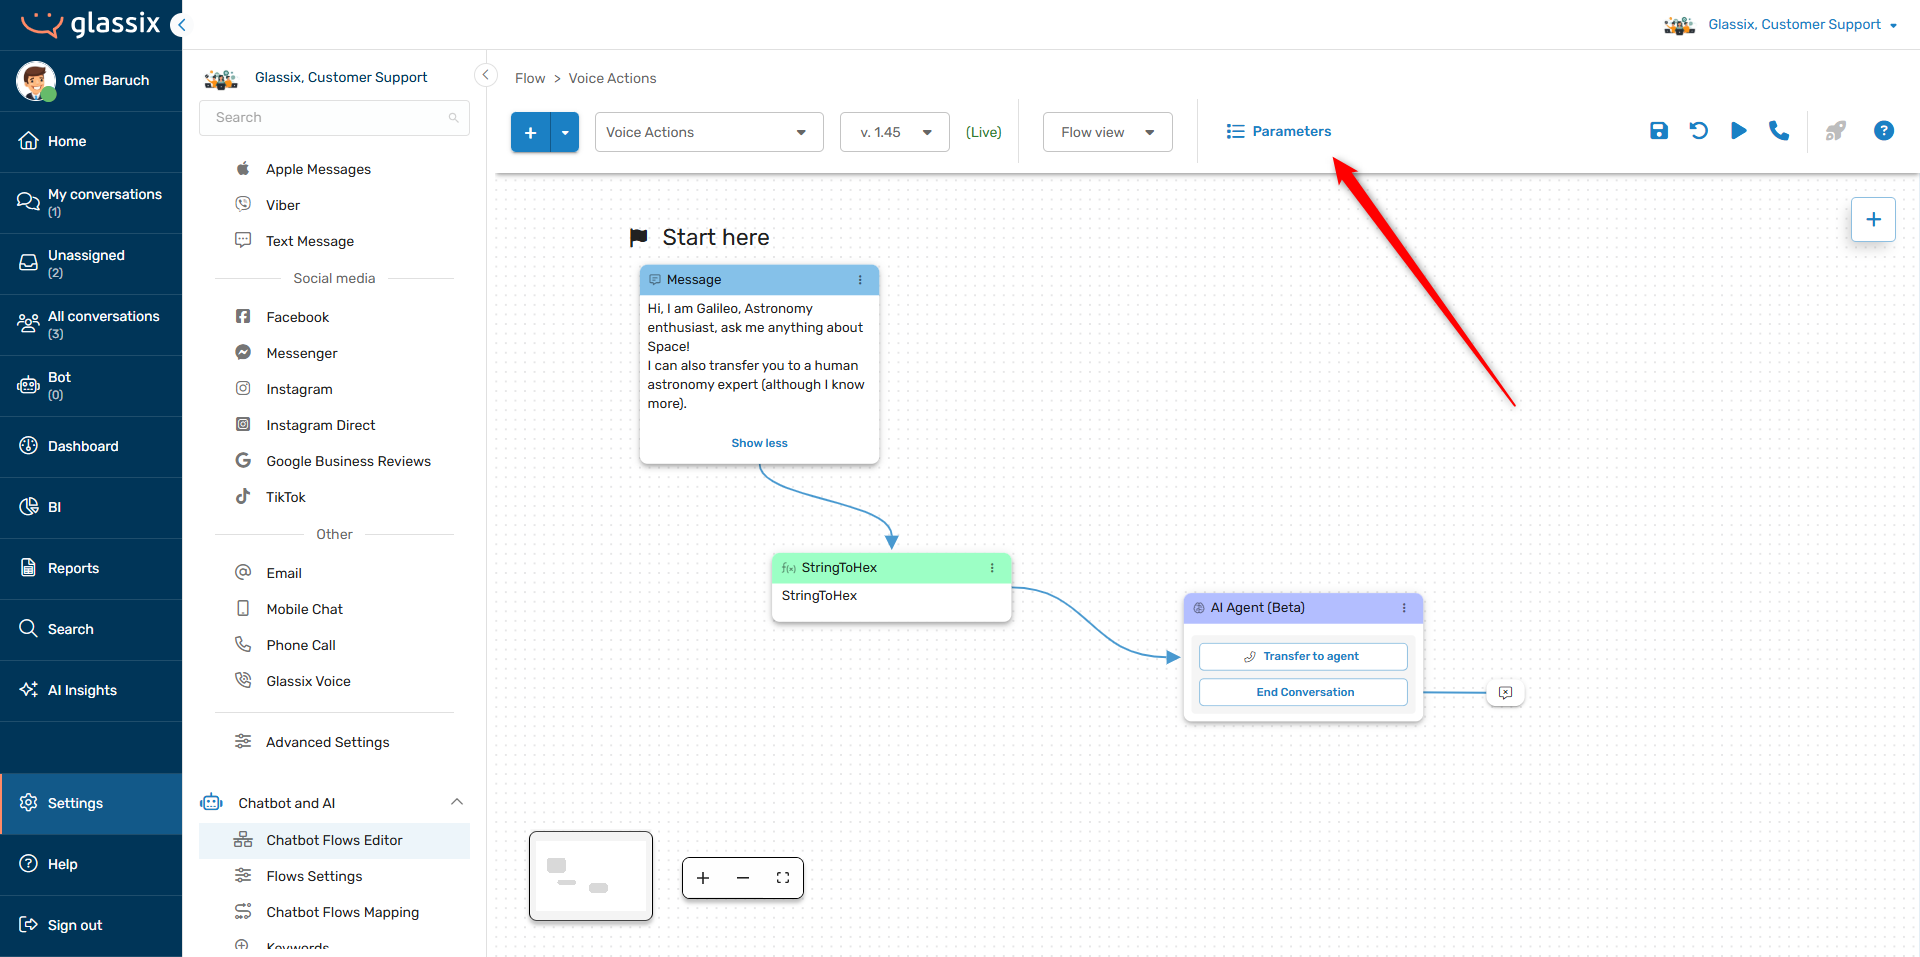
Click on Parameters in the top bar:
-
Create a new dynamic parameter and give it a key, starting with
SIP_, that matches the header name in your SIP INVITE.For example, if your SIP INVITE contains the header
X_Customer_Account_Id, create a parameter with the keySIP_X_Customer_Account_Id: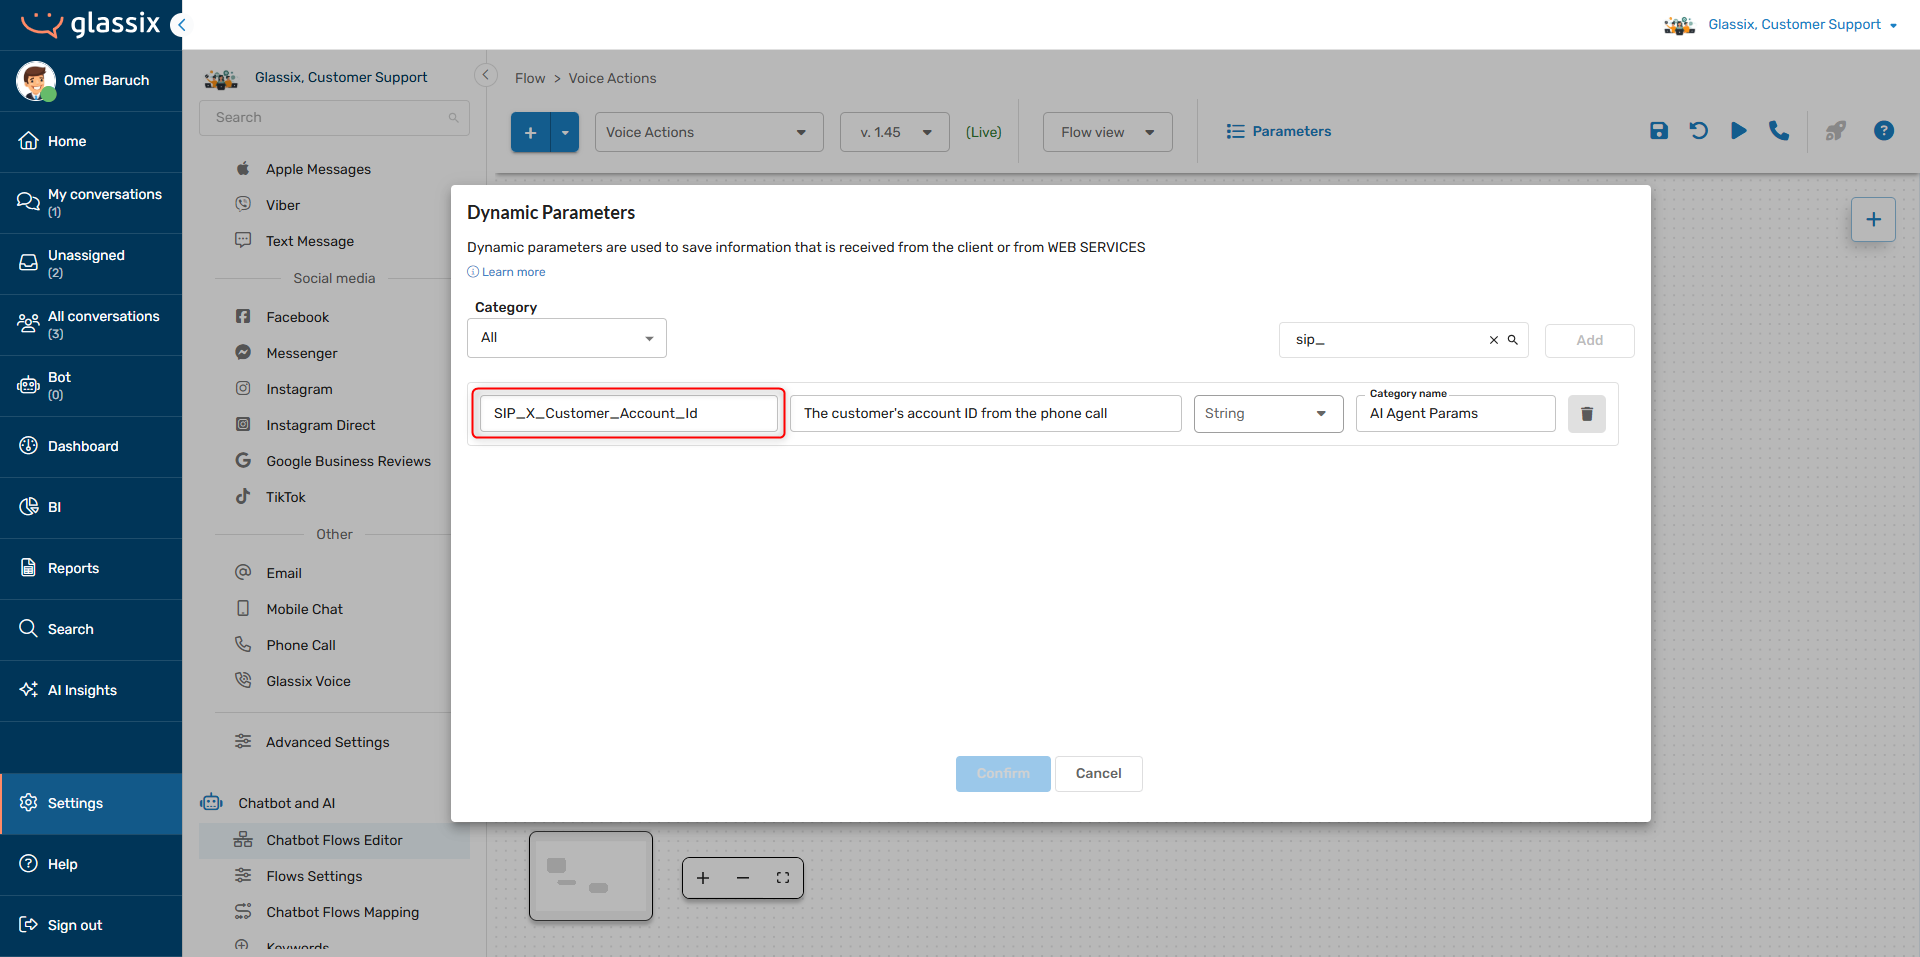
-
Calls with a SIP INVITE containing a header that matches your new dynamic parameter will automatically fill the parameter with their value.
Example
Let's say that your PBX forwards a call to your Glassix department with the header:
X-Customer-Account-Id: 98765To capture this value, you would create a dynamic parameter named SIP_x_customer_account_id.
You will then automatically have the {{@SIP_x_customer_account_id}} parameter available for use in your flows whenever the SIP INVITE contains the header X-Customer-Account-Id.
You can use this parameter just like any other dynamic parameter. For example, you can pass the parameter to a web API step to look up the customer's details before the conversation begins:
GET https://company.api.domain/api/account?accountId={{@SIP_x_customer_account_id}}And you can use the parameter in a message step:
"Hello, I have successfully pulled up your account, number
{{@SIP_x_customer_account_id}}. How can I help you today?"
Send Custom Headers When Transferring a Call
When your flow transfers a call to an external destination, you can attach custom SIP headers to the outbound SIP INVITE. This is the SIP INVITE that Glassix sends to your telephony system.
This lets you pass contextual data such as ticket IDs, customer information, or routing hints to your receiving system.
Info:Custom header names should follow standard SIP custom header conventions. Prefixing with
X-is recommended to avoid conflicts with standard SIP headers.Empty header names are not allowed, but empty header values are.
There is no hard limit on the number of custom headers you can add for transfers, but keep in mind that excessively long SIP headers may be truncated or rejected outright by intermediary network devices. Depending on the system your organization uses, this can result in transfers being dropped if your headers are too long or if you add too many.
Adding Custom Headers
-
Go to Settings → Chatbot and AI → Chatbot Flows Editor (or click here) and select your voice flow with a voice transfer step:

-
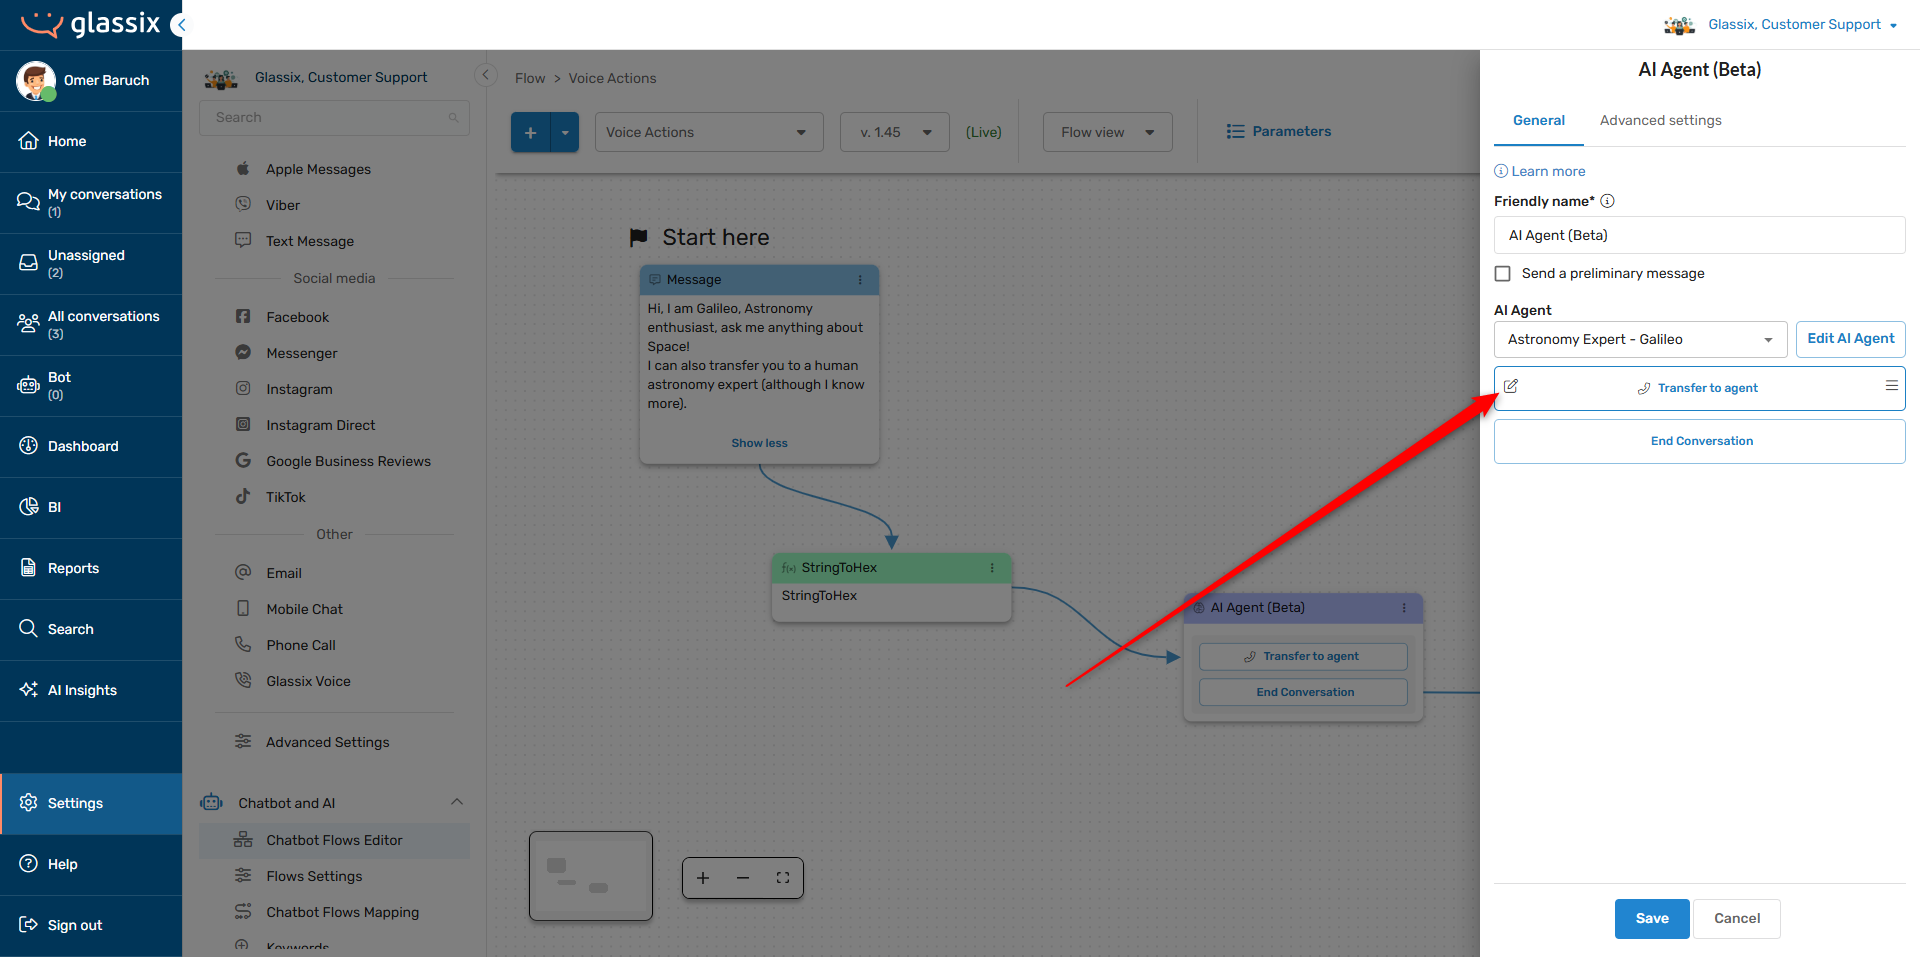
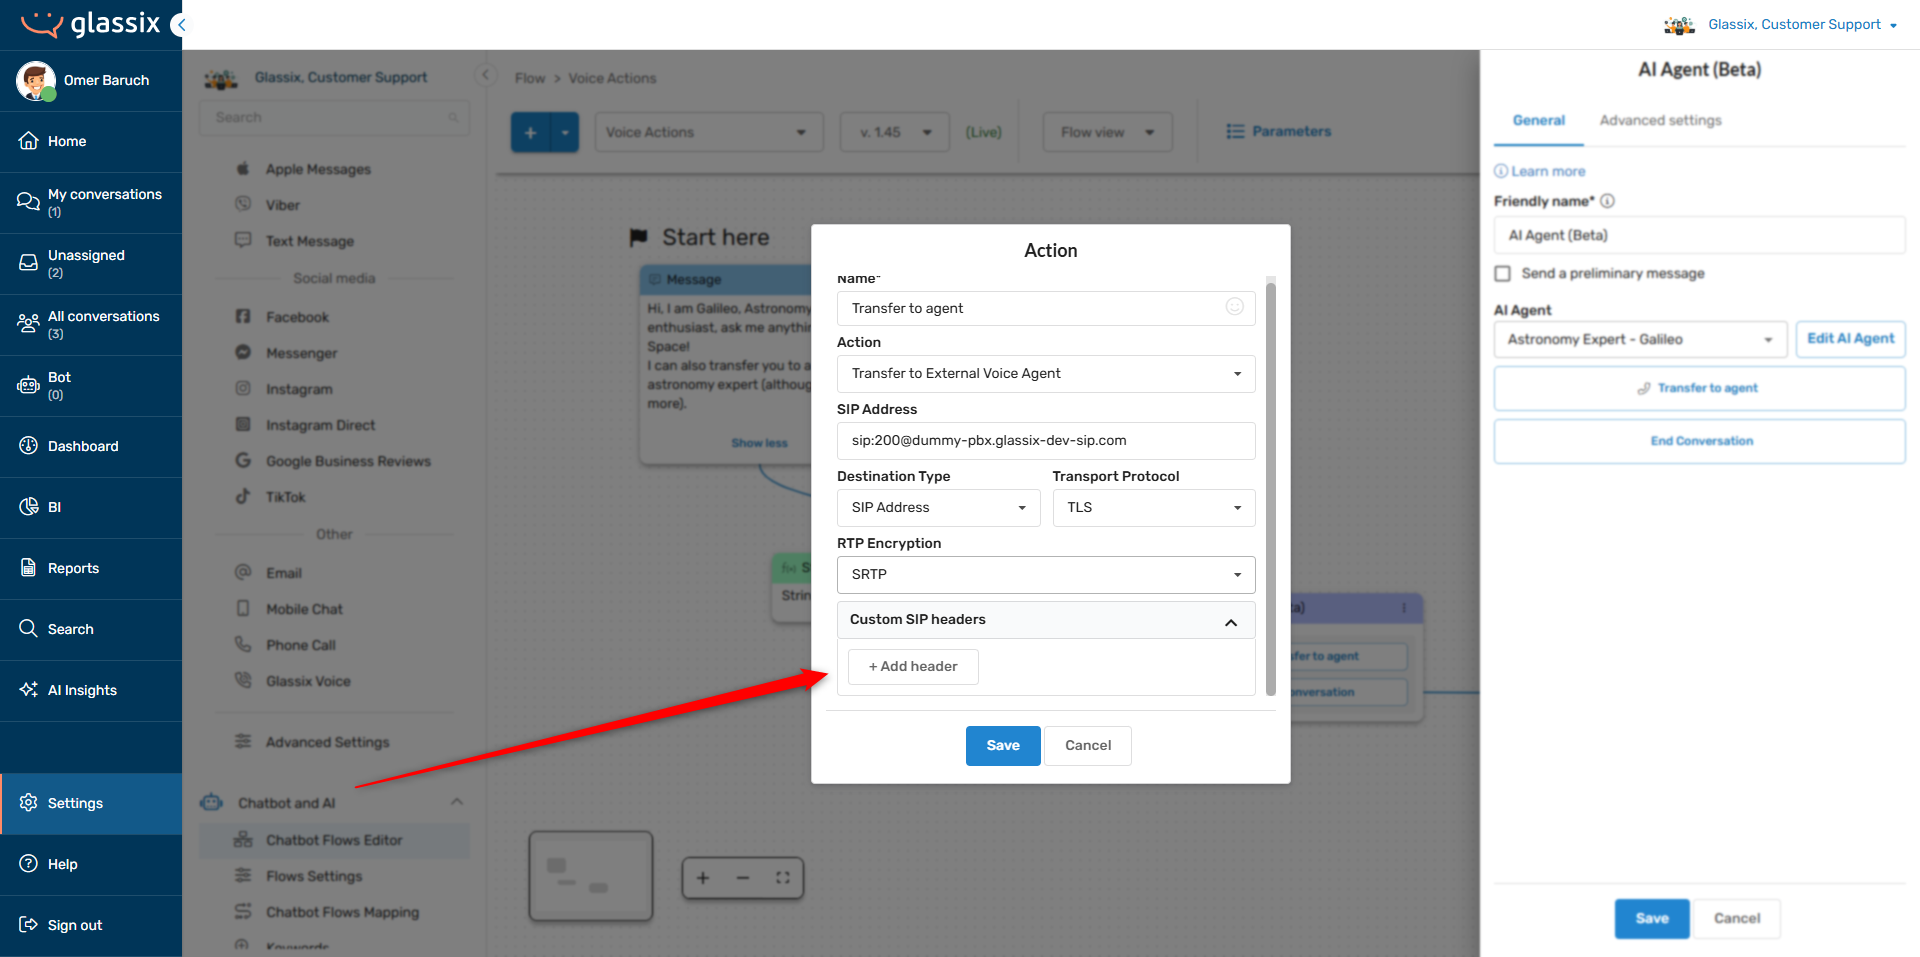
Double click the flow step to open it, then click to edit the transfer action:
-
Expand the Custom SIP headers section at the bottom of the editor, then click + Add header to add a new header row:
-
In the Header Key field, enter the name of the header as you would like it to appear in your telephony provider:

-
In the Header Value field, enter a fixed value or choose a dynamic parameter:
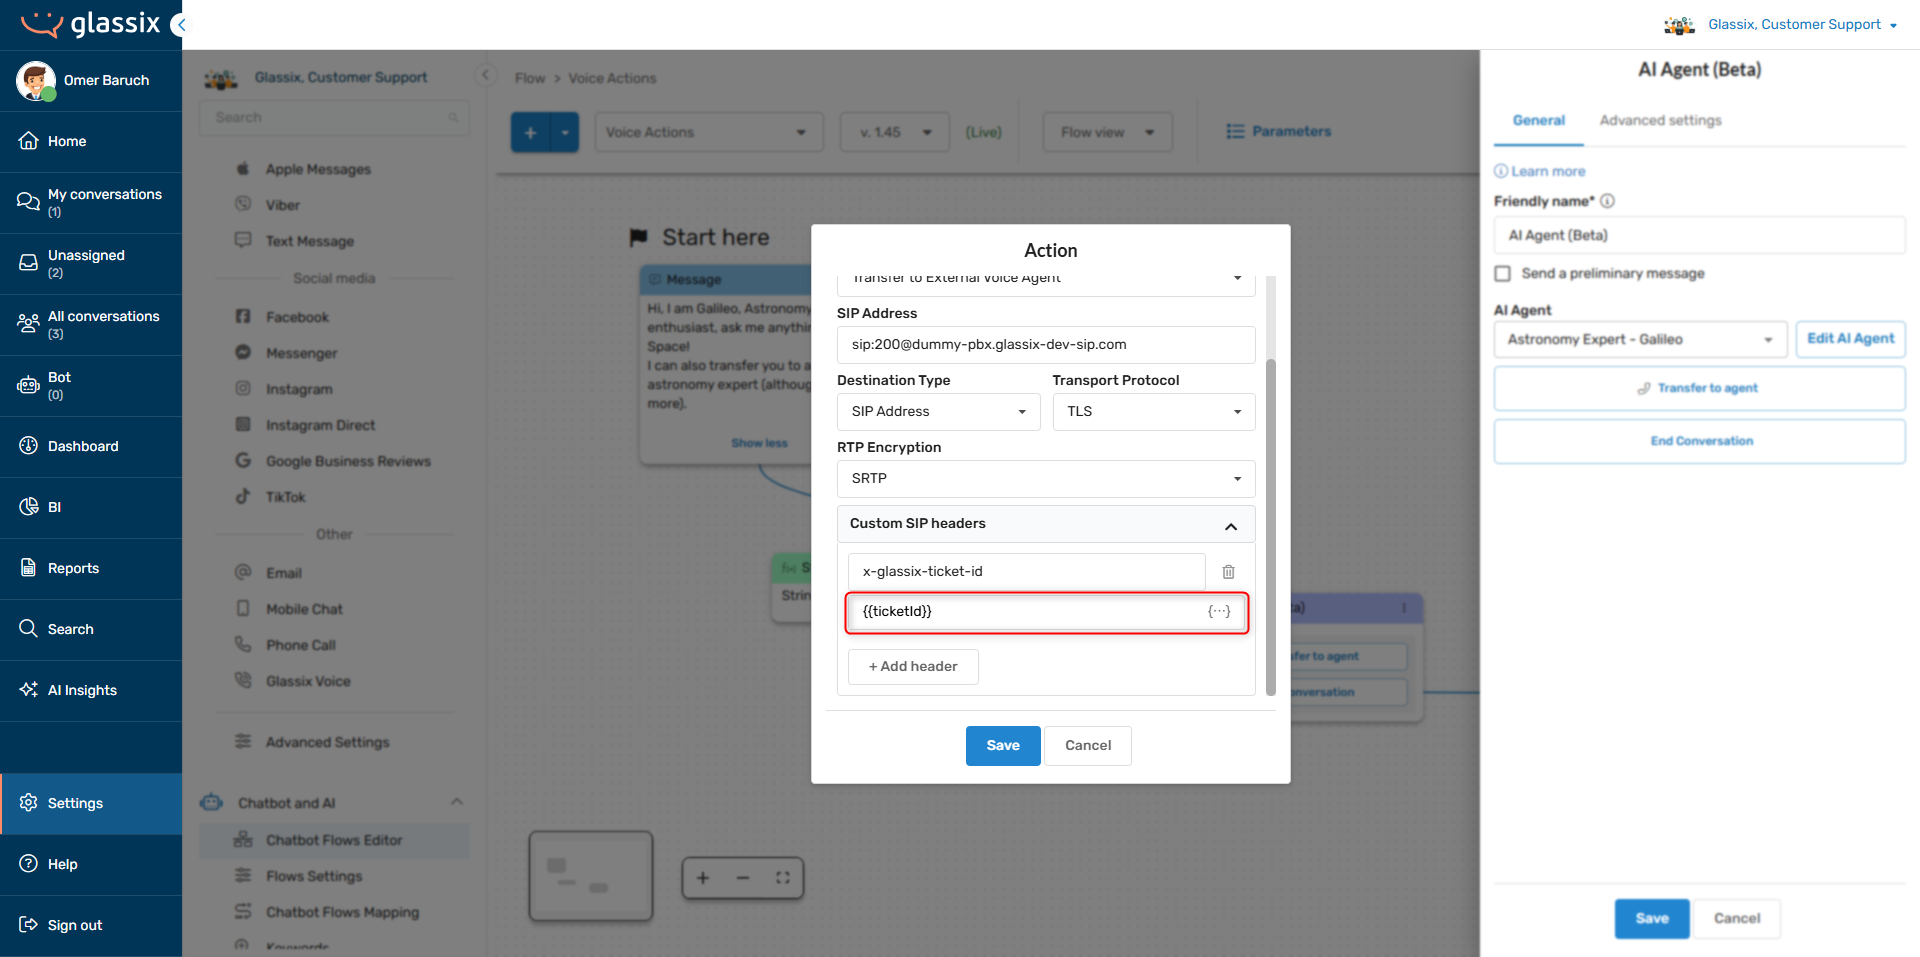
Click the {...} button inside the Header Value field to browse and insert available parameters.
Tip:Header values support the same dynamic parameter syntax used elsewhere in the flow editor. You can mix and match text with parameters, just like in any other flow step.
Example
When your flow transfers a call to your internal PBX system, you want to include the Glassix ticket ID and the customer's name so that the agent's desktop application can display them. You also want to make sure transfers get prioritized more highly than incoming calls.
In order to accomplish this, you can add the following headers to your SIP transfer:
| Header name | Value |
|---|---|
X-Glassix-Ticket-Id | {{ticketId}} |
X-Customer-Name | {{customerName}} |
X-Priority | high |
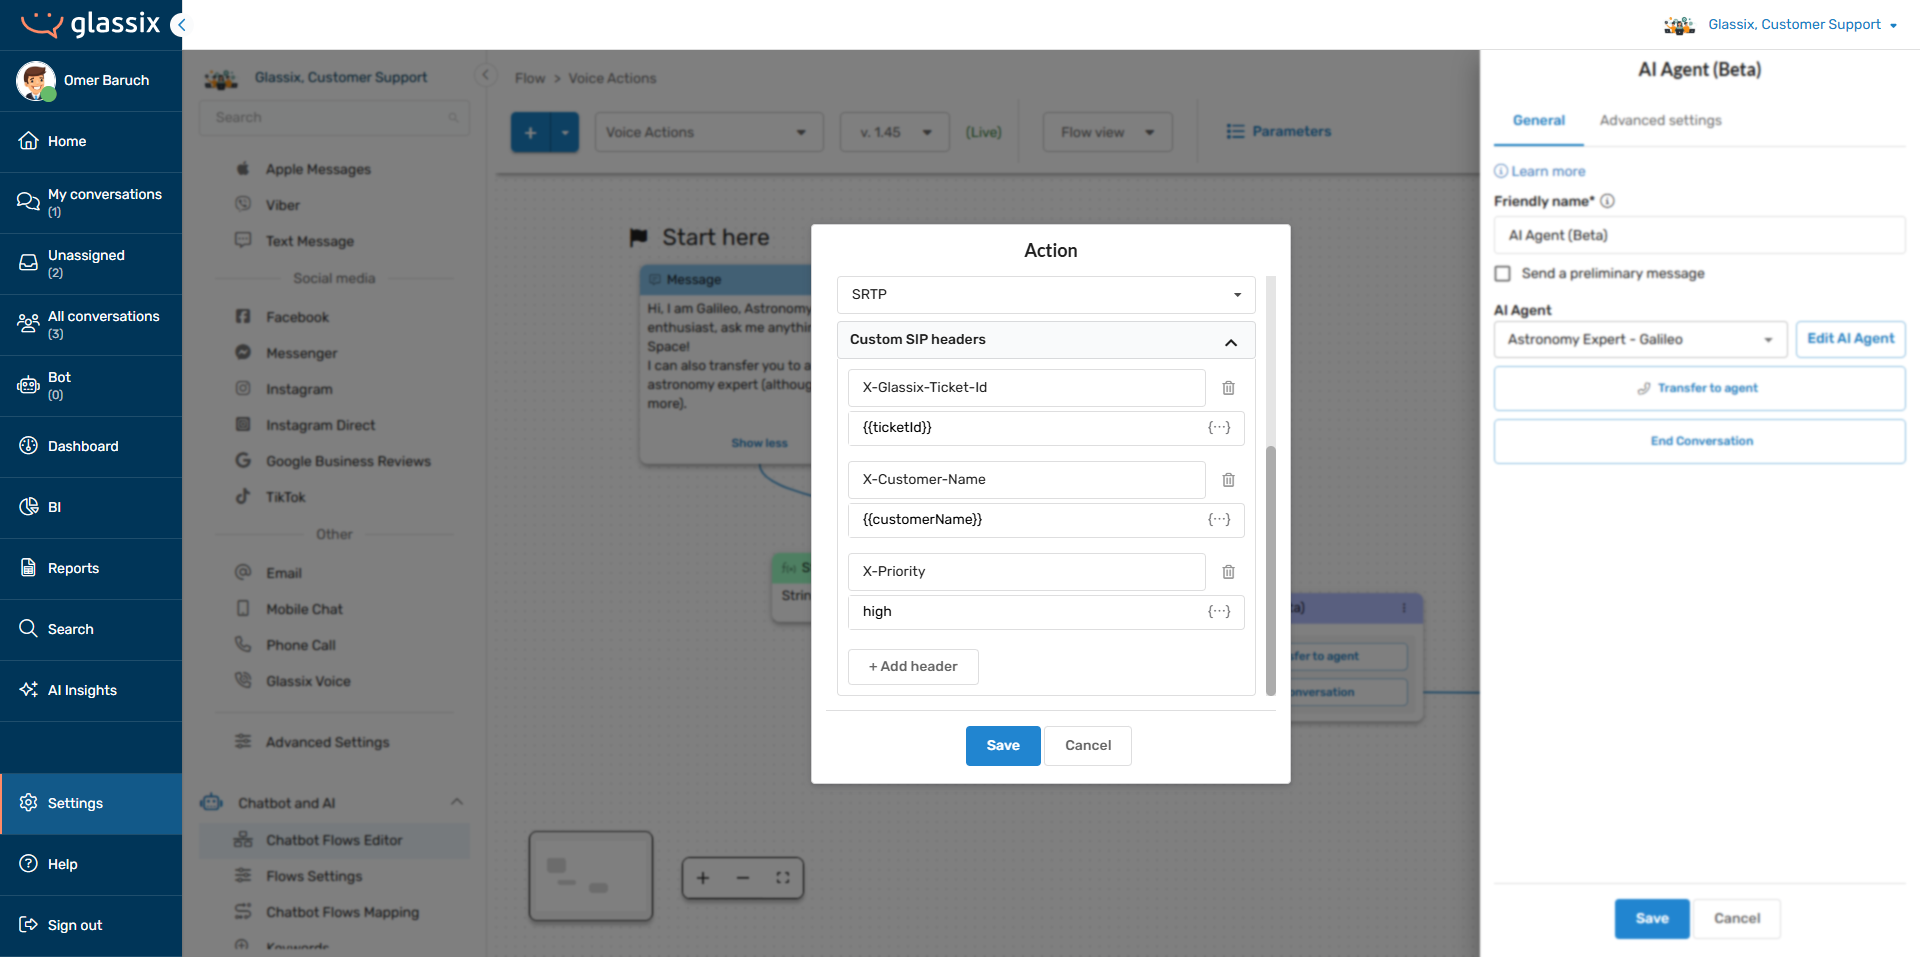
The outbound SIP INVITE will include these headers automatically, allowing your receiving PBX system to use the values for screen pops, routing decisions, logging, etc.
Updated about 2 months ago