Integrate Into a Flow
Put your agent to work by adding it to a flow.
Overview
In this article, we cover integrating your AI agent into a flow.
This article is part of a series covering setting up and deploying AI agents. See the other parts in the series:
- Create an AI Agent
- Write a Behavior Description (Prompt)
- Create Actions and Tools
- Add Your Knowledge Center
- Add Input Parameters
- Test Your Agent
- Security in AI Agents
- Integrate Into a Flow - this article
- Use Multiple Agents
Integrating into Your Flows
Tip:Don't replace your whole flow with agents right away. Replace one piece at a time and test your agents at every step of the process.
Info:This section continues the example from the Write a Behavior Description article.
Once you're done building, checking and testing your agents, it's time to integrate them into your flows. You can build entirely new flows for your agents, or replace pieces of your existing flows with AI agents one at a time.
When building out your flows, keep in mind that the actions you built for your agent need to be connected to relevant flow steps in order to actually complete the defined task.
For each of the tools you defined, you'll also need to build out a tool flow to actually gather the information you want your tool to collect.
Integrating Agents
Tip:If you're not familiar with adding flow steps in the editor, see here first before continuing.
Step one in building a flow with your AI agent - adding the agent to the flow!
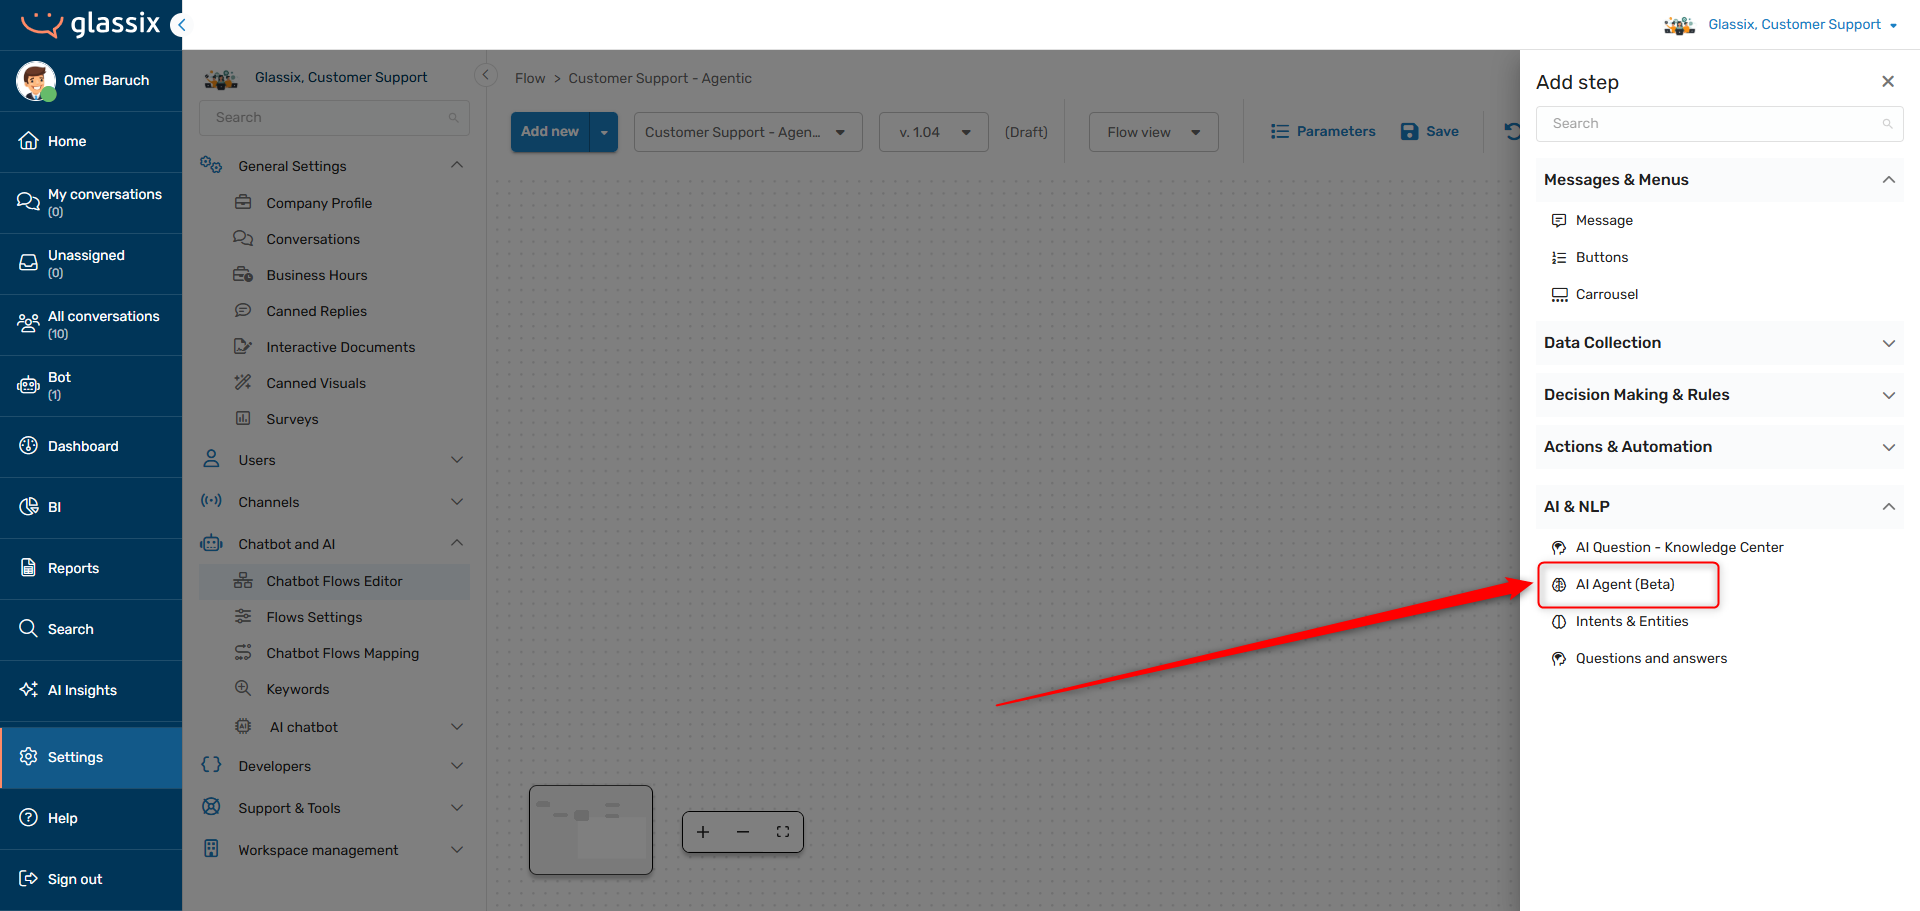
In our previous example, we created an agent called Tier 1 or Tier 2 Router. To add this to our flow, we'll first add an AI Agent (Beta) type step to our flow in the flows editor:
By default, AI agent steps don't have an agent selected, so we'll choose our Tier 1 or Tier 2 Router from the list:
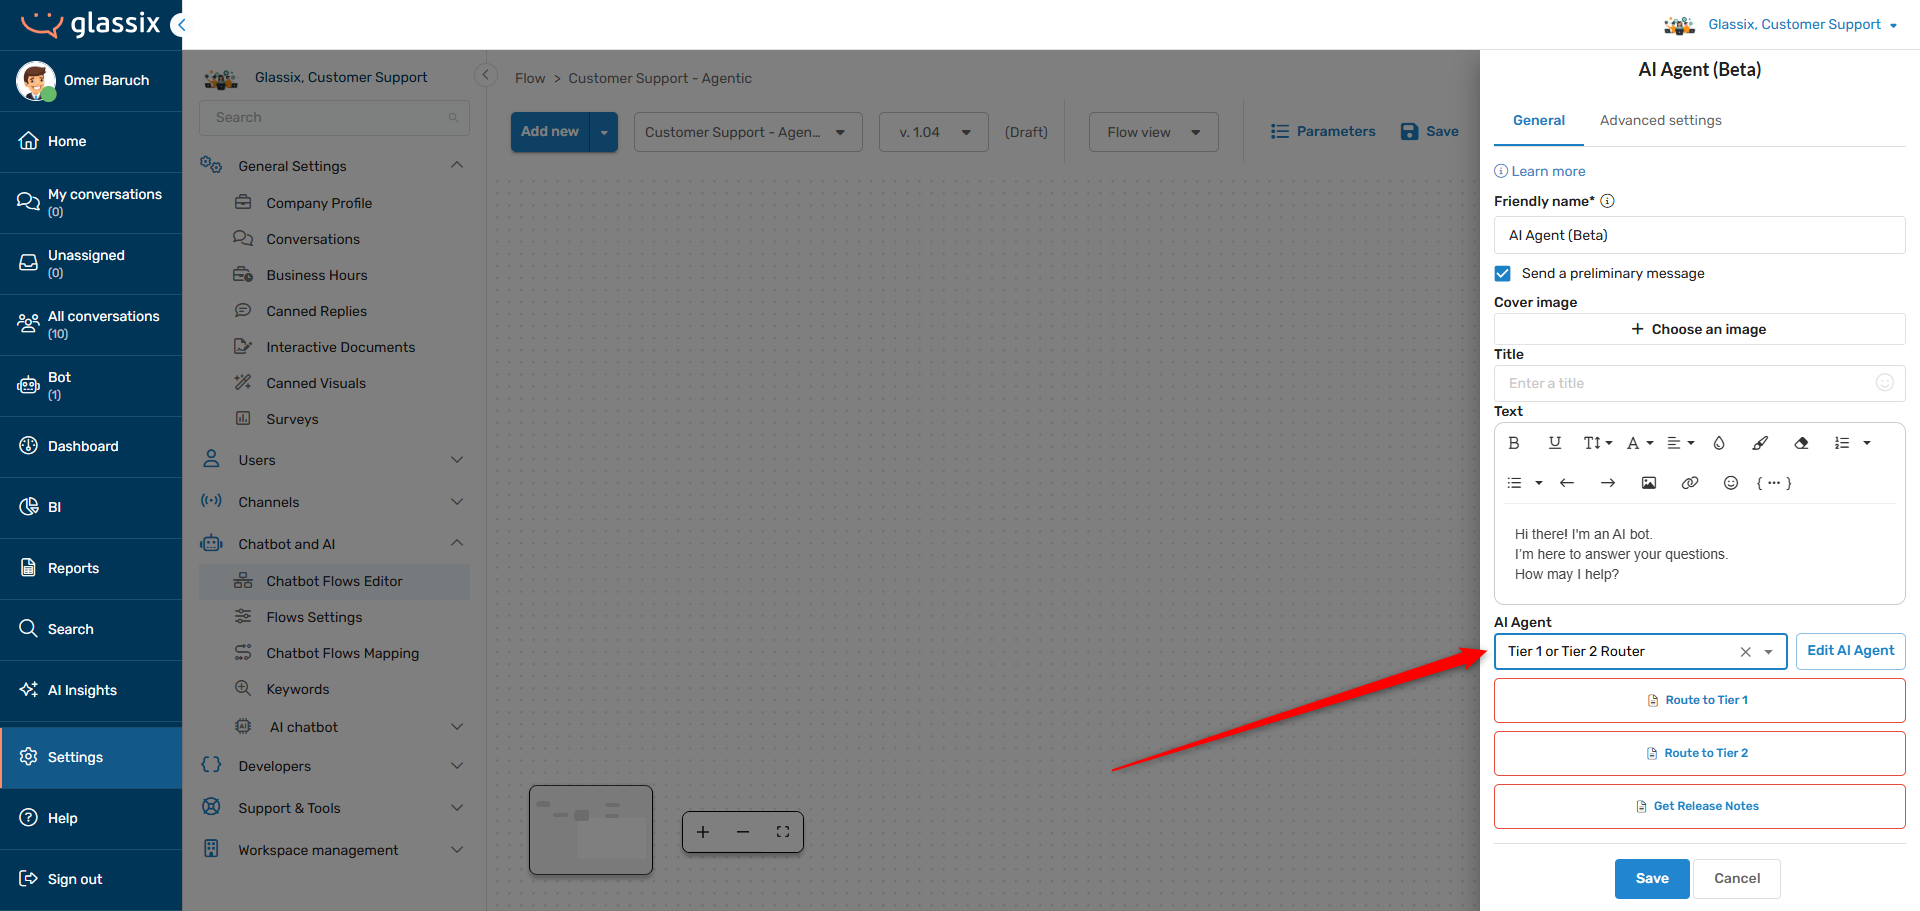
This will automatically add all your actions and tools to the flow step. See below for instructions on integrating actions and tools.
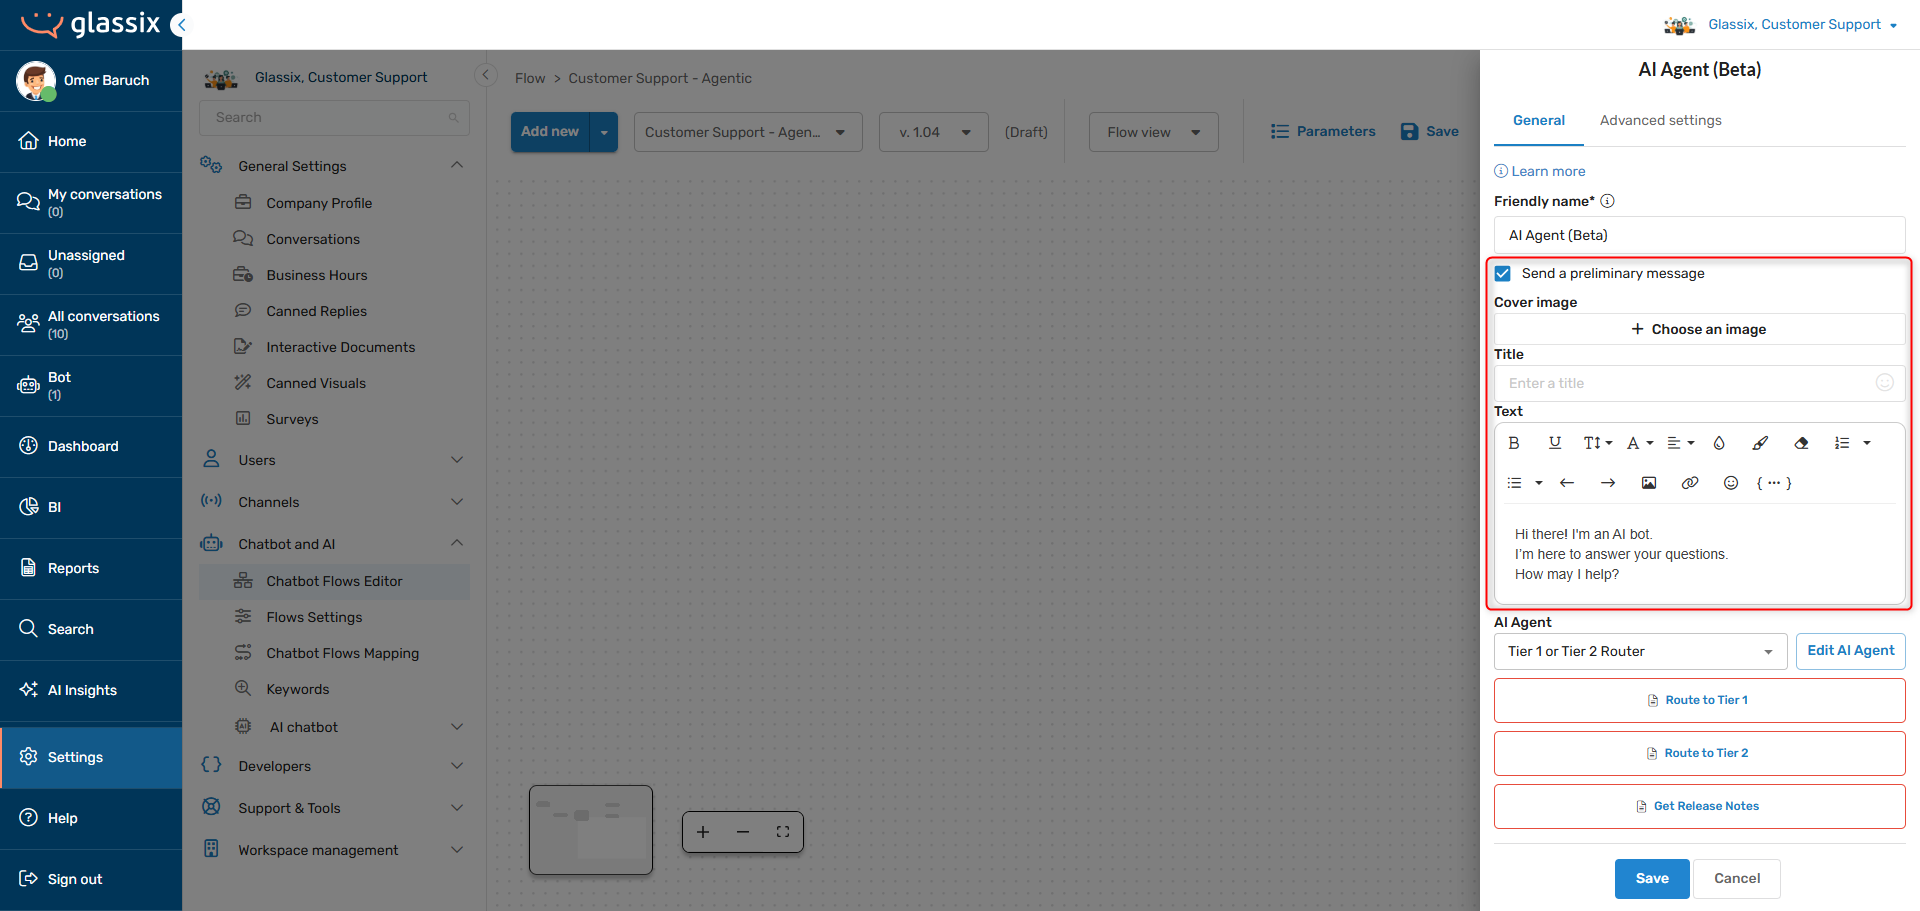
Before we save, we should decide if we want our agent to send a preliminary message or not.
Tip:Preliminary messages are good for when you want your customers to know they've reached an AI agent, and you want to send them a fixed intro message that never changes.
If you're passing customers between multiple AI agents during a flow, or if you're creating a flow to handle inbound messages from channels like WhatsApp, SMS and email, turn the preliminary message off.
Without a preliminary message, your AI agent will seamlessly start responding to your customers based on its prompt and any previous messages in the conversation.
A preliminary message is a default message which our agent will send automatically at the beginning of each conversation:
Since our routing agent is going at the beginning of our flow, and since we're building this flow for Web Chat (where the agent will start speaking before the customer), we should give it a preliminary message so it has something to say at the beginning of conversations:
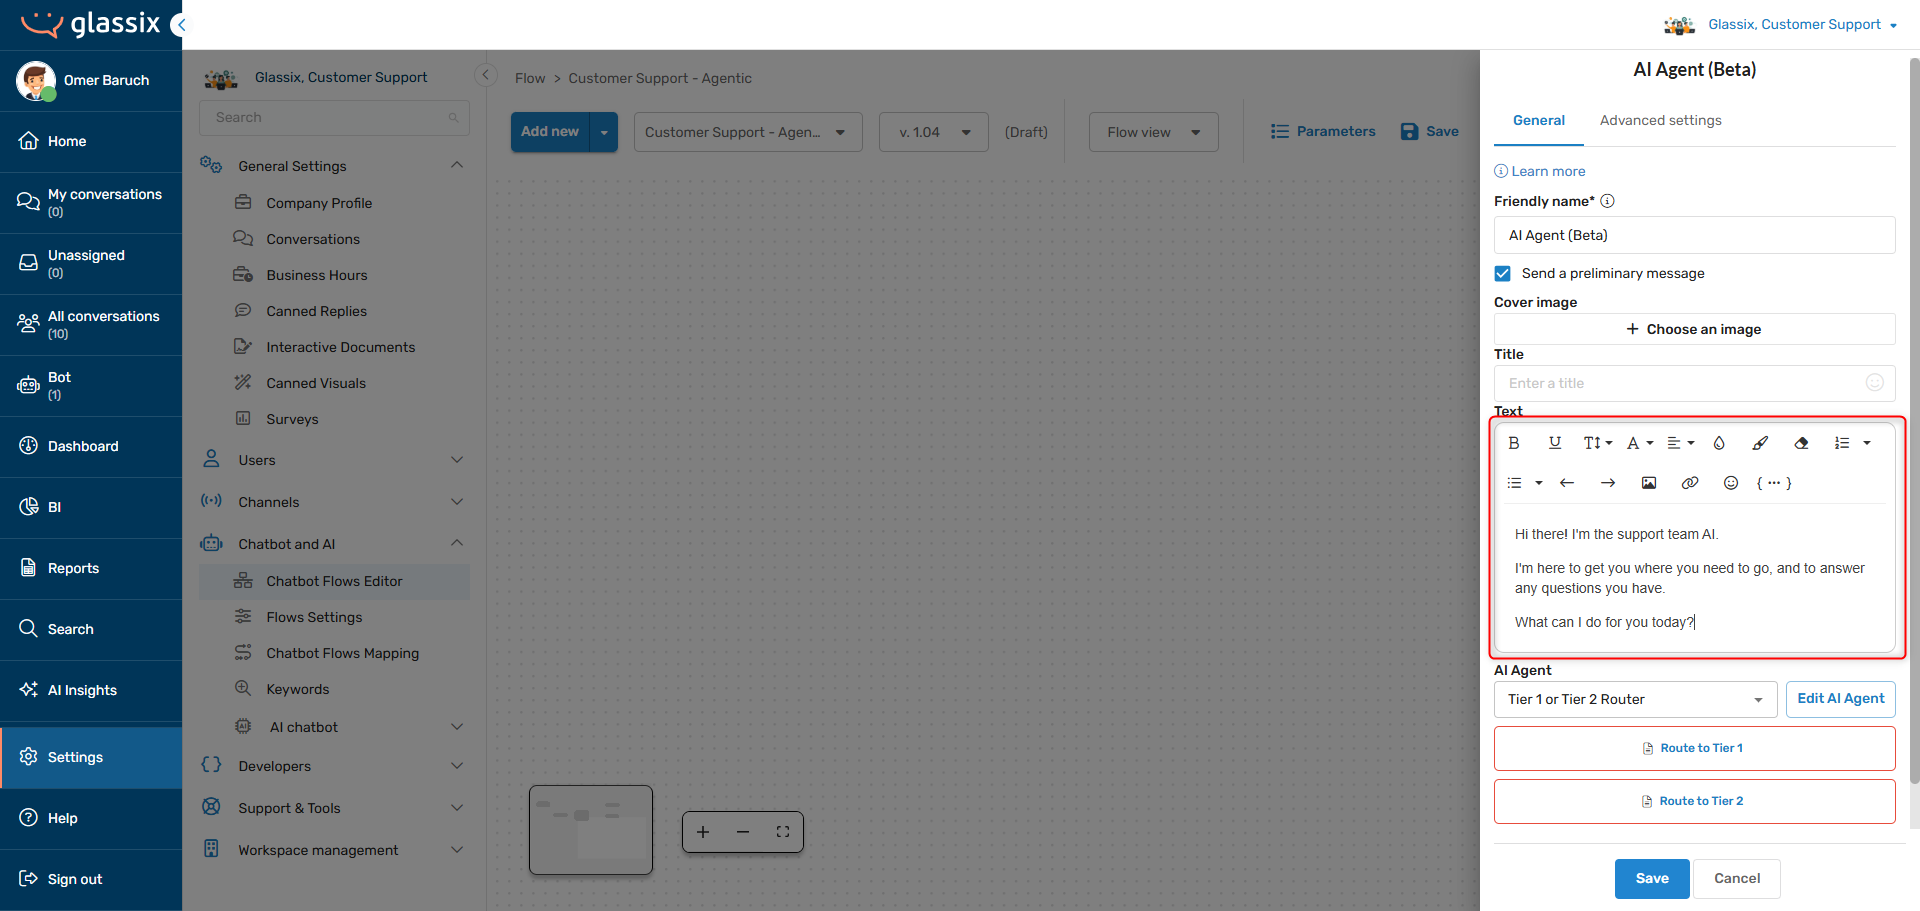
If this agent were going somewhere in the middle of a flow, or if we were building this flow to handle inbound communication where the customer would be sending the first message, we would want to turn the preliminary message off.
Once we save, we'll get a new flow step with all of the actions, tools and the preliminary message we set up for our agent:
Now it's time to integrate the actions and tools, and set up any input parameters we want filled for our agent.
Integrating Actions
AI agent actions are just exit points, so they need to be connected to flow steps which perform the actions you want taken. Once your AI agent decides to take an action, it will pass the conversation onto the flow steps you connect it to.
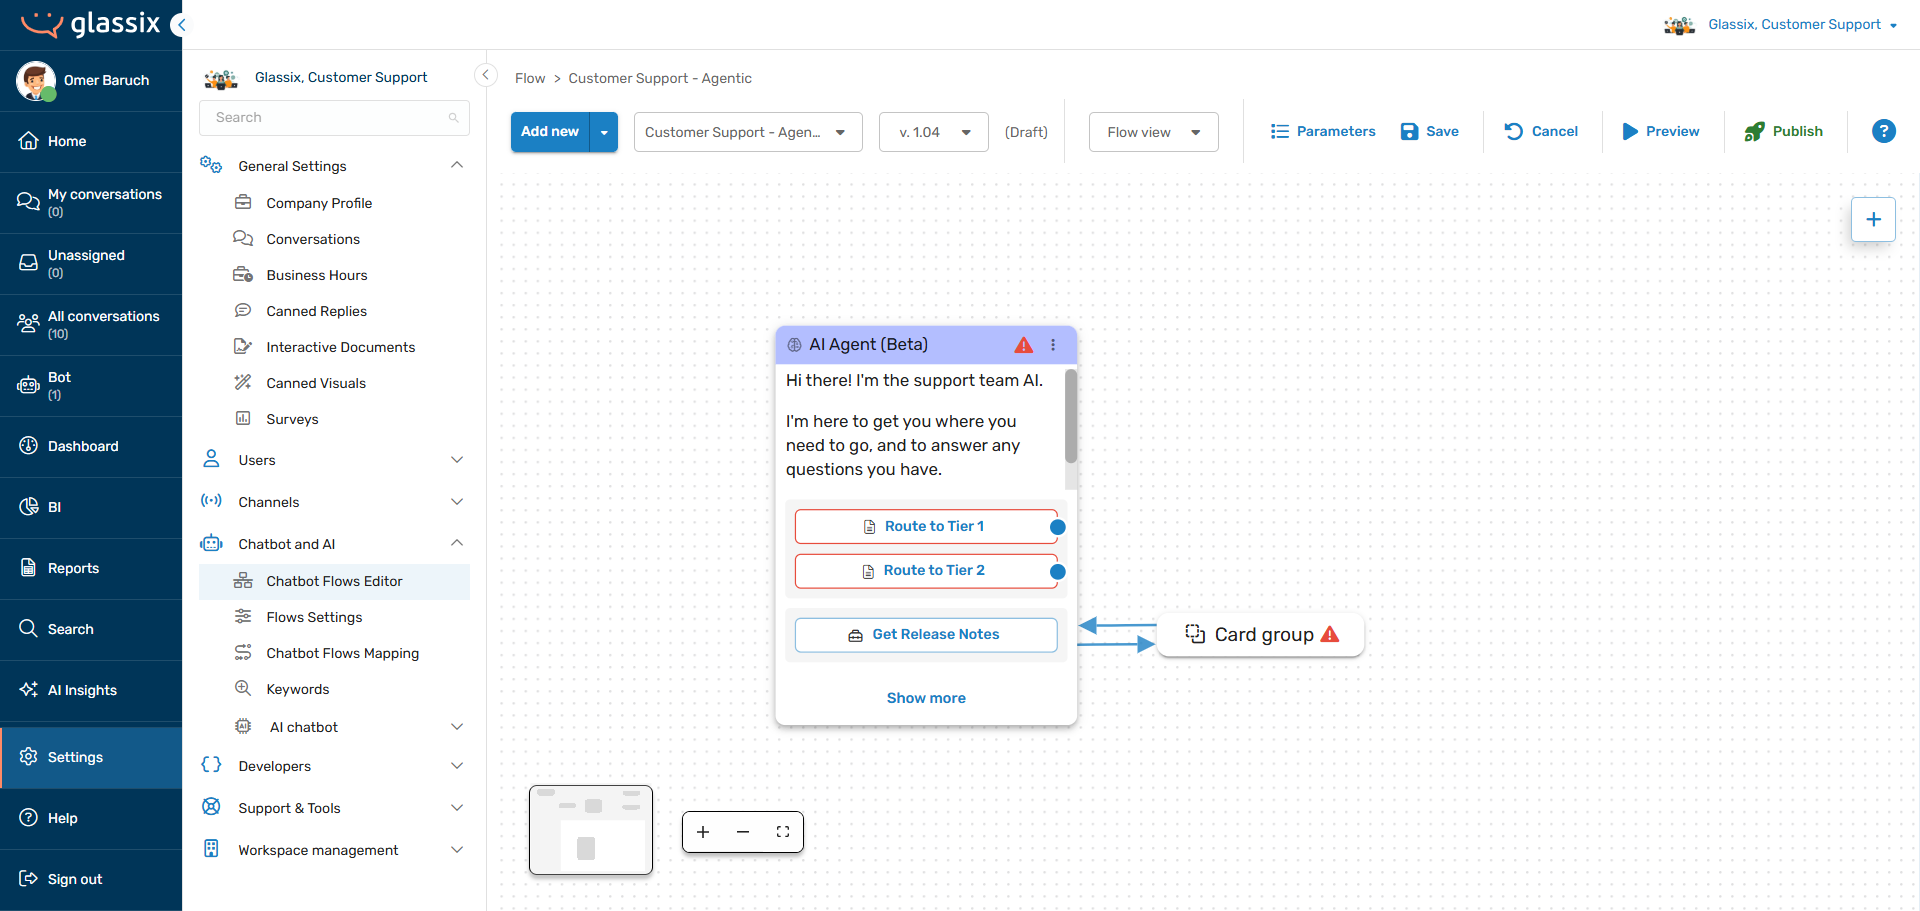
In our previous example, we defined actions called "Route to Tier 1" and "Route to Tier 2". When our agent chooses one of these actions, it doesn't actually perform the routing itself. Instead, it exits from the appropriate node in our AI Agent flow step:
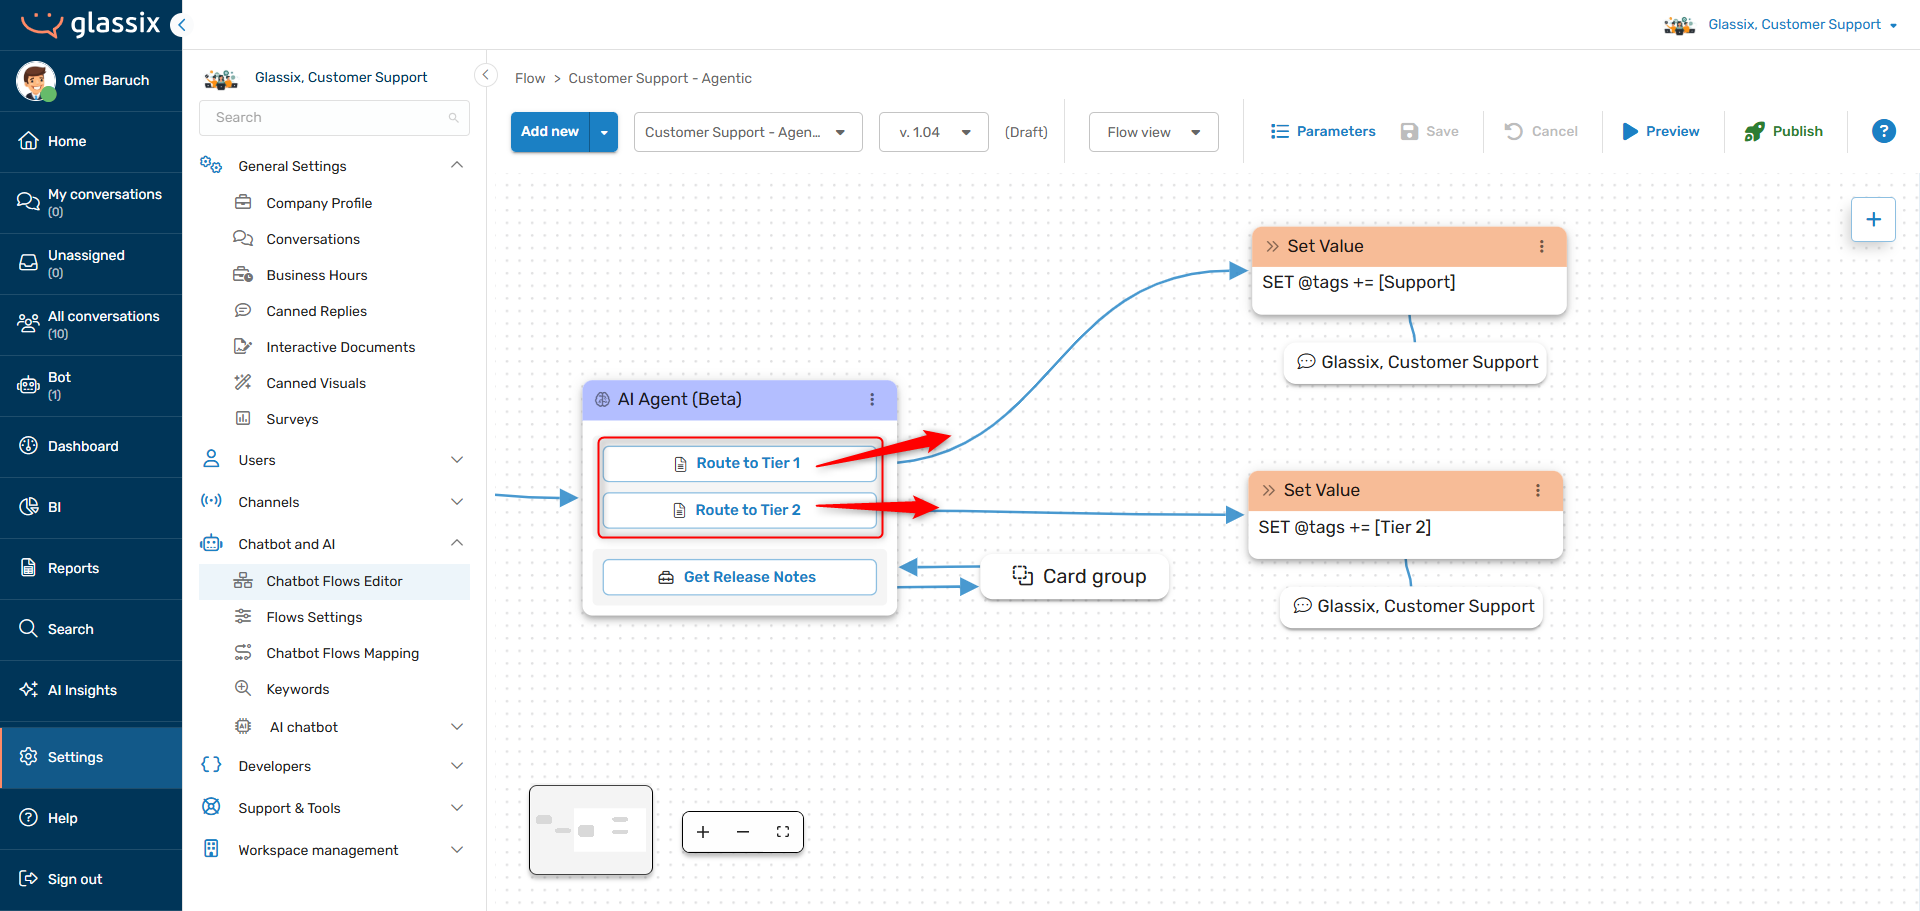
We then need to connect these exit nodes to flow steps which actually perform the routing:
As you can see above, we've connected each of the agent's actions (visible as exit nodes in the flow editor) to the flow steps which carry out the action.
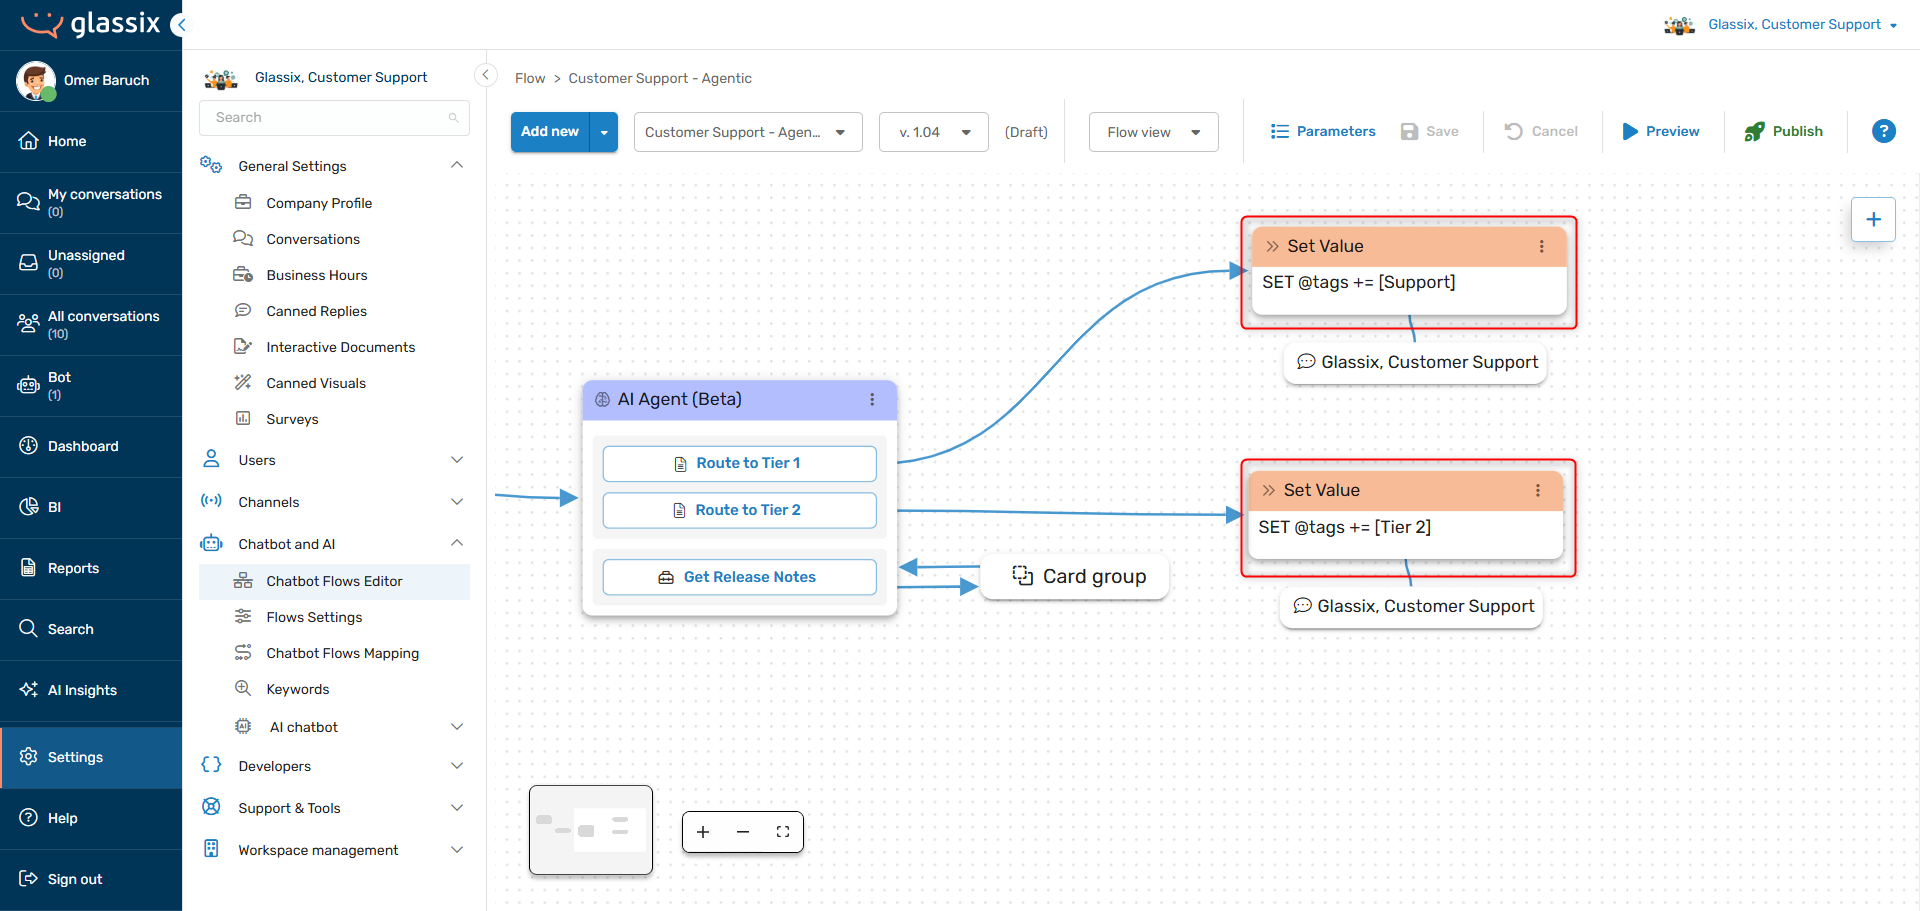
The Route to Tier 1 action connects to flow steps which open a ticket tagged Support in our department, while the Route to Tier 2 action connects to flow steps which open a ticket tagged Tier 2 in our department.
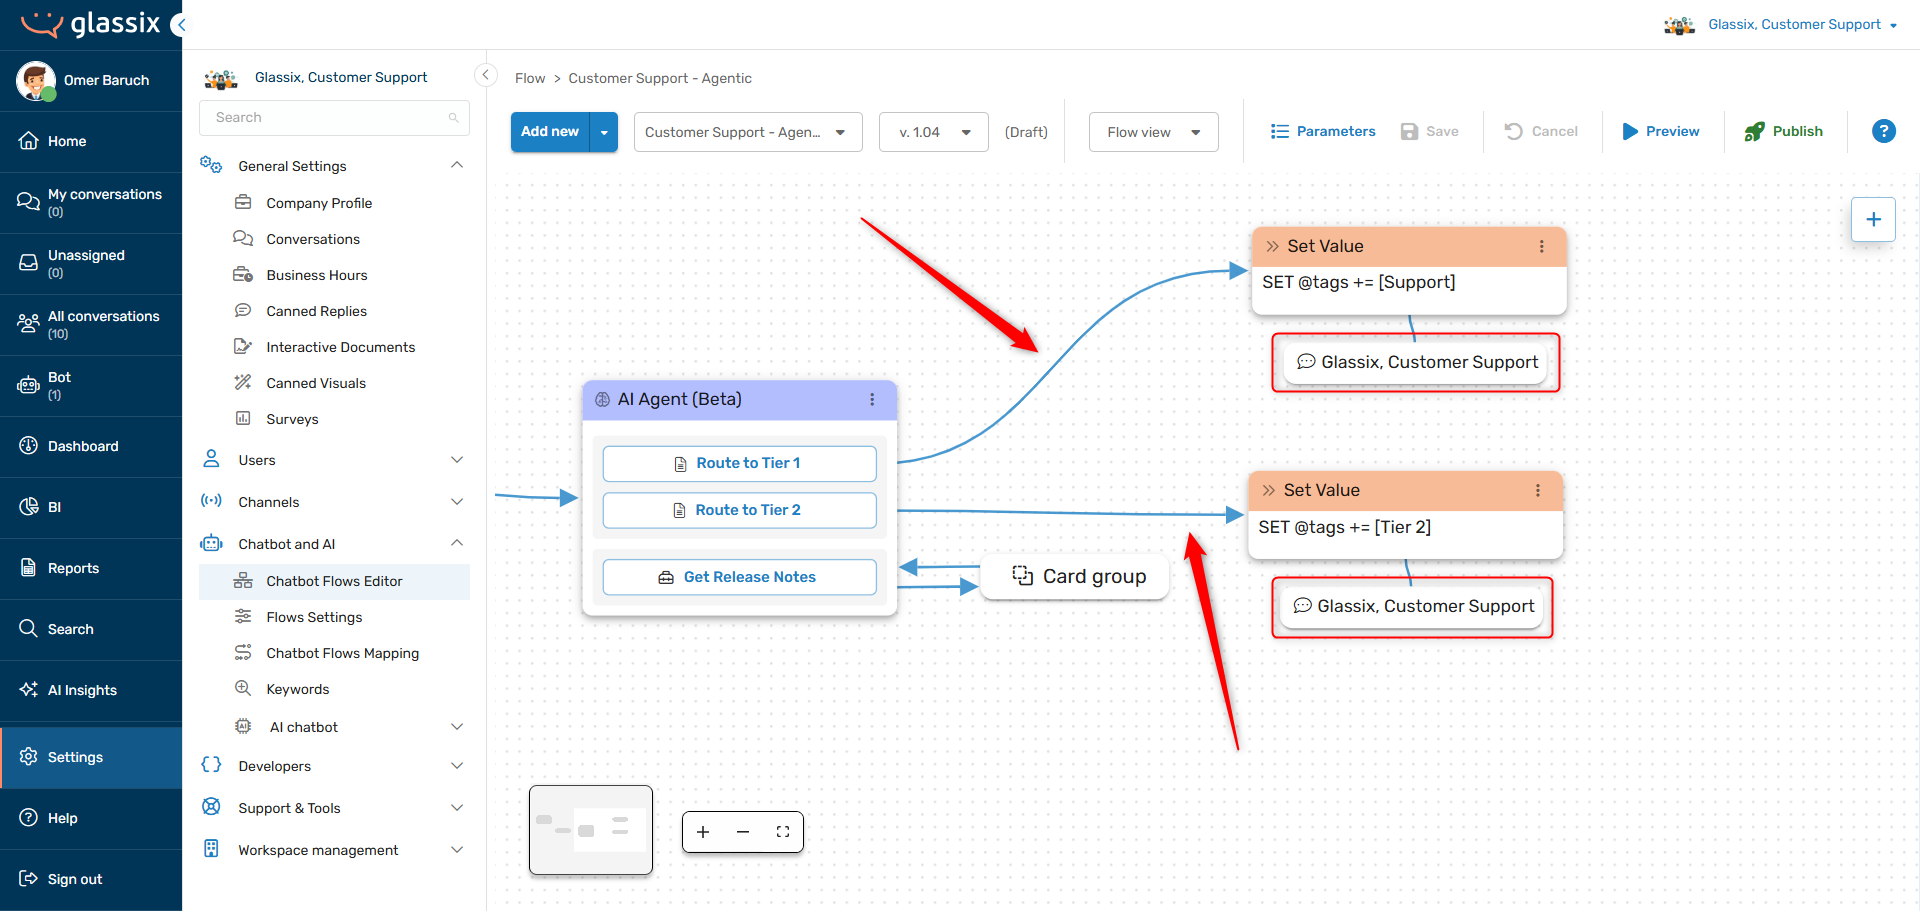
RememberAI agents don't do anything on their own, they just decide where the conversation should move next. It's the flow steps which carry out the actual actions.
Any tagging, field filling or other action you want carried out must also be built out as flow steps:
Your agent can't tag tickets or fill in ticket fields on its own, you must provide flow steps to take these actions.
Integrating Tools
The same applies to tools. Once your AI agent chooses to use a tool, it doesn't actually gather the data you want back from the tool.
Instead, it sends the conversation into a tool flow which you will need to build out in order to collect the relevant data and send it back to your agent.
Info:Tool flows are circular, they always start and end at your agent.
Your agent will save any conversation context when using a tool, meaning customers will be taken back to the same place in the conversation where they were previously after a tool finishes running.
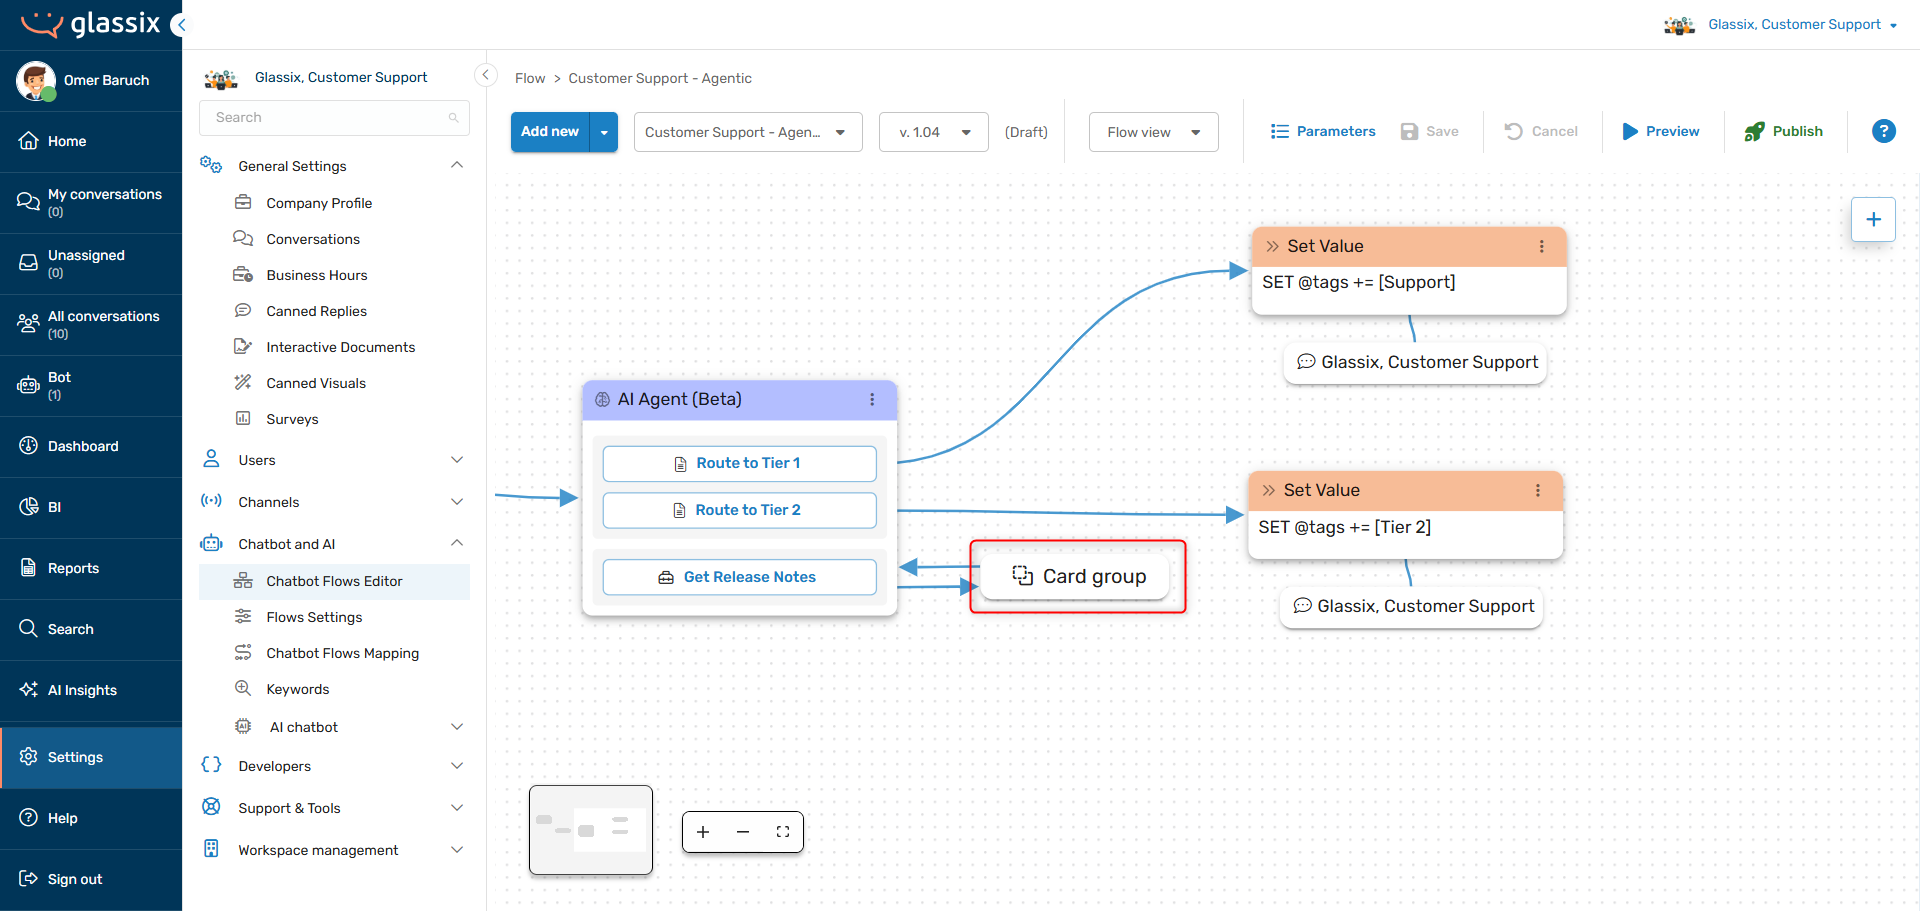
In our example, we defined a tool called Get Release Notes:
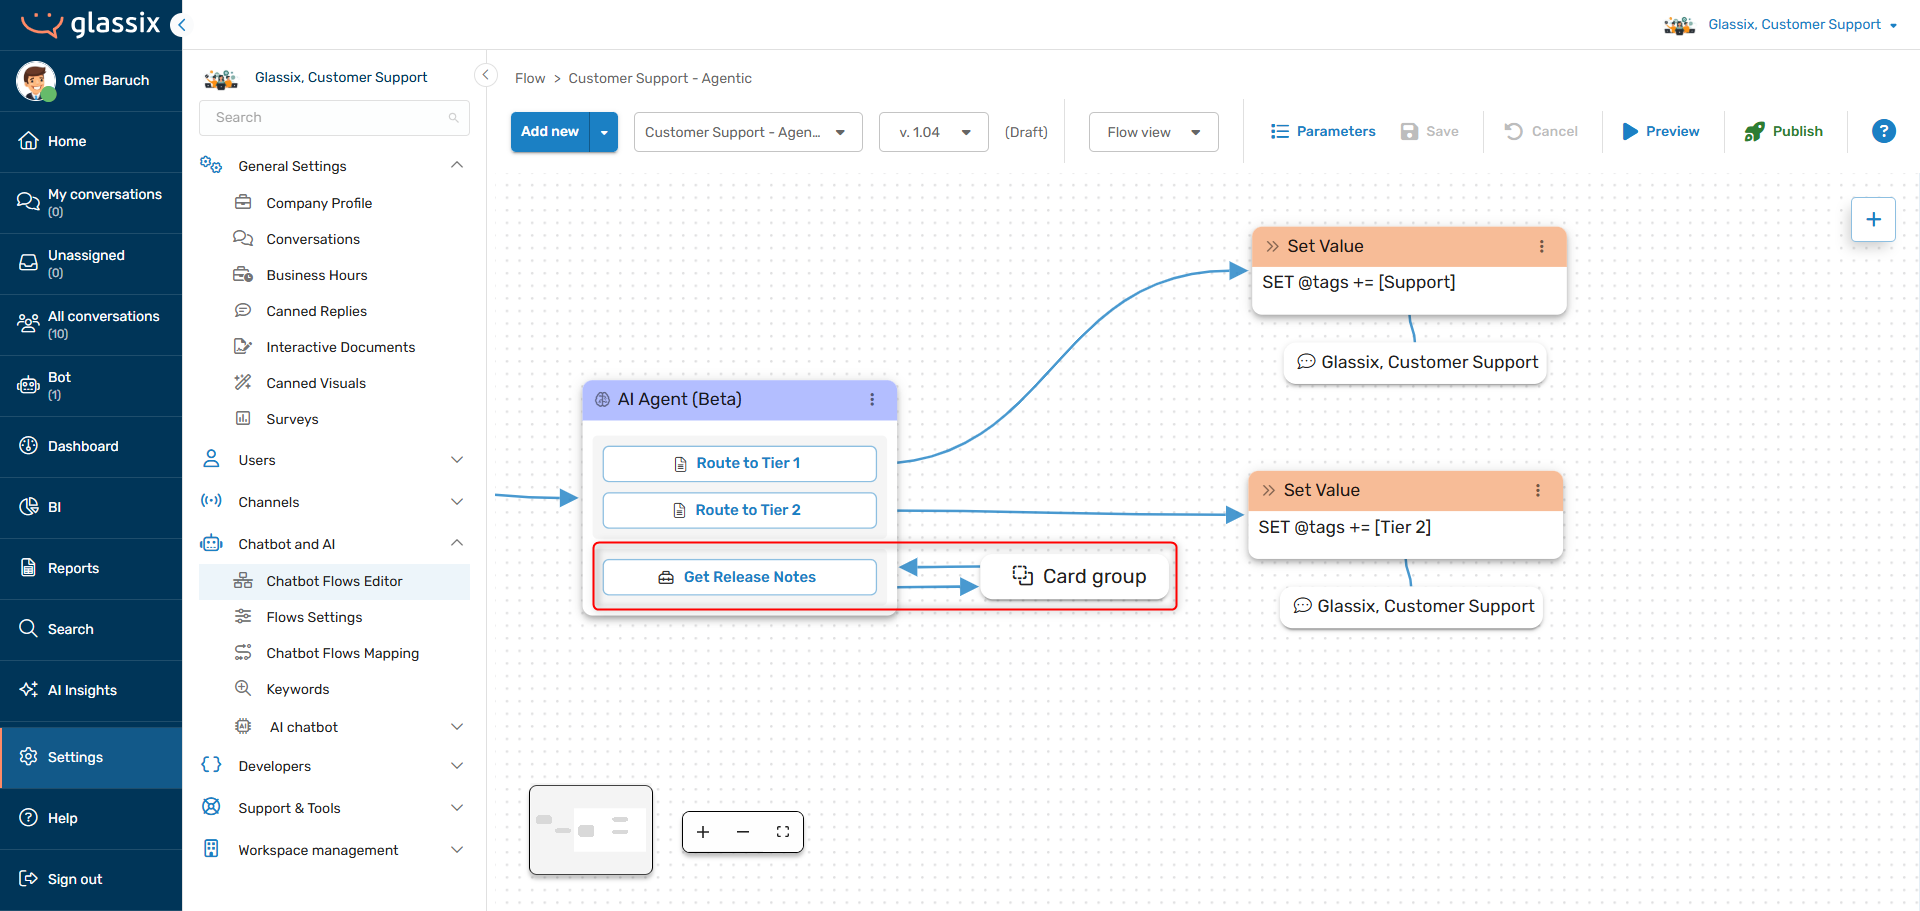
In order to make this tool actually get our release notes, we'll need to build out its tool flow by editing the card group:
Once inside the card group, we can build out the API call which actually gets the release notes and sends them back to our agent:
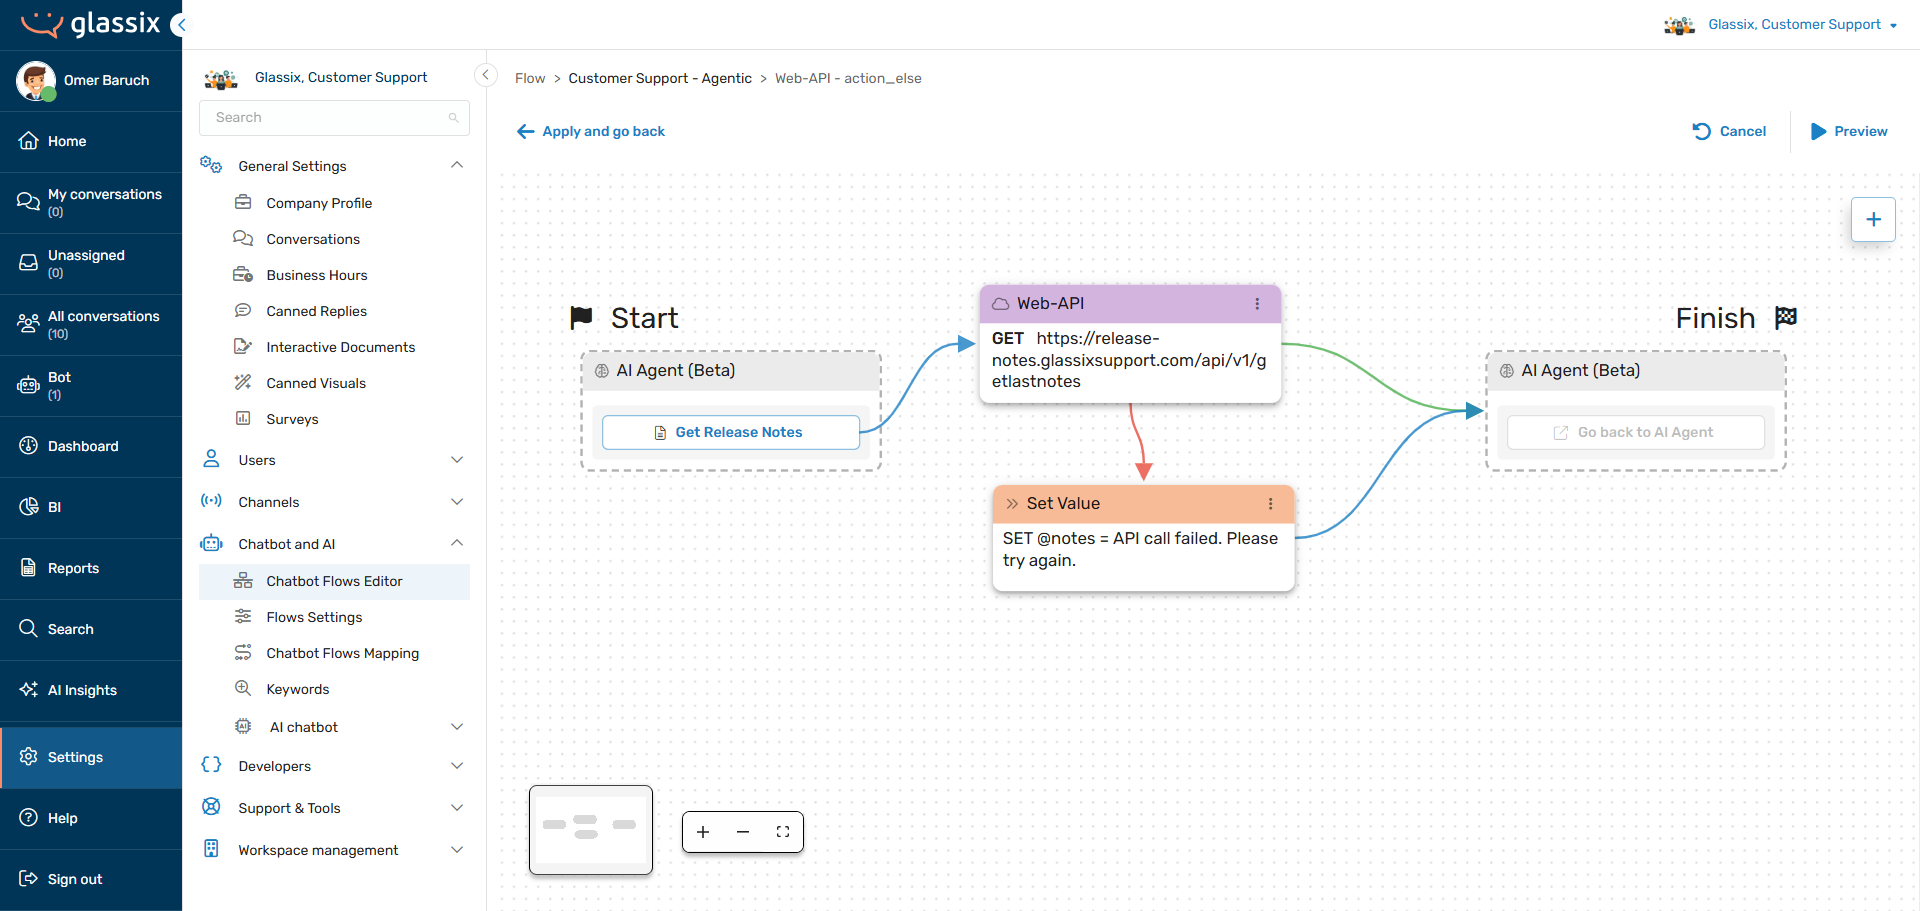
See here for the full set of instructions on building our your tool flows.
Integrating Input Parameters
See here for a full set of instructions for integrating input parameters.
Testing Your Flow
Even if you tested your agent already, it's important to test your flow in order to make sure your agent still behaves how you expect. Remember, agents get more context and input parameters when they're in a flow than they do when you're using the AI agent testing tool.
Publishing and Mapping Your Flow
Just like any other chatbot flow, an AI agent's flow needs to be published and mapped to a channel. See our Flows Editor documentation for more information.
Putting it All Together
AI agents are just one part of a larger chatbot flow. They must always be integrated into a wider flow in order to take actions, route conversations, perform functions and use tools.
When your whole flow is built out, you
Updated about 1 month ago