
Connect FreePBX
Connect your FreePBX system to a Glassix SIP address
Note:This article requires an existing Glassix SIP address. If you haven't created one yet, follow Step One: Create a SIP Address in Glassix first.
Overview
FreePBX connects to Glassix over a single PJSIP trunk, which carries calls in both directions. As with a connected phone number, there are two directions to configure:
- Sending a call to Glassix, so your callers reach your voice flows.
- Receiving a call from Glassix, so Glassix can transfer calls back to your extensions.
In this article, we'll create the trunk, then set up an outbound route for the first direction and an inbound route for the second.
Your Glassix SIP Address in FreePBX
Your Glassix SIP address is made up of two parts, username@domain, and each part goes into a different field in FreePBX:
- The username is what you dial. It goes in your outbound route's dial pattern.
- The domain (your regional server address) is the destination host. It goes in your trunk's SIP Server field.
For example, if your SIP address is [email protected], then 88 is the username you dial and glassix.emea.glassix-sip.com is the domain you point the trunk at.
Note:Never enter the full SIP address in the trunk's SIP Server field. That field takes the domain only, with no username, no
@and nosip:prefix.
Step One: Create a PJSIP Trunk
-
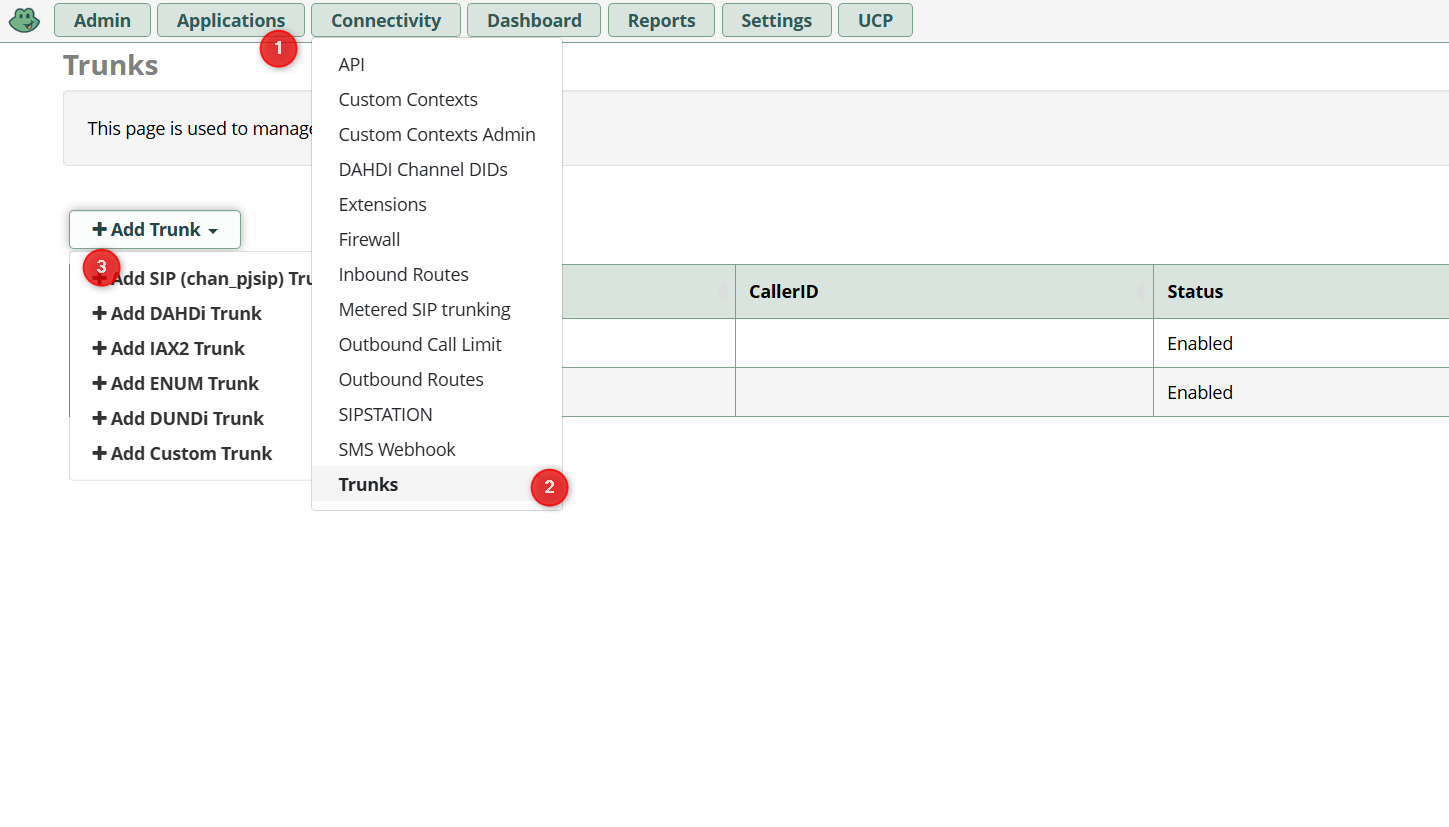
In FreePBX, navigate to Connectivity → Trunks, then select + Add Trunk → Add SIP (chan_pjsip) Trunk:
-
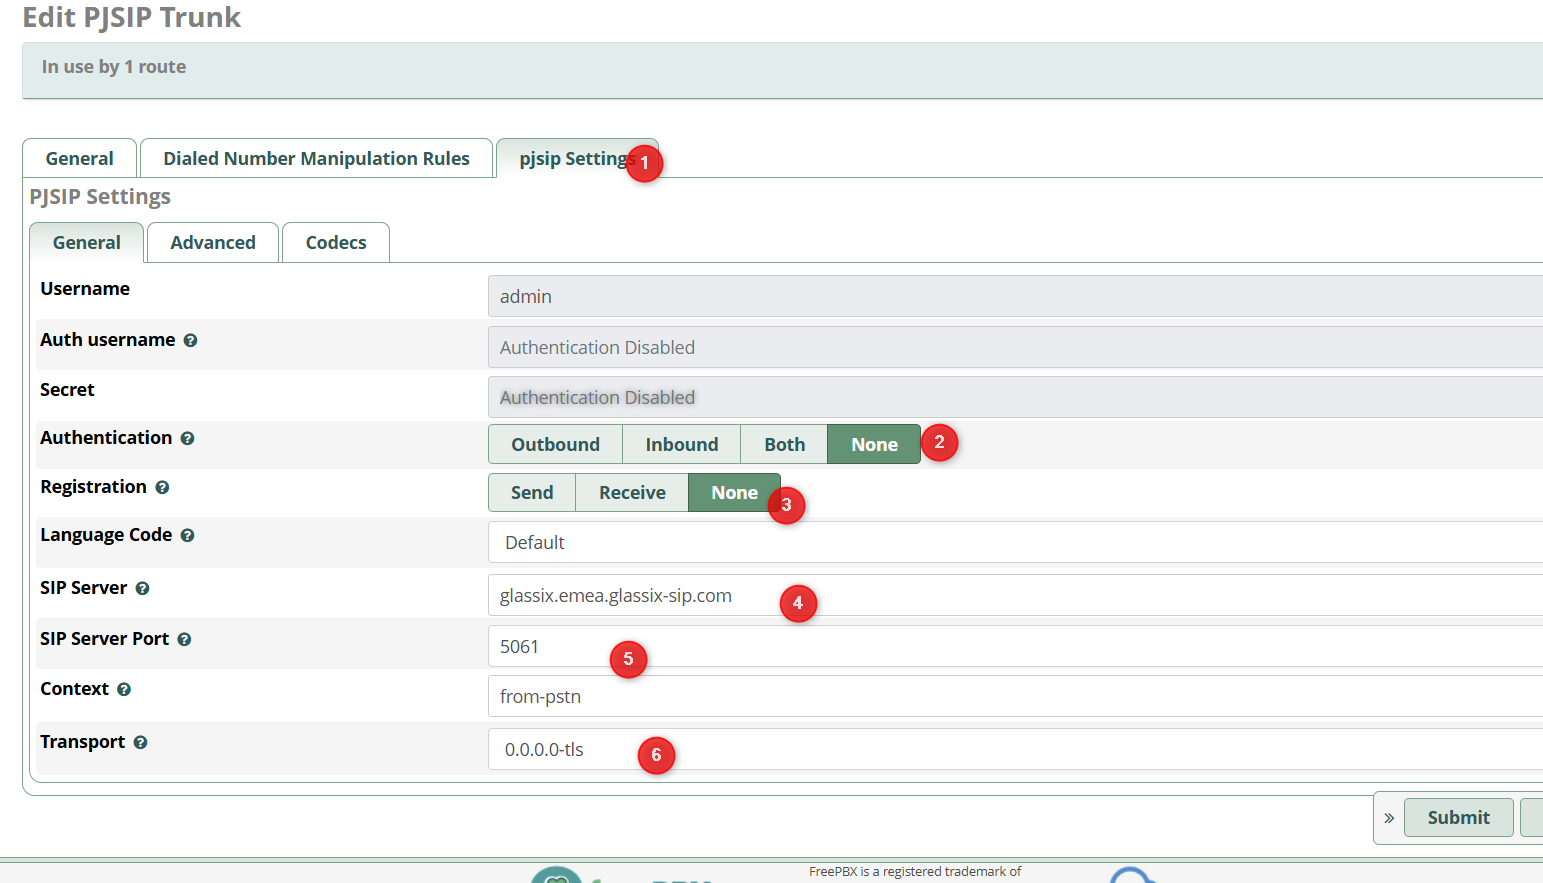
Give your trunk a name that identifies it as your Glassix trunk, then open the pjsip Settings tab and fill in the following values:
- Authentication: None
- Registration: None
- SIP Server: The domain portion only of your SIP address (in the example below,
glassix.emea.glassix-sip.com) - SIP Server Port: 5061 for TLS, or 5060 for UDP/TCP
- Transport: A TLS transport such as
0.0.0.0-tls(TLS recommended). If you're using UDP or TCP, select the matching transport and port instead.
Leave Context set to
from-pstnso that calls arriving on this trunk are handled by your inbound routes.See below:
-
Click Submit.
Step Two: Send a Call to Glassix
To send calls from your PBX to your voice flows, create an outbound route which dials your Glassix username over the trunk you just created.
-
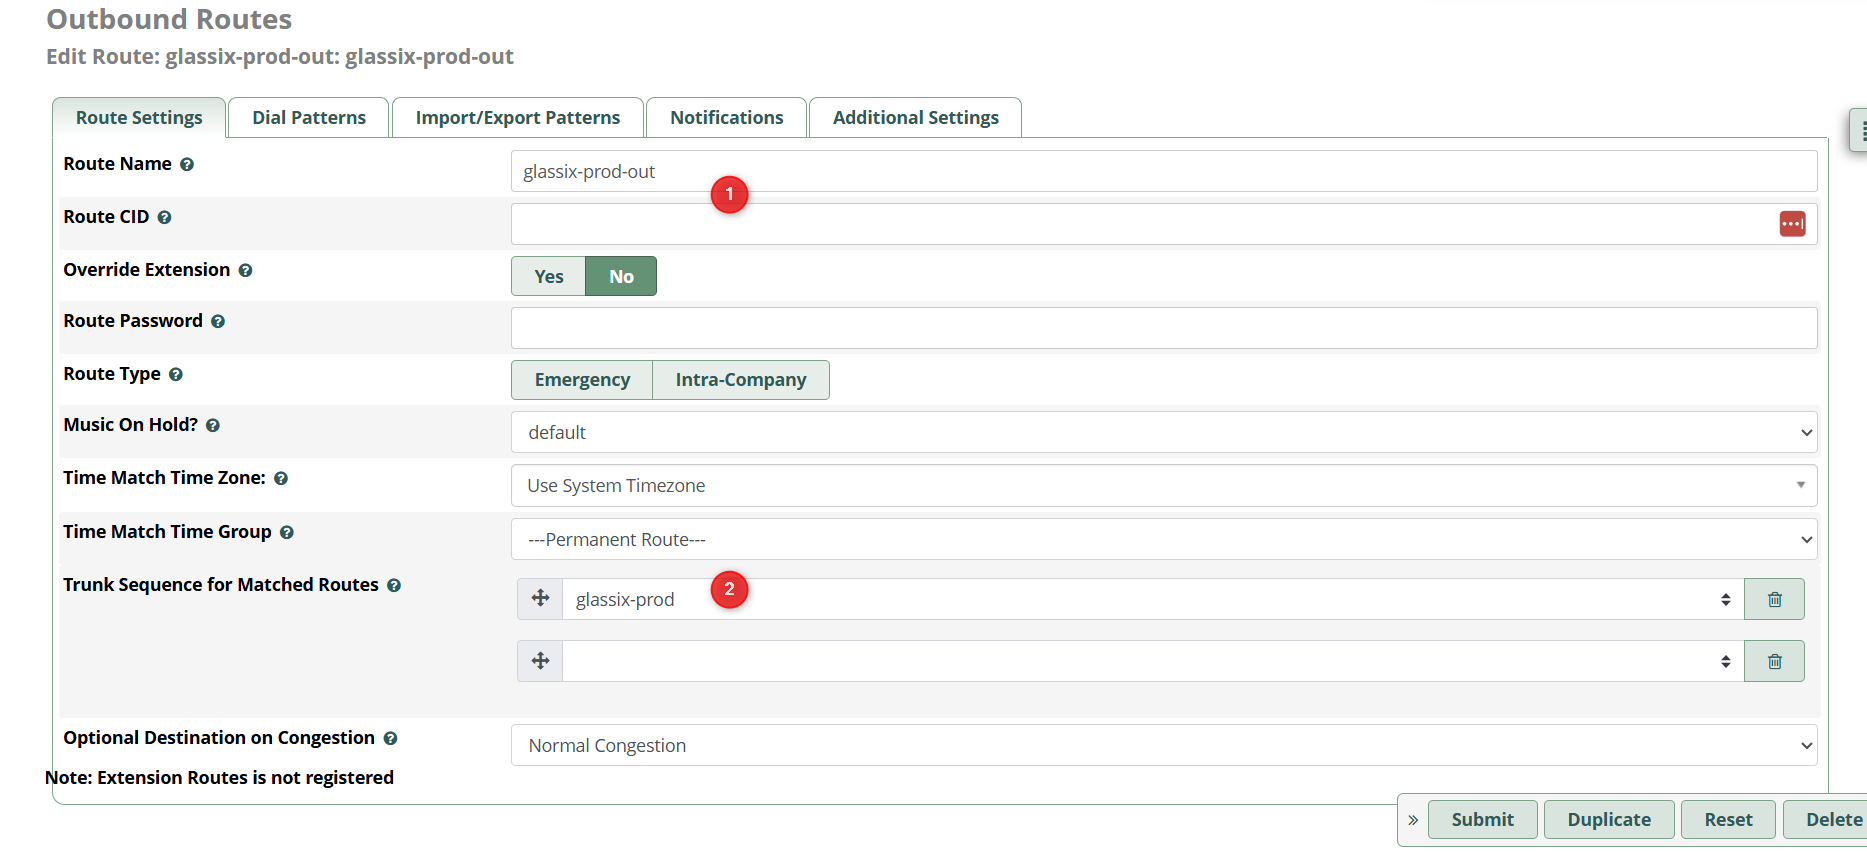
Navigate to Connectivity → Outbound Routes and add a new route.
-
Fill in a Route Name, then under Trunk Sequence for Matched Routes, select your Glassix PJSIP trunk:
-
Open the Dial Patterns tab and add a pattern which matches the username you chose in Glassix. This username is what your users dial to reach Glassix.
In the example below, the Glassix username is
88, so the route prepends88and uses.as the match pattern to pass along any remaining digits: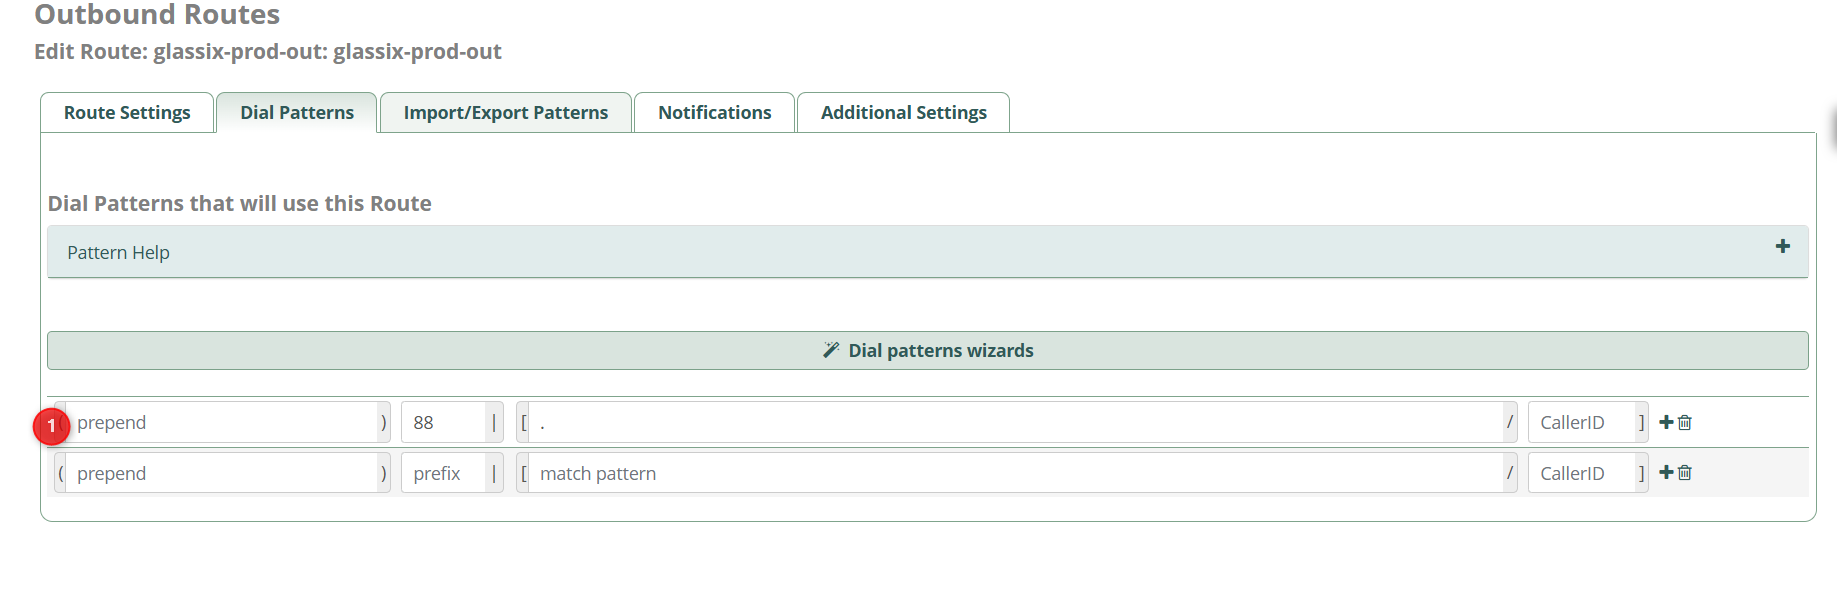
If your Glassix username is something other than
88, use your own username instead. Don't include the domain in your dial pattern, as the trunk already sends calls to the domain you entered as SIP Server. -
Click Submit.
Step Three: Receive a Call from Glassix
To let Glassix transfer calls back to your PBX (for example, when handing off to a live agent), you'll need to allow Glassix to send calls to your trunk and route the incoming call to a destination.
-
Go back to your Glassix trunk, then open pjsip Settings → Advanced and add the Glassix signaling IP addresses for your region to Match (Permit). For the EMEA region, these are
20.217.220.6and51.4.59.79/32: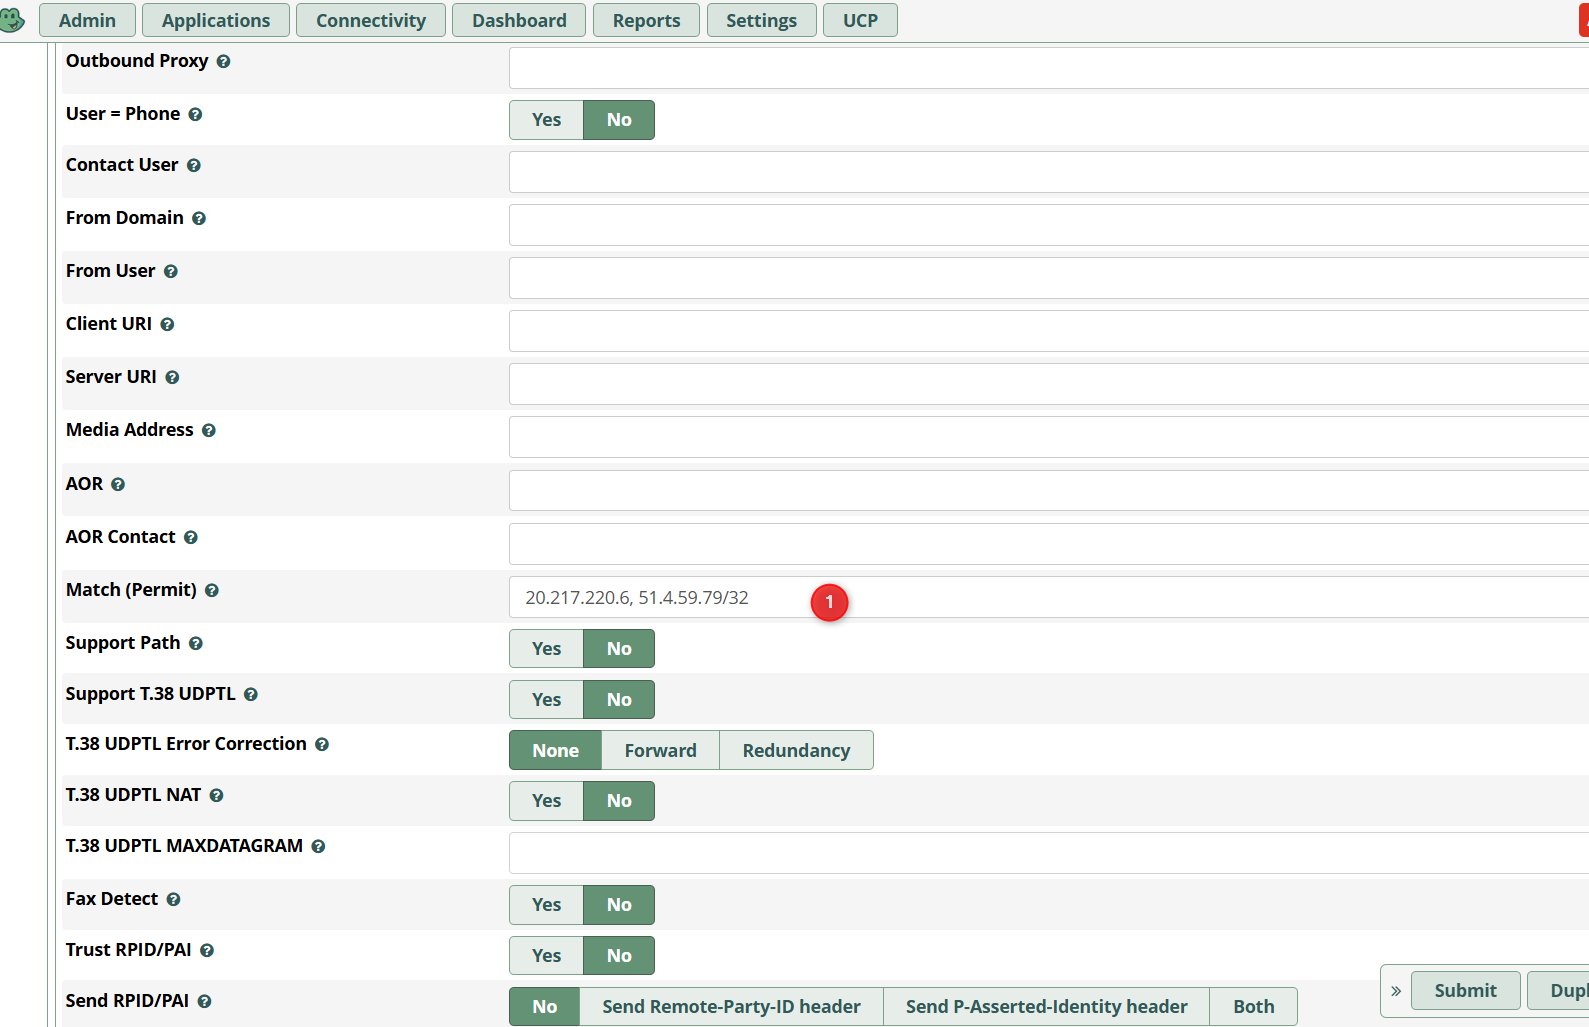
-
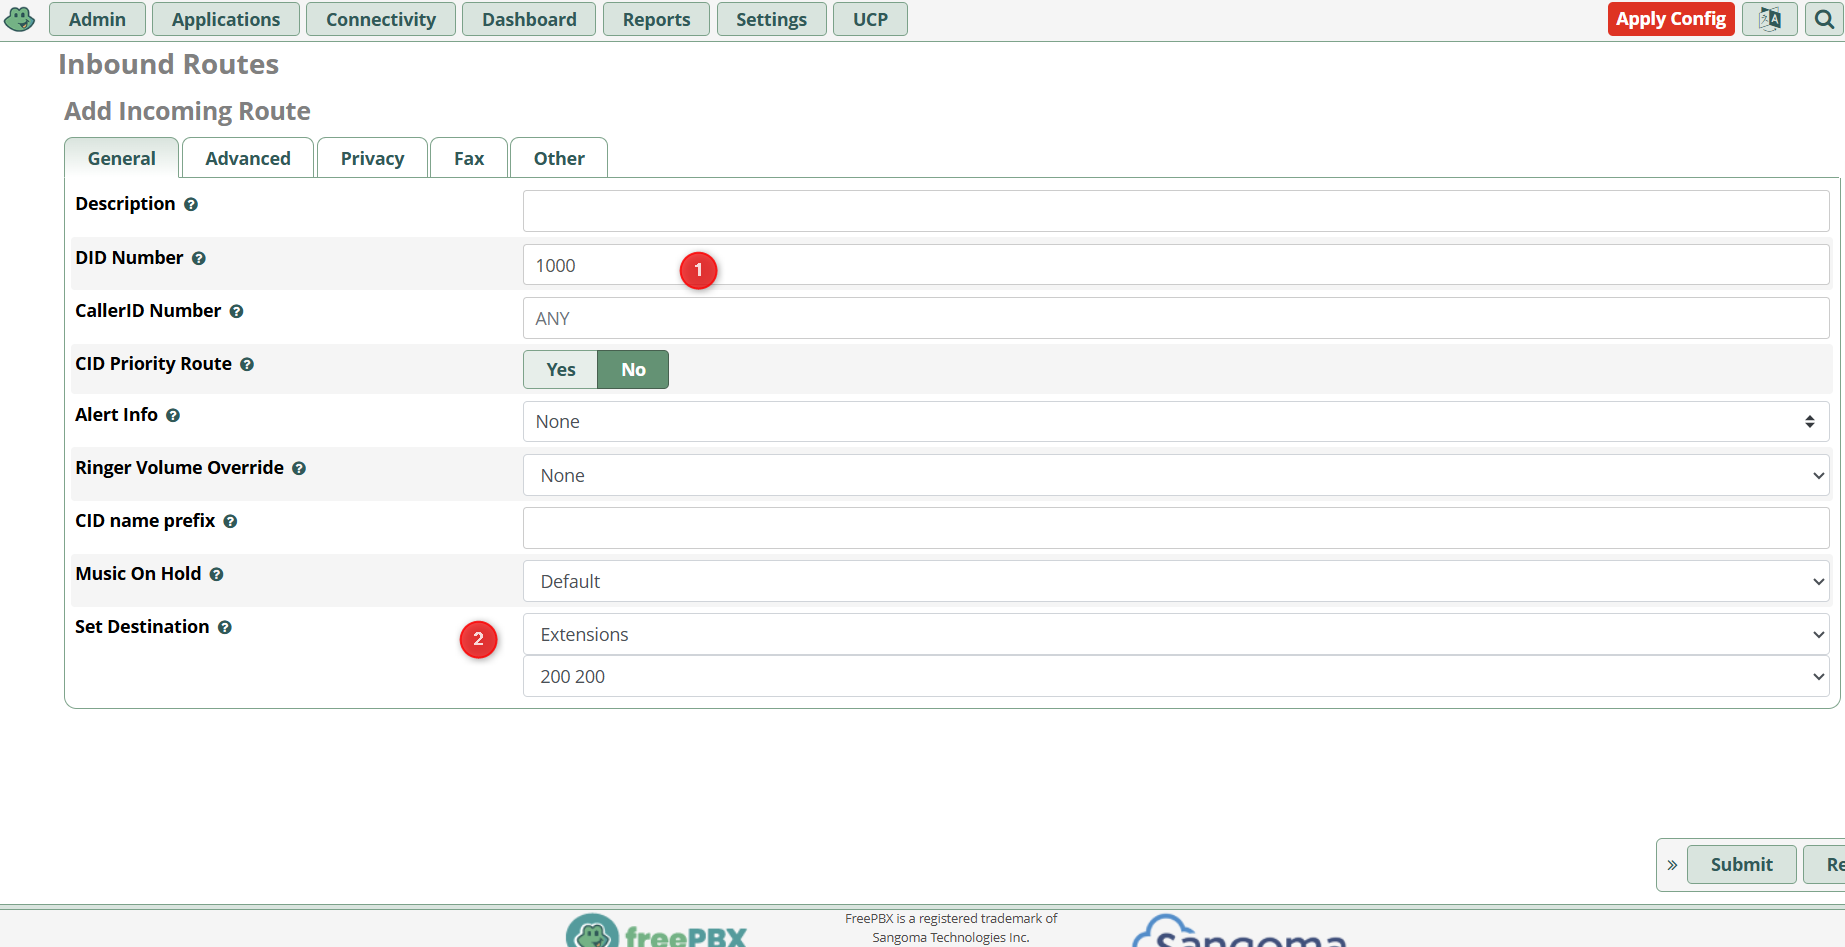
Navigate to Connectivity → Inbound Routes and add a new route:
- DID Number: The number Glassix sends the call to (in the example below,
1000) - Set Destination: The extension or other destination which should receive the call (in the example below, extension
200)
- DID Number: The number Glassix sends the call to (in the example below,
-
Click Submit, then click Apply Config to make your changes live.
Your PBX will also need to accept Glassix media traffic. See IP Whitelisting for SIP Transfers in our Connect a Number article for the full list of signaling and media addresses and ports to open in your firewall.
Step Four: Test Your Connection
Once your configuration is applied, place a test call to your Glassix username and make sure it triggers your mapped voice flow. If you've set up a transfer, trigger it and make sure the call arrives at the FreePBX extension you configured.
For steps to set up the Glassix side of a transfer, see Transferring Calls.
Updated 21 days ago